January 3, 2024
Like many of you that has purchased products directly from the country of origin, you have probably laughed, cried, threw up your hands, sent it back or just figured it out on your own. In some cases, going back to the company for information or returning it is your only options. Here is my story:
I purchased this product with a lot of hesitancy as the descriptions and on-line comments were mixed at best. At approximately $115, I decided to give it a shot. SO, the product showed up as pictured, however the installation materials showed up in a single bag of loose parts. No, bill of material, no wiring schematic, no diagrams. Some parts were oversized, undersized, not even intended for this product or just plain not there. I could do an entire write up on just what was wrong, but if you bought one, you already know most of that.
The product was advertised as an air compressor that could be installed on a vehicle with the intent to air up vehicle tires when needed after 4×4 off-road excursions. However, passed the marketing comments in the advertisements, there was little (none) information on how to apply/install the product properly in a vehicle. Looking at the 6-page document, it was obvious there was a lot of cutting & pasting from other product documents to assemble this manual as there are several instructional items that just don’t match the product provided.
Listed below reflects VEVOR’s entire installation and operational instructions.
INSTALLATION: The AIR compressor is designed for mobile, portable operation. Place the unit on the ground next to your vehicle, there is no requirement to permanently install or remove from the supplied box. Do not operate the unit with the box closed as this will limit air flow and may result in overheating.
OPERATION: Switch power switch to ‘on’ position. Compressor will cycle on and pressurize the inbuilt receiver tank. Adjust the pressure regulator to the desired outlet air pressure requirement. Connect and disconnect air lines as necessary to begin operation. The compressor will automatically start and stop based on demand.
I approached VEVOR both online and over the phone multiple times for additional information to use the product as advertised, but never got anywhere. However, I was asked multiple times by VEVOR tech support to provide detailed information on what was needed. When they replied “show us pictures of what is missing” I knew there was no reason to go any further.
I told them, I had no intention of providing engineering documentation (for free) to correct all their errors and omissions on the product. At the time, I estimated 20 hours of engineering and testing time. They did not respond to my offer other than not responding at all. When I attempted to return the product for a full refund, they would not provide me a full refund as I would not give them details on what was missing. They offered me $31 for my troubles and I could just keep the product. I took it just to close the dialog and use the money for installation parts needed to make the product functional.
(Teaser) Honestly, I think the air compressor will work as needed with changes in some of the installation parts provided. Before installing this on my vehicle, I bench tested the product with my solutions applied to make sure that it ran without issues and performed safely as I expected.
So, if you have purchased this product and want to install it as an onboard unit, but not totally sure where to go or what to do, send me an email and I will answer your questions or share my solution with you. I prefer not to openly publish my solution as it will just get back to the supplier, and that defeats the purpose.
homeownerbob@gmail.com
 Leave a Comment » |
  Product Review, Techy Things, Uncategorized | Tagged: cant install, missing parts, no wiring diagram, Vevor YF6475 air compressor |
  Permalink
 Posted by homeownerbob
December 10, 2023

The U.S. Fire Administration (USFA), estimates 240 home fires involving Christmas trees and another 150 home fires involving holiday lights and other decorative lighting occur each year. Together, these fires result in 21 deaths and $25.2 million in direct property damage.
For some reason, I am believed to be a Scrooge when it comes to decorating for Christmas. Normally, I let my family deal with all the details including unpacking all the decorations, placing ornaments on the tree, getting the doggie Christmas collars out, etc. But I do serve as the pack mule in unloading the attic to get it downstairs out of the attic, but a Scrooge I’m not!!… Ok, maybe curmudgeon.
Point One: Christmas lights in all their glory are a huge waste of energy. Four strings of C9 (old school) regular Christmas lights can consume 1800 watts of power or 1.8 kwh. On an individual house basis, it may not seem like much but add it to about 25% of all households and it works out to be a lot electricity. Not to mention, the selected idiots that adorn their house to the point that you can no longer recognize it. Ok, so you kind of get me at this point, so lets move on.
I have officially changed my tune!!!!!!!!Believe it or not, I bought Christmas C7 lights (on sale) to hang outside. We’re talking outline the house type lights… This is a big step for me. So with all this lead-in, where am I headed you ask. Dont forget, this is a blog about home maintenance anyway!!
Before we go to far, let it be known what amount of lights I have installed.
- 3 – Strings of 200 count C7 outdoor LED lights
- Total bulbs= 600
- Wattage per string 19.2W
- Total waste of energy 57.6Wh
- About the equivalent of one 60W light bulb, most of us waste that much energy on any given day
I will contain my excitement to exterior decorations and electrical load, but lets remember what the NEC code says about connected devices:
NEC 210-23 15 and 20 Amp branch circuits: …The rating of any one cord and plug connected utilization equipment shall not exceed 80% of the branch circuit rating. Furthermore… the total rating of equipment fastened in place shall not exceed 50% of the branch-circuit. In short, no one plug should exceed more than 80% of the circuit rating and that any stationary equipment (i.e. dishwashers, waste disposer) that constantly draws power should not exceed 50% of the rated circuit. Typical residential branch circuits (outlets, wall switches and fixtures) may be rated at 15 or 20 Amps.
So, we have a circuit budget of roughly 1100 watts for a standard plugged outlet ((15A*120V*.8pf)*80%).
Choosing the Lights: If you dont already own exterior lights, go for the LED versions (C7 or C9). By far, they will last the longest and cost the least to run. C7 and C9 are bigger bulbs and are easier to manage. If you take care of them, they could last a life time. Additionally, the prices have continued to fall over the last few years.
The following chart is a general guideline is fairly conservative. Most Christmas lights will provide the limitations and wattage. As mentioned in my calculation above, at 80% you have a budget of 1100 watts, at 50% your budget would be 720 watts.
| C7 or C9 Lamp Wattage |
Lamps per Outlet |
Lamps per 15 Amp Circuit |
Lamps per 20 Amp Circuit |
| .6 Watts (LED) |
250 Lamps(bulbs dim the farther
your runs are from main power source) |
2400 Lamps |
3200 Lamps |
| 1 Watt (LED) |
250 Lamps(bulbs dim the farther
your runs are from main power source) |
1440 Lamps |
1920 Lamps |
| 2.5 Watts |
300 Lamps |
576 Lamps |
768 Lamps |
| 3.7 Watts |
250 Lamps |
389 Lamps |
519 Lamps |
| 5 Watts |
175 Lamps |
288 Lamps |
384 Lamps |
| 7 Watts |
125 Lamps |
205 Lamps |
274 Lamps |
Key Points to Christmas Light Installations:
- Stay within the wattage limitations mentioned; 1000W at 80% and 720W at 50%. The light packaging should provide you to total wattage. Just subtract it from your total wattage budget as you organize your lighting plan.
- Attempt to either use a dedicated electrical circuit or one that does not have a lot of static or dedicated load.
- Limit the string to string connection to no more than 3 or what is provided as the manufacturers recommendations.
- Limit the per outlet load to no more than 50% of the per circuit limitation. 80% rule: 500W. 50% rule: 360W
- Use timers or remote control switches to turn the lights on and off to limit the energy usage.
- Dont fall off the roof
- Merry Christmas… BOB
Leave a Comment » | Electrical | Tagged: christmas light limitations, christmas lights, hanging christmas lights | Permalink
Posted by homeownerbob
April 20, 2020
 According to the United States Fire Association (USFA) Electrical fires in our homes claim the lives of 485 Americans each year and injure 2,305 more. Some of these fires are caused by electrical system failures and appliance defects, but many more are caused by the misuse and poor maintenance of electrical appliances, incorrectly installed wiring, and overloaded circuits and extension cords.
A day doesn’t go by that I don’t get a comment on the webpage about warm or hot electrical outlets. Before we get into the guts of the issue, lets define what most (residential) electrical branch circuits are designed to provide.
NEC 210-23 15 and 20 Amp branch circuits: …The rating of any one cord- and -plug connected utilization equipment shall not exceed 80% of the branch circuit rating. Furthermore… the total rating of equipment fastened in place shall not exceed 50% of the branch-circuit. In short, no one plug should exceed more than 80% of the circuit rating and that any stationary equipment (i.e. dishwashers, waste disposers) that constantly draws power should not exceed 50% of the rated circuit. Typical residential branch circuits (outlets, wall switches and fixtures) may be rated at 15 or 20 Amps. Typically things like window air conditioners, washing machines and refrigerators are on their own circuit.
NOTE: This is a very basic description of this code requirement and how it is applied to typical residential branch circuits. There are numerous differences when applying the code to specific uses. Greater detail can be found in sections 210 and 220 of the NEC.
The National Electric Code (NEC) was originally developed in 1897. As the housing market continues to respond to new demands and changes in the industry, the Code is continually updated. However, as with most houses, the electrical system installed in the house was designed based on the code of the era and unless the house has had the electrical system upgraded, either all or part of the system is still based on the original design. The most noticeable change to the average homeowner is that older homes have fewer outlets per room, and for this reason, it can be common to find excessive extension cords and power strips. All of these item place greater strain on a system that may have been designed and built 50 years ago.
Why is the electrical outlet warm?
 What’s plugged in: Things like cell phone chargers, computer printers, lawn sprinkler controllers, DLS Modem, video cameras, MP3 players, cordless drills and some small appliance. All these products use a “transformer” (aka: wall wart). Based on what they do (change the voltage input to a different voltage output) will cause them to be warm. Unplug it, wait about an hour and check the outlet again. The outlet should be normal ambient temperature. It is not uncommon to find these wall warts as much as 20 degrees warmer than ambient. However if you find one that is too hot to touch, it should be replaced.
- Excessive Demand At An Outlet: As stated above, no one device plugged in to a single outlet (receptacle) should exceed 80% of the rated circuit. To get perspective, residential grade appliances that are designed to plug directly into a standard (15A) wall plug will normally not exceed 1500W; such as a blow dryer (1500W/110V)/.95=14.35A ((Watts/Voltage)/PowerFactor =Amps). With two blow dryers in the same outlet or on the same circuit the circuit breaker should trip (e.g. turn off). Add in the fact that in many older homes it is very common to find extension cords, outlet multipliers, outlet extenders or un-fused power strips. All of these items can increase the opportunity to overload an outlet.
 Excessive Demand on the Circuit: Most standard residential electrical circuits are wired in a series where the circuit wires loop through the electrical box, terminate on the outlet, then continue on to the next outlet. In other words, the electrical current being used by one outlet (on the same circuit) may pass through terminations of another receptacle. If the current is excessive, the outlet may be warm without anything attached at the receptacle. As part of an electrical design, it is normal to have at least one outlet in the same room to be on a different circuit. This allows you to share the load requirement from one room into multiple electrical circuits.
- Poor Electrical Terminations: If electrical terminations (at the receptacle) are loose, or the wires are damaged, this too can cause excessive heat at both the point of use as well as in the circuit described in #2. Additionally, outlets terminated using the spring-loaded stab-lock on the rear vs. the screw-down attachment can cause excessive heat.
- Oversized fuse or breaker: Typically these values can be compromised in older homes as there are fewer outlets per room, and the circuits are not designed to support all the electronic gear we find in the modern home. Assuming the circuit was installed correctly, the circuit breaker should be the lowest rated item in the circuit and the wire in the wall should be the highest. For obvious reasons, if there was a fault or failure, you want the circuit breaker to fail first. If a breaker was replaced with a higher ampacity breaker, the circuit has been compromised potentially creating a fire risk by allowing higher current levels to pass through the circuit that was designed at a lower level. In this case finding a warm outlet is a warning that the wiring may be operating above its rating.
- Physical Deterioration of Plug: Outlet that appear worn, broken, cracked or chipped are all conditions that can compromise the function its function and can create heat at the outlet.
In urban areas, faulty wiring accounts for 33% of residential electrical fires.
What to Do? Analyze the problem within your capabilities. Some of these suggestions may be beyond your comfort (experience) level, so you may want to contact an electrician at this point.
- Identify all the receptacles associated with the warm outlet. After turning off the circuit breaker use an outlet tester to find all the outlets. Identify the circuit breaker rating found on the paddle of the switch. TIP: Inspect the entire house, both outlets and light fixtures. With the circuit breaker off you will be looking for dead outlets.
 Do any of the outlets have extension cords, power strips or outlet multipliers? Ensure the extension cord is rated for its use. Replace all unfused power strips or outlet multipliers with a fused power strip as these devices include a circuit breaker to add further protection. Do not daisy chain multiple power strips or extension cords. Try to de load the outlet by re-associating the plugs to different circuits.
- Follow the testing methods as found in Electrical Switches and Outlets. These testing methods will identify any wiring issues that should be resolved as well.
- By now, you may have found the problems associated with an outlet, fixture or receptacle. If you still have problems, the outlets may be internally bad, the connections may have deteriorated or may be loose. With the electricity off, inspect the wiring of all suspect outlets. Check for tightness of the screw terminations, crimped or cut wires. You can also perform this test by using a digital thermometer gun with a laser site. Scan the electrical outlet, specifically the wiring terminations, without disturbing the wiring. The probe should identify the problem by indicating a noticeably higher temperature.
- Replace suspect receptacles with higher quality equivalent receptacles using the screw down connection point.
- If you still have problems, review the tests found in the Electrical Service Panel post. Perform the tests that apply to the condition.
- If you still have problems, the circuit may have been compromised by enlarging the breaker, you may consider hiring an electrician to validate the condition and to correct the problem.
Additional Items to Consider
With over 15% of all electrical fires originating in the bedroom, municipalities have adopted local electrical code requirements that include arc fault circuit interruption (AFCI) circuit breakers to be installed in new construction. These breakers have the ability to recognize an arc usually due to a defective cord appliance or wiring.
One of the newest concern with electrical fires is the fact that many extension cords, plug adapters, power strips, appliances and etc. are coming from overseas areas that use counterfeit certifications. Here in the U.S., agencies such as UL, ETL, CSA are recognized as certified testers of electrical products. Unfortunately, many items are filtering in with fake labeling. Always purchase name brand products from reputable stores and inspect the product for the safety agency’s certification.
24 Comments | Electrical | Tagged: Electrical, electrical capacity, electrical service, electrical testing, electricity, overloaded electrical wire, plug outlet warm, power outlet warm, wall socket warm, warm electrical outlet, warm outlet | Permalink
Posted by homeownerbob
November 7, 2019
The U.S. Fire Administration (USFA), estimates 240 home fires involving Christmas trees and another 150 home fires involving holiday lights and other decorative lighting occur each year. Together, these fires result in 21 deaths and $25.2 million in direct property damage.
For some reason, I am believed to be a Scrooge when it comes to decorating for Christmas. Normally, I let my family deal with all the details including unpacking all the decorations, placing ornaments on the tree, getting the doggie Christmas collars out, etc. But I do serve as the pack mule in unloading the attic to get it downstairs out of the attic, but a Scrooge I’m not!!… Ok, maybe curmudgeon.
Point One: Christmas lights in all their glory are a huge waste of energy. Four strings of C9 (old school) regular Christmas lights can consume 1800 watts of power or 1.8 kwh. On an individual house basis, it may not seem like much but add it to about 25% of all households and it works out to be a lot electricity. Not to mention, the selected idiots that adorn their house to the point that you can no longer recognize it. Ok, so you kind of get me at this point, so lets move on.
I have officially changed my tune!!!!!!!!Believe it or not, I bought Christmas C7 lights (on sale) to hang outside. We’re talking outline the house type lights… This is a big step for me. So with all this lead-in, where am I headed you ask. Dont forget, this is a blog about home maintenance anyway!!
Before we go to far, let it be known what amount of lights I have installed.
- 3 – Strings of 200 count C7 outdoor LED lights
- Total bulbs= 600
- Wattage per string 19.2W
- Total waste of energy 57.6Wh
- About the equivalent of one 60W light bulb, most of us waste that much energy on any given day
I will contain my excitement to exterior decorations and electrical load, but lets remember what the NEC code says about connected devices:
NEC 210-23 15 and 20 Amp branch circuits: …The rating of any one cord and plug connected utilization equipment shall not exceed 80% of the branch circuit rating. Furthermore… the total rating of equipment fastened in place shall not exceed 50% of the branch-circuit. In short, no one plug should exceed more than 80% of the circuit rating and that any stationary equipment (i.e. dishwashers, waste disposer) that constantly draws power should not exceed 50% of the rated circuit. Typical residential branch circuits (outlets, wall switches and fixtures) may be rated at 15 or 20 Amps.
So, we have a circuit budget of roughly 1100 watts for a standard plugged outlet ((15A*120V*.8pf)*80%).
Choosing the Lights: If you dont already own exterior lights, go for the LED versions (C7 or C9). By far, they will last the longest and cost the least to run. C7 and C9 are bigger bulbs and are easier to manage. If you take care of them, they could last a life time. Additionally, the prices have continued to fall over the last few years.
The following chart is a general guideline is fairly conservative. Most Christmas lights will provide the limitations and wattage. As mentioned in my calculation above, at 80% you have a budget of 1100 watts, at 50% your budget would be 720 watts.
| C7 or C9 Lamp Wattage |
Lamps per Outlet |
Lamps per 15 Amp Circuit |
Lamps per 20 Amp Circuit |
| .6 Watts (LED) |
250 Lamps(bulbs dim the farther
your runs are from main power source) |
2400 Lamps |
3200 Lamps |
| 1 Watt (LED) |
250 Lamps(bulbs dim the farther
your runs are from main power source) |
1440 Lamps |
1920 Lamps |
| 2.5 Watts |
300 Lamps |
576 Lamps |
768 Lamps |
| 3.7 Watts |
250 Lamps |
389 Lamps |
519 Lamps |
| 5 Watts |
175 Lamps |
288 Lamps |
384 Lamps |
| 7 Watts |
125 Lamps |
205 Lamps |
274 Lamps |
Key Points to Christmas Light Installations:
- Stay within the wattage limitations mentioned; 1000W at 80% and 720W at 50%. The light packaging should provide you to total wattage. Just subtract it from your total wattage budget as you organize your lighting plan.
- Attempt to either use a dedicated electrical circuit or one that does not have a lot of static or dedicated load.
- Limit the string to string connection to no more than 3 or what is provided as the manufacturers recommendations.
- Limit the per outlet load to no more than 50% of the per circuit limitation. 80% rule: 500W. 50% rule: 360W
- Use timers or remote control switches to turn the lights on and off to limit the energy usage.
- Dont fall off the roof
- Merry Christmas… BOB
Leave a Comment » | Techy Things | Tagged: christmas light limitations, christmas lights, hanging christmas lights | Permalink
Posted by homeownerbob
March 28, 2019
 This seasonal reminder provides a list of items you need to review before the summer months set in. If you need details on what to look for or what to do, click on the link (if there is one) and it will take you to the post that was written on the subject and provide more detail.
- Heating/Cooling-Air Filters: Assuming you have a forced air system, change the filter prior to the heavy air conditioning months.
- Roofing-Looking For Leaks: Spring rains are approaching so inspect your roof for leaks, trim away any tree limbs and clean debris off the roof. Look for raised nails and any breaches in the roof surface.
- HVAC Outdoor Unit: Get your garden trimmers out and trim away any vines or growth away from the outside condenser. You should have 18″ to 2
 feet clearance around the unit. Also take your water hose and wash down the outside coils that may have accumulated dirt. Check the condensation drain that comes from the air handler in the house. Ensure that it is clear of obstacles or debris by pouring water through it.
- Water Leaks: Check all water fixtures and toilets for leaks. Inspect fixture drains for water puddles or loose joints in the traps.
- Lawn Sprinklers: Exercise the system. Look for excessive water traveling down the driveway or sidewalks. Inspect the sprinkler heads, look for blow-by and odd spray patterns. Replace or repair the heads. If you need more help on this item, click the “lawn sprinklers” tab to see multiple subjects on locating lost heads, valves as well as tune-up recommendations.
- Exterior Inspection: Walk around the house, look for rotted wood, peeling paint and other exposed surfaces. Use caulk to re-seal cracks and touch up paint to reseal the surfaces. Replace rotten wood as necessary.
- Interior Inspection: Winter dry-out will have caused some surface cracks around doorways and windows. Also re-caulk/grout any cracks that may have surfaced in the bathroom and kitchen, especially around the tub and shower. These two areas experience the most use and require the most maintenance. Replace or clean water filters, faucet strainers and vent-a-hood filters in the kitchen. Flush kitchen and bathroom sinks with scalding hot water for approximately 3-5 minutes.
- Water Heaters: Tank type water heaters should have their pressure release valve tested (opened and closed). This will also validate the drain pipe is clear and open.
- Gutters and Downspouts: Clean you gutters of leaves and debris. Flush them with water to ensure they flow freely.
 Surface Water Drainage: Culverts, waterways, landscape drainage systems should be cleared of debris and overgrowth that may have occurred.
- Windows and doors: Look at the edges where the windows and doors connect to the house. Ensure the caulk is in good shape and add caulk as necessary, indoors and outdoors.
- Electrical Service: Inspect the Entrance, Mast and Weather-head. Look for any damage that may have occurred over the winter. Look for tree limbs that may be contacting the entrance cable.
- Electrical Service-Smoke Detectors: Clean your smoke detectors of cob webs and change the battery.
- Test your security system: Work with monitoring service to validate all the door, window, glass break, and motion sensors operate properly.
- Test Smoke Detectors: It’s a good time to clean off the cob webs and change the battery.
If you are needing some additional information on one of the topics that I have not written about, let me know and I will put it higher on the list of articles to write.
Leave a Comment » | Uncategorized | Permalink
Posted by homeownerbob
September 23, 2018
 Technically, fall is here and we actually are seeing sub-70 degree days. WOO HOO!!! However are still regularly in the high 80’s. Re-caulking, sealing, and roof inspections are in order. Checking door and window seals should also be on your list. The lower temperatures are a relief, summer is mostly over and we can attack those projects we wouldn’t touch during the summer heat.
- Heating/Cooling-Air Filters If you live in a dusty area and/or have been using your air conditioner a lot, inspect you filter and change it if it has noticeable build up from your spring change out.
- Exterior Inspection: Walk round the house, look for bird and wasp nests, as well as locations that rodents might be using to get in the house. Remove the nests and use caulk to re-seal any breaches in structure that may be an entry point for rodents or bugs. Don’t forget to look at you electrical service entry as spring and summer growth, additional tree trimming may be required.
 Roofing-Looking For Leaks: Winters are a bad time to look for roof leaks so inspect your roof for leaks, trim away any tree limbs and clean debris off the roof. Look for raised nails and any breaches in the roof surface and all the exposed vents.
- Sealing the Leaks: Summertime weather can cause the home exterior to dry out. Look for cracks and voids in building materials. Seal them with a good latex caulk. Larger voids should be filled (first) with a foam spray caulk, then to make it dressed for paint, use the latex caulk to finish it off and paint as necessary.
- Interior Inspection: Flush kitchen and bathroom sinks with scalding hot water for approximately 3-5 minutes to clear out any build up. If its been running slow, pour a half of cup of baking soda in the drain followed with a 1/2 cup of vinegar. Close it up for 30 minutes then flush it with hot water.
- Surface Water Drainage: Culverts, waterways and landscape drainage systems should be cleared of debris and overgrowth that has occurred.
- Electrical Service-Smoke Detectors: Clean your smoke detectors of cob webs and check the condition of the battery.
- Chimney Flue Inspections and Cleaning: For our northern friends this is the time to ensure your stoves and fireplaces are prepared for the winter use. Inspect the stove seals, clean the chimneys and flues.
- Drain and cut-off sprinklers: If you are in the northern climates, its time to turn off these services to protect them through the winter. In the south, southwest and western part of the US, we can wait a few more months. For more details see Winterizing Plumbing.
- Smoke Detectors: As we enter the heating season, it’s a good time to clean the cob webs and change the battery.
- Lawn Sprinkler Adjustment: Whether you have to shut down your sprinkler or just reduce your watering schedule, now is the time.
- Power Outages: For some of us, this time of year can bring extended power outages, check out this post to make sure you are prepared
Leave a Comment » | Uncategorized | Permalink
Posted by homeownerbob
July 4, 2018
 Several months back I wrote a post about Watering Your Foundation, after that I wrote Watering Your Foundation – Getting Ready for Summer and in that post I promised a final follow-up on creating a permanent solution to creating a low maintenance solution that removes most of the problems associated with earlier solutions. Granted, this one is a bit more work and on a DIY scale of 1-10 10 being the hardest, I would give this a 7-8 (depending on what you may or may not already have. Since you have already read the last two, no need to go through the why and what for, but to just pick it up from the last post. Since the summer has set in, this might not be a good project to complete with the weather as hot as it is, but you can at least you can start plotting out the plan.
The biggest advantages to this solution vs. the last one is, convenience, and integration into a lawn sprinkler system.
Things you will need to for this to work with the least amount of inconvenience and disruption. This solution is based on having all three of the listed conditions. However, any of these items can be added, but it can dramatically impact the cost to provide it.
- Preexisting lawn sprinkler system in good working order and a timer/controller
- The timer/controller will need to have at least one extra or vacant station assignment. If you have more station numbers than active stations you probably have an extra one.
- You will need to determine if you have a spare controller wire (in the controller) and you will have to locate that same wire outside.
The next step is to create a new zone or station on your lawn sprinkler system. I will cover the basic process but if you have never really cut into your system, this might be the time to get some knowledgeable help or hire a sprinkler contractor to build you a new zone.
 Create a New Sprinkler Zone
- Find a sprinkler zone that has its control valve close to the house.
- Dig up the dirt around the control valve enough to expose the control valve and the associated water pipe that feeds the valve. Figure out which side of the valve has pressure on it (all the time).
- Determine that the spare wire you located in the timer/controller shows up here too! Us a volt ohm meter as a continuity tester to confirm.
- The pipe feeding the valve is under pressure, so you will need to turn the water off at the source before you do it.
- To determine which is the pressure side, there should be an arrow, or water flow indicator on the valve body.
- .Cut the pipe, Tee in a joint to install a new valve.
- Install a drip zone flow control valve equipped with a filter assembly. This valve will keep the flow in spec as well as keep the emitter from getting stopped up.
- Extend a wire from the existing valve to the new valve including a common (usually white) and a new wire that you are picking up from the controller timer.
- Make sure the new valve is closed and turn the water back on and check for leaks.
- If you want to test it at this point, go right ahead, but realize if you did this correctly, it’s gonna get real muddy real quick.
Parts Needed for the Drip Emitter Foundation Watering System
- 1/2 poly hose to use for areas that do not need the emmiters
- 1/2 Emitter tube, used to circle the house
- Various connector/fittings. You will need some fitting to go around tight corners since the pipe does not make sharp corners as well as connecting to the valve.
- Landscape anchor staples; use to pin the tubing down in place while you are installing it.
Install the System
- Dig a ditch from the new valve to about 12-16 inches from the foundation to conceal the feeder pipe so it will not be exposed to damage in the yard.
- Depth of new emitter hose is kind of “it depends”, so in other words, it can be on the surface or 3-12 inches below the surface. Either way, realize that when gardening or digging around the flower beds, if you hit the emitter pipe, you can easily cut it. So regardless of the depth, after gardening, run the section to identify any leaks.
- Since you are probably 10 or more feet from the house, you may want to use 1/2 poly hose from the valve to the house foundation (unless the valve is already at the foundation, then you can just start with emitter hose). You can buy shorter lengths of this from the big box store, but depending on your house arrangement, you may want to use this pipe in places you do not need to water
- Connect the emitter tube and route through the landscape staying about 12″ from the edge of the foundation. This tubing is sort of stiff, so use a connector to make a sharp bend. Use the landscape staples to keep it in its place.
- There are no rules to stop you from installing a Tee and going both ways around the house, and if you have to branch out, that is fine too. 100 feet is the limitation of the emitter tube from the valve, but you can tee it in to two 100 ft lengths.
- Make the electrical connection at the sprinkler controller and program in the new zone. You can have a summer and winter time schedule, but its good to water this zone all year long, again to keep the soil close to a constant moisture level.
Leave a Comment » | Exterior, Foundations, Lawn Sprinklers, Uncategorized | Tagged: Conserve Water, drip irrigation, foundation cracks, foundation maintenance, foundation watering, lawn sprinkler, lawn sprinkler valve | Permalink
Posted by homeownerbob
February 17, 2018
 Unless you have been under a rock for the past 3-4 years, LED light bulbs have been creeping into the stores for about the last 8 years. As with any new technology, the initial cost is higher than normal, however, as manufacturing processes are refined the prices start falling. As an early adopter, I started fiddling with LED bulbs in 2008 and wrote my first article on using LED bulbs in a landscape lighting system in 2009. Back then, a MR16 based bulb was about $25. Today that same bulb is less than $6. (See Whole House Landscape Lighting)
Additional incentive to move away from incandescent bulbs driven by our government will result in incandescent bulbs being just specialty bulbs and less for general use. The prime directive in their initiative is to reduce consumption of electricity, and for the most part this is what most of the published propaganda supports. Most all written documentation shows you a comparison chart to reach a near equivalent lighting level with a huge savings in consumption. HOWEVER there is a secret the government is not telling you. With this change in technology, many existing fixtures can actually supply more light (using LED’s), without being dangerous or exceeding the wattage limitations of the fixture design. So, what does this really mean; With traditional lighting wattage limitation in fixtures are all based on using incandescent bulbs. In older houses, it can be difficult to get more light in certain places of a home without making major upgrades or adding more fixtures. If you live in a house built before the 2000’s there are typically fewer light fixtures and outlets causing it to be difficult to get more light in a room without calling an electrician by adding lights or outlets. With an LED bulb replacement you may be able to get a lot more light out of the same fixture without risk without exceeding the wattage limitation of the existing fixture. There is one simple rule: Never exceed the manufacturers wattage limitation of an outlet or fixture. This rating is usually stamped or labeled on the socket or fixture
Just for a moment, lets get in the weeds to understand why this will work. Here are a couple of definitions that will help in understanding the concept.
- Wattage: In simple terms, a watt is considered a unit of power. It is not really a measurement of light. But since the invention of the incandescent light bulb we have used the consumption of power (wattage) rating as a reference to the light output. As for an incandescent light it consumes a lot more power than light produced. An incandescent light consumes (by generating heat) about 90-95% of its power to produce the amount of light it produces. In other words, its about 5% efficient.
- Lumens: Simply put; Lumens is as a measurement of the total amount of visible light, regardless of the consumed power or wattage. So, even though there is a relation, they don’t exactly correlate.
An incandescent bulb heats up a metal filament (tungsten) in a controlled environment (bulb). That metal turns super hot resulting in both visible and non visible light as well as a lot of heat. Where a LED (light emitting diode), radiates light in a narrow spectrum, without the high amount of heat found with the incandescent bulb.
Heat: Since LEDs radiate light, they emit very little heat. In comparison, incandescent bulbs release 90% of their energy as heat and CFLs release about 80% of their energy as heat. LED’s use about 75% less energy to produce the same amount of visible light. This should be the AH-HA moment for you.

Taking advantage of the LED: Lets say you have a fixture that is rated at 60 watts, like maybe an old recessed kitchen light found back in the 1950’s. Its in the correct location, but you want more light. So without changing the fixture (assuming the socket and wiring is intact), you can upsize the bulb to a 2600 lumens equivalent, and still only use 30 watts of power. As a measurement of light you went from 800 lumens to 2,600 lumens with an increase of over 3 times the light of the original 60 watt bulb!! Impressive huh!! Granted the government will recommend that you replace the bulb with the 7 watts (800 Lumens)LED bulb. By using the 2600 lumens bulb you can increase your available lighting without having to change the fixture or exceed the wattage limitation. Granted you will about 23 additional watts of power, but I don’t even have to do the math to tell you its a lot cheaper than having an electrician add new fixtures. The chart to the left is a simple conversion of standard bulb wattage’s vs. lumens.
The LED bulb is a great advancement and we will continue to see new uses and options with the technology. Hopefully I’ll have reasons to write future articles about LED’s.
Leave a Comment » | Electrical, Uncategorized | Tagged: incandesent, LED lighting, lighting, lumens, more light less wattage | Permalink
Posted by homeownerbob
October 3, 2017
Technically, fall is here but it hasn’t brought the cool weather to Texas yet. We are still regularly in the high 80’s. Re-caulking, sealing, and roof inspections are in order. Checking door and window seals are also in order. For the rest of us, the lower temperatures are a relief, summer is mostly over and we can attack those projects we wouldn’t touch during the summer heat.
- Heating/Cooling-Air Filters:If you live in a dusty area and/or have been using your air conditioner a lot, inspect you filter and change it if it has noticeable build up from your spring change out.
- Exterior Inspection: Walk round the house, look for bird and wasp nests, as well as locations that rodents might be using to get in the house. Remove the nests and use caulk to re-seal any breaches in structure that may be an entry point for rodents or bugs. Dont forget to look at you electrical service entry as spring and summer growth, additional tree trimming may be required.
- Roofing-Looking For Leaks: Winters are a bad time to look for roof leaks so inspect your roof for leaks, trim away any tree limbs and clean debris off the roof. Look for raised nails and any breaches in the roof surface and all the exposed vents.
- Sealing the Leaks: Summertime weather can cause the home exterior to dry out. Look for cracks and voids in building materials. Seal them with a good latex caulk. Larger voids should be filled (first) with a foam spray caulk, then to make it dressed for paint, use the latex caulk to finish it off and paint as necessary.
- Interior Inspection: Flush kitchen and bathroom sinks with scalding hot water for approximately 3-5 minutes to clear out any build up. If its been running slow, pour a half of cup of baking soda in the drain followed with a 1/2 cup of vinegar. Close it up for 30 minutes then flush it with hot water.
- Surface Water Drainage: Culverts, waterways and landscape drainage systems should be cleared of debris and overgrowth that has occurred.
- Electrical Service-Smoke Detectors: Clean your smoke detectors of cob webs and check the condition of the battery.
- Chimney Flue Inspections and Cleaning: For our northern friends this is the time to ensure your stoves and fireplaces are prepared for the winter use. Inspect the stove seals, clean the chimneys and flues.
- Drain and cut-off sprinklers: If you are in the northern climates, its time to turn off these services to protect them through the winter. In the south, southwest and western part of the US, we can wait a few more months. For more details see Winterizing Plumbing.
- Smoke Detectors: As we enter the heating season, it’s a good time to clean the cob webs and change the battery.
- Lawn Sprinkler Adjustment: Whether you have to shut down your sprinkler or just reduce your watering schedule, now is the time.
- Power Outages: For some of us, this time of year can bring extended power outages, check out this post to make sure you are prepared
Leave a Comment » | Home Inspection, Seasonal Reminder, Uncategorized | Tagged: Home Inspection, home maintenance | Permalink
Posted by homeownerbob
May 4, 2017
This seasonal reminder provides a list of items you need to review before the summer months set in. If you need details on what to look for or what to do, click on the link (if there is one) and it will take you to the post that was written on the subject and provide more detail.
- Heating/Cooling-Air Filters: Assuming you have a forced air system, change the filter prior to the heavy air conditioning months.
- Roofing-Looking For Leaks: Spring rains are approaching so inspect your roof for leaks, trim away any tree limbs and clean debris off the roof. Look for raised nails and any breaches in the roof surface.
- HVAC Outdoor Unit: Get your garden trimmers out and trim away any vines or growth away from the outside condenser. You should have 18″ to 2 feet clearance around the unit. Also take your water hose and wash down the outside coils that may have accumulated dirt. Check the condensation drain that comes from the air handler in the house. Ensure that it is clear of obstacles or debris by pouring water through it.
- Water Leaks: Check all water fixtures and toilets for leaks. Inspect fixture drains for water puddles or loose joints in the traps.
- Lawn Sprinklers: Exercise the system. Look for excessive water traveling down the driveway or sidewalks. Inspect the sprinkler heads, look for blow-by and odd spray patterns. Replace or repair the heads. If you need more help on this item, click the “lawn sprinklers” tab to see multiple subjects on locating lost heads, valves as well as tune-up recommendations.
- Exterior Inspection: Walk around the house, look for rotted wood, peeling paint and other exposed surfaces. Use caulk to re-seal cracks and touch up paint to reseal the surfaces. Replace rotten wood as necessary.
- Interior Inspection: Winter dry-out will have caused some surface cracks around doorways and windows. Also re-caulk/grout any cracks that may have surfaced in the bathroom and kitchen, especially around the tub and shower. These two areas experience the most use and require the most maintenance. Replace or clean water filters, faucet strainers and vent-a-hood filters in the kitchen. Flush kitchen and bathroom sinks with scalding hot water for approximately 3-5 minutes.
- Water Heaters: Tank type water heaters should have their pressure release valve tested (opened and closed). This will also validate the drain pipe is clear and open.
- Gutters and Downspouts: Clean you gutters of leaves and debris. Flush them with water to ensure they flow freely.
- Surface Water Drainage: Culverts, waterways, landscape drainage systems should be cleared of debris and overgrowth that may have occurred.
- Windows and doors: Look at the edges where the windows and doors connect to the house. Ensure the caulk is in good shape and add caulk as necessary, indoors and outdoors.
- Electrical Service: Inspect the Entrance, Mast and Weather-head. Look for any damage that may have occurred over the winter. Look for tree limbs that may be contacting the entrance cable.
- Electrical Service-Smoke Detectors: Clean your smoke detectors of cob webs and change the battery.
- Test your security system: Work with monitoring service to validate all the door, window, glass break, and motion sensors operate properly.
- Test Smoke Detectors: It’s a good time to clean off the cob webs and change the battery.
If you are needing some additional information on one of the topics that I have not written about, let me know and I will put it higher on the list of articles to write.
Leave a Comment » | Home Inspection, Seasonal Reminder, Uncategorized | Tagged: Home Inspection, home maintenance | Permalink
Posted by homeownerbob
April 25, 2017
 You probably read my article on “Is your Air Conditioner running Efficiently“, there are a lot of good tips in that post as we near the air conditioning season. In this post I want to highlight the condensate drain (another one of those items that gets little respect or notice until it’s not working properly).
Looking at the picture with the blue box knife you will see a piece of 3/4 copper with all but about 1/4 inch opening left. This is what I found today as I replaced a condensate drain. I would have never figured this!! As with many HVAC installations, units may be changed out every 10 years or so, but how often is the condensate drain replaced or inspected? Granted, this will not impede the unit from making cold air, but it may leave an ugly damp spot on the ceiling or floor (depending on the location of the HVAC). As it can back up and overflow.
HOW DOES A CONDENSATE DRAIN WORK: Lets first start by understanding what the condensate drain does. In the process of the cooling the house, the evaporator coil inside the air handler unit (located in a closet, attic or basement) operates at a temperature that creates condensation on the cooling coil. The collected water from this process has to drain off. The water drips off the evaporator and is expelled through a drain pipe. Based on gravity and slope, the water is either released outside the house or into the sanitary drain pipes. This drain tube must stay clean of debris, otherwise it can back up and cause water to drain into the house damaging sheetrock and possibly the building structure. They only drain when the unit is running in AC mode. Visually seeing water dripping is not a good enough inspection as it could still be backed up.
 HOW TO INSPECT THE CONDENSATE DRAIN:
Visually inspect the condensate drain for all the parts mentioned in this picture. Pouring a vinegar in the VENT and the pan will allow you to look for leaks and the rate of flow. Both locations should drain in a few seconds.
- VENT: Should be open and clear.
- PAN DRAIN: Should be open and clear. Should exit out of the house where visible. If you see water dripping from this drain pipe (at its exit), the primary condensate drain is probably stopped up.
- DRAIN PAN: Resides under the HVAC unit and should be clear of debris and free of water. Rusted pans should be replaced. Collected water in this pan is an indication there may be a drain flow stoppage of the primary drain.
- PRIMARY & PAN DRAIN: Both should have a slight downward slope to its destination. This will ensure the water can flow freely out of the house.
HOW TO CLEAN A CONDENSATE DRAIN: If the drain has never been cleaned, it would be best to use a Wet/Dry vacuum cleaner to attach to the pipe (at the end, outside the house) to suck out all the debris. Seal the vacuum cleaner hose to the drain pipe (furthest from the HVAC). Run the vacuum for about 5-10 minutes. In really bad cases, you may need to pour some vinegar down the drain to pull the gunk through the pipe while the vacuum is running. If necessary, you may need to repeat it until it shows to be running free and clear.Once you know it is clear pour a a gallon of vinegar down the drain once a year. That should keep it in good shape.
Leave a Comment » | Central Heat & Air | Tagged: condensate drain, hvac, hvac inspection | Permalink
Posted by homeownerbob
January 6, 2017
 Winter decided to show up today.. Kind of late, being that its mid-January. But hey: its Texas. It looks like it might just be a bounce in the temperature as it will be in the 40’s next week. With that said, you may have a few days to do some catch up home maintenance. For those of you in the “real” cold weather areas you have probably already done the items mentioned,
- Plant material that has previously lived through the winters may die, so hopefully you have already covered them up.
- Outdoor faucets may freeze up. Either cover them up with some form of insulation material or turn the faucet off below ground
- Its also a good time to look at the trees that may be near the electrical service drop. Look for limbs that have drooped too close to the service wire. This is not the time to trim them safelty, but you should take not and trim them in early spring. If they are putting excessive stress on the service line you should call a professional.
- Also look at my article on extended vacations.
If that wasn’t enough for you, here are the regular winter items to look at. Take care and stay warm.
Heating/Cooling-Air Filters: Assuming you have a forced air system, change the filters as we enter the heavy heating season.
- Roofing-Looking For Leaks: Winter rain and snow can cause the most marginal leak to show up, If you can still get on your roof, give it a look.
- Attic Inspection: Making a general inspection of your attic is important. Look for rodent tracks, damaged electrical wires and importantly vents and stacks.
 HVAC Indoor Unit: Besides the air filter, look at the general condition of the unit. If the unit uses natural gas look for a good strong flame. If you smell natural gas anywhere, address it immediately.
- Set Back Type Thermostat: If the battery is a year old, replace it.
- Winterize Plumbing: Wrap exposed pipes, fixtures and drain down the automatic sprinkler system.
- Surface Water Drainage: Culverts, waterways, landscape drainage systems should be cleared of debris and overgrowth that may have occurred.
- Caulking and Sealing Windows and Doors: Look at the edges where the windows and doors connect to the house. Ensure the caulk is in good shape and add caulk as necessary, indoors. (leave the outdoor caulking till Spring).
- Tile Grout and Caulk: Take a look in your bathrooms for separation in the tile grout and around the tub and shower. Winter heat will cause those materials to shrink. This is a great time to reapply caulk or grout in those areas.
- Gutters and Downspout: Clean you gutters of leaves and debris. Flush them with water to ensure they flow freely. This is as much a fall issue for the colder climates, but in the warmer states we are still seeing leaves fall. Look for a new article on this one next year. As you may know, I hate gutters, but I found a new product that may reduce my dislike. I will order some of the product and install them on another house that has lots of tree to see if they work.
 Exterior Inspection: Walk around the house, look for those wasp/bird nest and remove them with a broom. At this time of year you will have little resistance from them.
- Electrical Service-Smoke Detectors: Clean your smoke detectors of cob webs and change the battery.
- Seasonal Power Outages: Winter storms can leave many without electricity and other essential services. Review these items for safety sake.
If you are needing some additional information on one of the topics that I have not written about, let me know and I will put it higher on the list of articles to write. Email to HomeownerBOB@gmail.com
Leave a Comment » | Seasonal Reminder | Tagged: Home Inspection, home maintenance | Permalink
Posted by homeownerbob
December 13, 2016
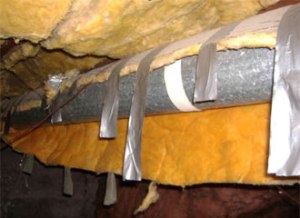 If you have read any of my last articles on HVAC ducts you recognize that, like the HVAC units, the duct network is a system as well. In the past I was an advocate of reinsulating the existing ducts over replacing them because of the cost. However, I am changing my tune as I continue to see more and more duct systems that were either so poorly installed from the get go or they have been patched, damaged or added to (incorrectly) they weren’t worth saving.
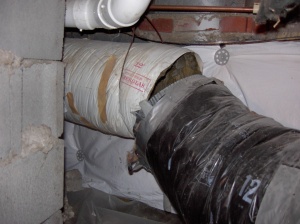
On my most recent project, I found the return air plenum was sucking return air right off the dirt floor in the crawl space. Some people might say “it just smells like an old house”; trust me, even an old house shouldn’t smell musty if the system is in good condition.
For the most part, properly installed ridged system can be superior, but if not, they stink. One of the biggest problems with ridged duct systems are: They are ridged! Just like the biggest problem with flexible ducts are; they are flexible! As with any house construction there are lots of obstructions that have to be dealt with. The flexible ducts are great for these applications as they can be easily routed around structural beams. However, all turns and bends should be gradual and smooth. No kinks or sharp turns.
One of the most disappointing things I see in residential construction is what I call “the lack of trade respect”. Think of it like fighting siblings, the older brother is always going to pick on the younger brother, just cause he can. Time and time again, I find shoddy work that is caused by a sibling trade. In a recent remodel project, we found that the HVAC contractor purposely removed several supporting beams because: they were in his way. In turn, it was left that way and didn’t show up until the roof was replaced some 40 years later. The roofers couldn’t re-deck the roof because of 6 split rafters, in other words, the roof was caving in. Admittedly, the workers are long gone but the negative effect of their work lives own. The rafters had to be rebuilt and purlins had to be replaced. Though our investigation, it was obvious that the HVAC tech removed them so he could have a straight path for his ridged duct. Negatively impact the integrity of the house was trumped by his laziness or willingness to cut corners. As with most attic or crawl space work, there is no one checking their work.
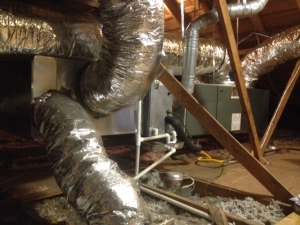
New Duct system installed using flexible ducting
Its not uncommon to find a 50 year old house that has had new HVAC units installed multiple times but the ducting is still 50 years old. Granted, when an HVAC unit fails to work, the problem is the units not the ducting. As the homeowner it is easy to just have the units replaced and leave the ducting as is since the new ducting can be as expensive as the unit itself. Unfortunately you can easily be giving up some of the efficiency gained by replacing the units. To learn more about “Improving the Efficiency of Your Duct System“, I have attached a link to a paper written for the US Department of Energy by Brookhaven National Laboratory. After reading the article and you realize it is time to replace the ducting, look to schedule the work in off-peak months. You will probably get a little better deal and a lot better job.
Leave a Comment » | Attics, Central Heat & Air | Tagged: duct replacement, hvac duct work, hvac inspection, insulating hvac duct, replace hvac duct work | Permalink
Posted by homeownerbob
August 1, 2016

Sorry for the delay in the Summer reminder posts. I tend to forget the official 1st day of summer, but start remembering it once we start getting full weeks of 100 degree days. Up to that point, I continue to bask in the spring. So, summer is formally if not officially already here! This seasonal reminder is more about making sure everything continues to work well through the stress and strain of the summer months more than anything. If you live near me, getting these things done before 10 AM in the morning is the best time of the day, otherwise you may wait till after 6 PM or so (stay hydrated; regardless). If you need details on what to look for or what to do, click on the link (if there is one) and it will take you to the post that was written on the subject and provide more detail.
- Heating/Cooling-Air Filters: If you live in a dusty area and/or have been using your air conditioner a lot, inspect you filter and change it if it has noticeable build up from your spring change out.
 HVAC Outdoor Unit: We did this in the spring and it’s good to do it again as vegetation has been growing through the spring months. Get your garden trimmers out and trim away any vines or growth away from the outside condenser. You should have 18″ to 2 feet of clearance around the unit. Airborne particles generated by the blooming of trees and flowers can easily show up around the air conditioning condenser. Take your water hose and wash down the outside coils. Check the condensation drain that comes from the air handler in the house. Ensure that it is clear of obstacles or debris by pouring water through it.
- Water Leaks: Check all water fixtures and toilets for leaks. Inspect fixture drains for water puddles or loose joints in the traps.
- Water Heaters: Make a visual inspection of the water heater. Look for dripping water and rust stains. Look at the exhaust flue to ensure it is still sealed. If its time to drain the tank or replace the anode, check the link for more details.
- Lawn Sprinklers: Even though we performed this maintenance during the spring, yard work and vegetation growth can cause some additional sprinkler maintenance. Exercise the system (again). Look for excessive water traveling down the driveway or sidewalks. Inspect the sprinkler heads, look for blow-by, odd spray patterns, missing heads, pooling water and brown spots. Replace or repair the heads. Chasing Lawn Sprinkler Leaks is the first of the series and covers the inspection, leak detection, repairs and tips in more detail.
 Exterior Inspection: Walk round the house, look for bird and wasp nests, as well as locations that rodents might be using to get in the house. Use caulk to re-seal any breaches in structure that may be an entry point for rodents or bugs. They are all looking for cool locations and possible water. If you are not opposed to using perimeter bug spray, this is a good time.
- Interior Inspection: Flush kitchen and bathroom sinks with scalding hot water for approximately 3-5 minutes to clear out any build up. “Water Leaks”, cover this item too.
- Appliances: Use a hand-held vacuum cleaner to clear the dust bunnies from around all appliances such as washers, dryers and dish washers. Pull you refrigerator out from the wall and do the same. If it’s within your skill set, turn off the unit, pull the back cover off, and vacuum out the condenser coils and all the dirt around the fan.
 Surface Water Drainage: Gutters, culverts, waterways and landscape drainage systems should be cleared of debris and overgrowth that has occurred.
- Electrical Service: Inspect the Entrance, Mast and Weather-head. With tree limbs heavy with leaves, seed pods, fruits and nuts, you may have some limbs that are drooping on your electrical service lines.
- Electrical Service-Smoke Detectors: Clean your smoke detectors of cob webs and change the battery.
- Test your security system: Work with monitoring service to validate all the door, window, glass break, and motion sensors operate properly.
- Heating/Cooling-Air Filters: If you live in a dusty area and/or have been using your air conditioner a lot, inspect you filter and change it if it has noticeable build up from your spring change out.
- HVAC Outdoor Unit: We did this in the spring and it’s good to do it again as vegetation has been growing through the spring months. Get your garden trimmers out and trim away any vines or growth away from the outside condenser. You should have 18″ to 2 feet of clearance around the unit. Airborne particles generated by the blooming of trees and flowers can easily show up around the air conditioning condenser. Take your water hose and wash down the outside coils. Check the condensation drain that comes from the air handler in the house. Ensure that it is clear of obstacles or debris by pouring water through it.
- Water Leaks: Check all water fixtures and toilets for leaks. Inspect fixture drains for water puddles or loose joints in the traps.
- Water Heaters: Make a visual inspection of the water heater. Look for dripping water and rust stains. Look at the exhaust flue to ensure it is still sealed. If its time to drain the tank or replace the anode, check the link for more details.
- Lawn Sprinklers: Even though we performed this maintenance during the spring, yard work and vegetation growth can cause some additional sprinkler maintenance. Exercise the system (again). Look for excessive water traveling down the driveway or sidewalks. Inspect the sprinkler heads, look for blow-by, odd spray patterns, missing heads, pooling water and brown spots. Replace or repair the heads. Chasing Lawn Sprinkler Leaks is the first of the series and covers the inspection, leak detection, repairs and tips in more detail.
- Exterior Inspection: Walk round the house, look for bird and wasp nests, as well as locations that rodents might be using to get in the house. Use caulk to re-seal any breaches in structure that may be an entry point for rodents or bugs. They are all looking for cool locations and possible water. If you are not opposed to using perimeter bug spray, this is a good time.
- Interior Inspection: Flush kitchen and bathroom sinks with scalding hot water for approximately 3-5 minutes to clear out any build up. “Water Leaks”, cover this item too.
- Appliances: Use a hand-held vacuum cleaner to clear the dust bunnies from around all appliances such as washers, dryers and dish washers. Pull you refrigerator out from the wall and do the same. If it’s within your skill set, turn off the unit, pull the back cover off, and vacuum out the condenser coils and all the dirt around the fan.
- Surface Water Drainage: Gutters, culverts, waterways and landscape drainage systems should be cleared of debris and overgrowth that has occurred.
- Electrical Service: Inspect the Entrance, Mast and Weather-head. With tree limbs heavy with leaves, seed pods, fruits and nuts, you may have some limbs that are drooping on your electrical service lines.
- Electrical Service-Smoke Detectors: Clean your smoke detectors of cob webs and change the battery.
- Test your security system: Work with monitoring service to validate all the door, window, glass break, and motion sensors operate properly.
Leave a Comment » | Home Improvement, Home Inspection, Seasonal Reminder, Uncategorized | Tagged: hvac inspection, water heater inspection | Permalink
Posted by homeownerbob
April 29, 2016
With all the Restoration, Repurpose and Reclamation programs on TV, its easy to get inspired to pick up an old fixture and bring it home. However, buying used fixtures/lamps that appear to be working correctly might still have hidden problems. I thought it might be a good idea to devote an article to inspecting a lamp/light fixture. As with any of my projects, safety is number 1, and with any electrical appliance, lamp or light fixture, insuring it remains compliant with the electric code and the original UL listing is very important.
 We recently picked up the swag lamp pictured to the side. The picture is from the location we bought it. As you can see it was working. So why would I want to take it apart? Just to check it out! So, I disassembled it to clean, inspect, repaint the metal surfaces and total rewire if required. As with most any hanging type fixture with the bulb below the socket, there is a natural tendency for the rising heat to make an impact on the above wiring. As expected, I found brittle and decayed wiring above the socket. After seeing the condition of the wiring I wondered why the fixture was working at all! Overheated wiring is the sleeping giant of lamp and light problems. Most wiring is rated at 105C (or 221F), and in most correct applications will be fine, however when a bulb wattage is greater than the lamp rating is used, the wiring will be the first component to suffer. You may never know it until the wiring is disturbed. Once disturbed, the insulation can disintegrate and potentially cause the wires to touch each other. You know where the story
  goes from here. Always follow the bulb ratings requirements as listed on the fixture.
Without knowing the history on a light fixture, it never hurts to confirm that it is in good working order before you use it. Here is my basic check list:
- Physical Review of the Lamp: Is it relatively clean, does it appear to have been stored inside or outside? Fixtures left outside can rust as well as rodents can get to places unseen to chew on the plastic wire insulation.
- Manufactured or Custom: In general, lamps that were manufactured in mass generally were designed and built to a specification. Typically they use standard lamp parts and overall meet the design criteria necessary for long term use. Custom lamps can be made from most anything (bowling balls, table legs, vases, etc.). Good custom manufacturers follow the same criteria. On the other hand, I regularly run across lamps that were hand built, but failed to ensure proper safety for long term usage. Many of them I can fix, but for various reasons a bad design can cause premature failure, in turn, it may not be a good lamp. The two most important items with custom lamps is 1)quality of workmanship and 2) proper heat dissipation.
 Wiring terminations: Most failed wiring is at the terminations. Frayed/broken wires, premature insulation failure, loose connection can all impact the safety and performance of the light. In this picture the bottom wire has decayed insulation and has turned black in color due to excessive heat. The one on top is in good condition.
- Polarity: In a simply lighting circuit there is a “line or hot” side and a “neutral”. Those terminations should be consistent from the plug to the socket to ensure the hot termination is in the base of the socket not the shell. This is tested with a VOM meter.
- Polarized Plug: Similar to #4. The larger prong on the plug goes in the larger hole in the wall socket, which is the neutral side, maintaining the polarity through the entire circuit. If it is a lamp and has a plug on the cord and it is not polarized, it is a good idea to change it out.
- Wiring Size: Not usually a problem with US manufactured lights, but most lamps/lights originally designed to work in a different country could have undersized wiring for use in the US. After determining the wire gauge, this can be addressed in multiple ways including, 1)rewiring the lamp or 2)simply lowering the wattage of the light bulb to be used.
- Bulb Sockets: Sockets show wear for various reasons, including the cardboard insulator and the metal contact surfaces. Regardless of the reason; noticeable wear in the socket should be resolved by replacing it.
- Grounding circuit: Lamps have polarized plugs, but light fixtures require a grounding circuit. This could be a green wire, or a small bare wire, or even a black wire with green tape that is attached to the body of the light fixture. With a VOM meter, continuity between the conductor and the bare metal surface of the fixture can be confirmed.
- Switches: Most switches tell you when they are bad and there is little indication they are going bad; not a lot of in-between. They can be good today, and bad tomorrow. If you have taken the lamp apart, changing the switch/socket is cheap insurance.
- Dimmers: Many times dimmers start to act up before total failure. Inspect for 1)free movement between clicks, 2)ambient temperature to touch, 3) full range of light from the bottom to the top of the dimmer movement. If it is just dead, some large dimmers have internal fuses that can go open.
- Physical Integrity: Most all manufactured lamps include metal parts. Many of them are soft metals such as brass or pot metal which can be fairly easy to bend or break. With that said it is not uncommon to have to occasionally tighten up some of the parts to keep everything in alignment. Do not over tighten the parts, the soft metal can break and be difficult to repair. FYI: Pot metal can be difficult to fix, so if you are thinking of buying a lamp that is physically broken, you might think twice.
 Ventilation: As you can see in this picture of the top cap of the same swag lamp; there is virtually no ventilation for the heat to escape. Just for safety sake, I added some ventilation holes in the top cover.
- Light it up: The final test is to power it up and let if run. Depending on the type of lamp, I may let them run for 30 minutes or so with the highest rated bulb. Mainly looking for heat problems with components and if it smells.
Here is the finished lamp. You can see the small holes I added to the top section for heat dissipation. Since heat is a major issue in this style fixture, I used an LED bulb and it drastically cut down the amount of heat. LED bulbs have become a game changer for multiple reasons; look for a later post on LED bulbs.


This article was originally published in my other blog found at DallasLampandLight.com
Leave a Comment » | Electrical | Tagged: broken lamp, inspect lamp, lamp restoration, repair lamp, rewiring a lamp, wiring a lamp | Permalink
Posted by homeownerbob
April 21, 2016
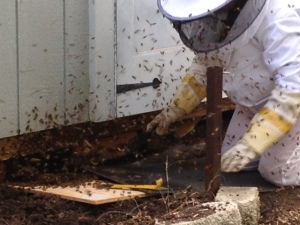 Yes, that is me in the bee suit. Spring is not a great time to do bee remediation, but you will find them swarming this time of year. Yes I knew they were there and had decided to let them do their thing, but the situation changed and I had to ask them to leave. They were not happy with my request. We did our best to save the hive.
I attempted to relocated about 20k bees that were under my shed the spring of 2015. The picture was a reminder to me to re inspect the shed. The good news is they have found a new home somewhere. I have not seen them this spring.
This seasonal reminder provides a list of items you need to review before the summer months set in. If you need details on what to look for or what to do, click on the link (if there is one) and it will take you to the post that was written on the subject and provide more detail.
- Heating/Cooling-Air Filters: Assuming you have a forced air system, change the filter prior to the heavy air conditioning months.
- Roofing-Looking For Leaks: Spring rains are approaching so inspect your roof for leaks, trim away any tree limbs and clean debris off the roof. Look for raised nails and any breaches in the roof surface.
- HVAC Outdoor Unit: Get your garden trimmers out and trim away any vines or growth away from the outside condenser. You should have 18″ to 2 feet clearance around the unit. Also take your water hose and wash down the outside coils that may have accumulated dirt. Check the condensation drain that comes from the air handler in the house. Ensure that it is clear of obstacles or debris by pouring water through it.
- Water Leaks: Check all water fixtures and toilets for leaks. Inspect fixture drains for water puddles or loose joints in the traps.
- Lawn Sprinklers: Exercise the system. Look for excessive water traveling down the driveway or sidewalks. Inspect the sprinkler heads, look for blow-by and odd spray patterns. Replace or repair the heads. If you need more help on this item, click the “lawn sprinklers” tab to see multiple subjects on locating lost heads, valves as well as tune-up recommendations.
- Exterior Inspection: Walk around the house, look for rotted wood, peeling paint and other exposed surfaces. Use caulk to re-seal cracks and touch up paint to reseal the surfaces. Replace rotten wood as necessary.
- Interior Inspection: Winter dry-out will have caused some surface cracks around doorways and windows. Also re-caulk/grout any cracks that may have surfaced in the bathroom and kitchen, especially around the tub and shower. These two areas experience the most use and require the most maintenance. Replace or clean water filters, faucet strainers and vent-a-hood filters in the kitchen. Flush kitchen and bathroom sinks with scalding hot water for approximately 3-5 minutes.
- Water Heaters: Tank type water heaters should have their pressure release valve tested (opened and closed). This will also validate the drain pipe is clear and open.
- Gutters and Downspouts: Clean you gutters of leaves and debris. Flush them with water to ensure they flow freely.
- Surface Water Drainage: Culverts, waterways, landscape drainage systems should be cleared of debris and overgrowth that may have occurred.
- Windows and doors: Look at the edges where the windows and doors connect to the house. Ensure the caulk is in good shape and add caulk as necessary, indoors and outdoors.
- Electrical Service: Inspect the Entrance, Mast and Weather-head. Look for any damage that may have occurred over the winter. Look for tree limbs that may be contacting the entrance cable.
- Electrical Service-Smoke Detectors: Clean your smoke detectors of cob webs and change the battery.
- Test your security system: Work with monitoring service to validate all the door, window, glass break, and motion sensors operate properly.
- Test Smoke Detectors: It’s a good time to clean off the cob webs and change the battery.
If you are needing some additional information on one of the topics that I have not written about, let me know and I will put it higher on the list of articles to write. Email to
Leave a Comment » | Uncategorized | Permalink
Posted by homeownerbob
March 23, 2016
 As mentioned in my last post on watering your foundation; Here in North Texas it is essential. Since this is not a one time event but a regular requirement, you might as well look at a relative permanent approach to the solution. I identified several ways to do this in my last posts on the subject but I wanted to share a bit more permanent method. The concept is the same, but its a bit more work, and you may want to hire an irrigation specialist to do it.
The biggest difference in this solution is capitalizing on the fact that you may already have a permanent in-ground sprinkler system. With this system, you operate it as any other section to your irrigation system profile and its no longer a separate system to take care of.
Criteria of existing lawn sprinkler system: For this to work, you need an automatic lawn sprinkler system and a couple more conditions to make it work.
 Electronic Irrigation controller: The irrigation controller will be the source of the schedule to water the foundation.
- Spare Zone: Most controllers come in 4, 6, 8, 12 (and so on) zones. You will need at least one vacant zone position for this to work. You can query the controller by stepping through the zones. When you select the zone with the controller, look for statements in the readout that could say things like; vacant, not-wired, turned off, etc. It that doesn’t work, open the back half of the controller and look at the incoming wiring. Each position that has a number on it represents a zone. If you find a number with no wire, you should have a vacant zone. If you don’t have any vacant zones, your forward path from this point would be to replace the controller with more zones. This may exceed your budgetary limitations
- Spare Wire: In many cases during the initial installation, the cable with the zone wires in it, may exceed the number of connected zones. So look for some coiled up wires in the base of the controller. If that is the case, you are in luck and can use one of the spare wires. If you have no spare wires but a spare zone on the controller, you would have to add a pair for the new zone. (a colored wire and a common (white) wire).
- Adding a New Valve: At this point, you have a 1)zone position in the controller, 2) a spare wire for the new zone. Now, locate all the existing valves in the yard. Specifically ones that are close to the house.
- In that valve box, look for the same color wire you identified in the controller, if it is not there, check the other valves. Worst case, you may have to bring a new wire to your chosen location.
- Dig up around the existing valve and identify which pipe is under pressure all the time. Once identified, turn the main water supply off that feeds the sprinkler system (probably near the water meter), you will cut into the pipe and add a new valve. You may have to run a short piece of wire from the existing valve to the new one to hook it up. The connection will be one colored wire and one “Common”.
- When you buy the new valve, make sure it has (low) flow control, and or is designed to work with zones that don’t use a lot of water pressure. The drip lines you use have a low GPM (gallon per minute) rating as well as low pressure.
- Polypipe: Depending on where you locate the new valve, you may need a section of polypipe to get you to the foundation. You can cut the hose to length and use the polypipe fittings to make up the ends. Make sure the polypipe and fittings are the same dimensions. Since all these connections are on the low pressure side of the system, these fittings are just simple resistance (chinese finger) snap in connectors.
- Drip Lines: From the poly pipe, use the same fitting to transition to the Drip Line. These hoses are designed with drip emitters in the hose every 12 inches. Run it around the house keeping it about 6 inches from the foundation. You can bury them a couple of inches or hide them with mulch.
 Staking them with landscape stakes will help keep them in place as this product does not like to lay flat to the ground. You can purchase the hose in bulk from the Orange Box store of Sprinkler Warehouse. You will need to also purchase inter-hose connectors as well as a way to connect to your water. If you have to make a sharp turn it is better to use a fitting than bending the pipe. You do not want to crimp the hose. Splitting the line with a Tee is totally acceptable, and it will also allow a little better flow control if the go half way around the house with one feed and half with the other.
So here is what it looks like in dollars. Admittedly, you can probably do this a little cheaper, but I used high quality components, so this should last for years to come.

Related articles:https://homeownerbob.wordpress.com/2012/03/05/watering-your-foundation-its-a-texas-thing/
Watering Your Foundation – Getting Ready for the Summer
Leave a Comment » | Conserve Water, Foundations, Lawn Sprinklers | Tagged: clay soil, foundation watering, texas black gumbo, texas soil | Permalink
Posted by homeownerbob
March 10, 2016
 If you read the previous 4 parts of this series, you will remember my quest to cut the cord (disconnect traditional cable TV). The plan was to imulate as closes as possible a solution that included a 1) broadcast antenna for local service, 2) Streaming services such as Netflix, Amazon and Hulu (currently the big players in this space) and 3) Simular to #2, in that it includes streaming video, but from sources such as You Tube, and other individual content providers such as CMT, CNBC, MSNBC and 4) some sort of DVR to allow for time shifted viewing (something the cable companies got us to like). So here we are, over 4 years later and I still hadn’t done it cause I just wasn’t happy with my solution as well as it didn’t pass the wife test. Until now!!! I had tried one brand of OTA DVR, but it just didn’t have the response, nor did it have a good 14 day schedule. So after much deliberation, I purchased the TiVo Bolt. For three reasons, 1) it had all the time tested feature sets that TiVo has refined over many years, 2) the Bolt will be their premiere product as they phase out the Roamio, so all their development will go toward their newest product and 3) it had enhanced feature that recognize streaming video sources more than the Roamio:
So lets look at how TiVo Bolt answered my questions/problems identified in my previous post.
- Broadcast Antenna: vs. UVerse. Hands down, assuming you have good OTA (over the air) reception, the broadcast antenna provides a superior picture quality. With the Bolt connected to my antenna, I can not see any service degradation between the straight antenna connection vs going through the Bolt box. After watching this for a couple of days, I keep thinking I bought a new TV. If you have CATV, satellite or a fiber based service provider, it will probably not be that noticeable, but if you have a provider such as AT&T that originally provided their content over copper, the difference is quite noticeable. Note: In the recent months AT&T has announced with the purchase of DirecTV, they will be moving their customer base from UVerse to DirecTV (copper vs. satellite based solution).
- Antenna Reception: As noted in my earlier entries, having a good antenna and good broadcast antenna service will be paramount to support your OTA TiVo receiver. This is the core of your off cable, non streaming service. If you have poor reception, pixeling, or blocking you will get quite frustrated with the service. If your antenna service is marginal on a good day, it will be poor on a bad day. Wind, rain, tree’s with large leaves in the summer will all negatively impact the reception. If you are old enough to remember, depending on a TV antenna for all of your broadcast television, you will remember fuzzy, scratchy and intermittent service. Its still the same but different. Even though having an antenna on a 10 ft. mast may work for many urban dwellers, antenna masts of greater proportion may be required. In my case, I have struggled with getting adequate reception of the NBC affiliate (and I live in the city). I have continued to tweak my arrangement and after several months of refinement, I have it to a manageable level. In bad weather it is usually the first station to start acting up.
- No or limited on-screen TV Guide for Broadcast TV: So far, the Bolt has got this covered. The user programing for identifying shows, show series, and movies from both traditional OTA providers but also non-traditional services such as Amazon and Hulu, create an almost seamless transition from CATV type solutions. Setting down with my non-tech wife (aka; NTW) to provide some training, showed me how smooth the transition would go, as she picked up on it very quickly. The Bolt remote is very intuitive to most all the activities we all have come accustom to with other remotes.
- DVR: To bring OTA broadcast TV up to speed with CATV, a DVR is nearly a must. The folks at TiVo understand that time-shift viewing is taking over traditional viewing habits and have simplified the process quite well. Whether you want to record a series or just some specific events, the recording process is very simple. The Bolt comes with 500g but you can easily add an outboard larger hard drive storage.
- Netflix: Over the last 4 years Netflix has become the elephant in the room by embracing our new viewing habits. Add in Amazon Prime and Hulu (just to name a few), and you can fill in many of the blanks left by leaving CATV. Call it ala carte or pay per view, TiVo has integrated these services into the box as just another part of the viewing spectrum.
- Roku Box: I was probably an early adopter to this service and it kind of reminded me of when we first got FM radio. Needing a special tuner to get there. Whether it be Smart TV’s, DVD players, game boxes, or TiVo receivers. Gaining access to streaming services has come mainstream. The Roku served me well, but I really don’t need it since the streaming services are now nearly everywhere on most all connected devices.
- Multiple TV’s: Again, TiVo has this covered as well. With the TiVo Mini, you can watch the same TV programs that show up on your primary TV.
- Sports: There is still a hole here and if they had a good fix for it, we would already have it. Typically Sports are viewed in real time, not recorded (as much). And the most acceptable way to watch live sports is through a CATV provider as they have access to all locally broadcast events. If you just want local sports, you can probably make it work, but if you live in a far away place from your favorite, you still have a problem.. However, there are some establishments that will broadcast far away game for you at their business. Granted, it might cost you the price of a couple of beers, but hey; its an option. For me, its not a deal breaker as I really don’t watch sports.
Next time we will look at the costs and payback
Image courtesy of [Vlado] at FreeDigitalPhotos.net
Leave a Comment » | Cut the Cord, Techy Things | Tagged: alternatives to cable tv, antenna tv, cut the cable, cut the cord, cutting the cord, DVR, Internet TV, internet tv options, living without cable tv, OTA DVR, TiVo | Permalink
Posted by homeownerbob
October 24, 2015
 As we (finally) start rolling into the cooler months, its worth talking about smoke detectors again. The NFPA (National Fire Protection Agency) recommend that every home have a smoke detector outside each sleeping area (inside as well if household members sleep with the door closed) and on every level of the home, including basements. Floors without bedrooms should have detectors in or near living areas, such as dens, living rooms or family rooms. TIP: Even though we may believe the kitchen and bathrooms should have detectors, in fact these rooms can be a source of numerous false alarms. Depending on the age of the house, smoke alarms may have been installed as part of a security system, or they may be stand-alone. Depending on the brand and style they may be receiving power from the security system, so there may not be a battery at the unit. If this is the case, the battery at the security system may last for several years and should be replaced based on that required interval. TIP: Most security systems will provide a battery alert when they require changing. Testing smoke alarms associated with a security system may be more involved and you may have to coordinate your test with the security system monitoring/surveillance center. TIP: Smoke or fire alarm routed through the security system are typically an “automatic dispatch” with no confirmation required so consult with your provider. Key Inspection Points and Action Items:
- Visually inspect the detector
- Clean off cob webs from the cover without removing the cover. You can get a can of “air” used to clean electronics from a computer store that will work
- Replace the battery yearly or earlier if the chirp indicator has been active. (Locally powered 9V type batteries)
- If you find corrosion (green powdery substance) on the battery terminals, replacement is recommended. TIP: If the corrosion is minimal, try using a Q-Tip dipped in a liquid mix of baking soda/water or Coca Cola to clean the battery contacts. You must remove all the corrosion and avoid getting the solution(s) on anything but the effected area. After cleaning put a light film of dielectric grease on the connectors to slow down the opportunity for corrosion to re-appear.
- The NFPA recommends the detector(s) be tested monthly. Press the test button which should briefly activate the audible horn. It should reset itself shortly.
Residential grade smoke alarm/detectors are not repairable, if they fail to operate properly through testing, they should be replaced. Limited long-term test data exists, but manufacturers and trade associations indicate the product should remain properly functional for 10-12 years under normal conditions.
9 Comments | Safety Items, Seasonal Reminder | Tagged: Electrical, electricity, fire alarm, home maintenance, home repair, home safety, nfpa, repair, smoke alarm | Permalink
Posted by homeownerbob
August 11, 2015
 Here in the Southwestern part of the country air conditioning is a requirement. With temperatures running above 100 degree’s for weeks at a time, these systems can struggle to perform as necessary to keep you and your family cool. Besides filters, there are a few other things that are worth mentioning. If you think you may have a problem, it will probably be showing up in your electric bill as either you or your system is having to compensate for its inability to perform as required. Canvas your neighbors about their electricity usage as a comparison. Talk to folks that have simular houses and life styles for a good comparison. Square footage, thermostat settings and occupancy times are all important. Differences of more than 20% can be a clue there may be an issue. Also, use energy numbers or kwh as listed on the electric bill not the actual dollars spent. Here in Texas, the electricity is deregulated and there could be 2 to 5 cents of difference in kwh per hour charges.
If your system has operated properly in the past, these inspection and preventative maintenance items will ensure optium performance. However, if your system has never worked properly or struggeled to keep the house cool, you may have design or service conditions that may warrant a call to a professional. Either way, by inspecting and maintaining the obvious you are isolating the issue allowing the trained technician more time to fix the problem less time to find it.
Inspection and Maintenance Items:
- Clean air filters: Replace the air filter 2 to 4 times a year. See my complete article for details. Heating/Cooling Air Filters.
- Air Returns:Keep these vents clean from dust debris and any obstruction. Depending on the design, the return air vent(s) may be close to the floor or in the ceiling. If the air return is near the floor, remove the metal grid and use a vacuum cleaner to remove all the dust and debris. If you have an air filter located here, replace it as necessary. In some cases you may have a filter here as well as at the unit. If so, this filter should be replaced on the same schedule as your normal filter.
- Room Temperature: A well designed central air conditioning system should provide balanced air flow and temperatures of no more than about 3 degrees in difference from one room to the next. Large windows and doors will impact that number to some degree.
- Air Flow: With air registers in each room, the air must circulate from the room to the return air location. For this reason, the air must be able to exit the room with the door closed. Either the door will (should) be undercut or there may be a pass-through return vent into a hallway or another room. If doors slam themselves shut (when the system is running), you may have a return air issue. TIP: If you recently added new carpet to your house, and you are now having air conditioning problems, the new carpet may not be adequately allowing the air to return under the doors.
- System Temperature Differential: This test is similar to checking your blood pressure as variables can effect the results. Most professionals set the thermostat low enough to require the system to run constantly (8 to 10 degrees below ambient) for at least 30 minutes (run it longer if you can). Use a digital thermostat to validate the air temperature exiting the register. Do not go by the temperature of the register itself. Its the air temperature you need. Do the same at the make-up or input air. You should have a temperature differential of 14 to 20 degrees in difference. Too high or too low is a symptom of a larger problem. High numbers indicates a 1) dirty filter, 2) improper/inadequate duct-work, 3) a fan not spinning fast enough or undersized. A low number indicates 1) refrigerant loss, 2) a dirty coil, 3) overworked compressor, 4)over-sized fan, or 5) deficient/blocked return air system. Check the obvious, then contact an HVAC specialist.
 Water Pan and Condensate Drains: In the process of the cooling the house, the evaporator coil inside the air handler unit (located in a closet, attic or basement) can pull humidity out of the house envelope. In doing so, that water collected by the system has to be expelled. By design, a drain is connected to the unit and released outside. This drain tube must stay clean of debris, otherwise it can back up and cause water to drain into the house causing damage to Sheetrock and overtime to the building structure. They don’t drain all the time so just visually seeing water dripping is not a good enough inspection. Once you locate the drain, use a Wet/Dry vacuum cleaner to attach to the pipe (at the end, outside the house). Seal it as best as possible and run the vacuum for a couple of minutes. This should pull any bugs, lint, dust or debris out of the pipe. This is a better method than pouring water through the system, and a lot less messy. Perform this function at least once a year.
- Outdoor Compressor: Ensure plant material is clear of the compressor (18″ to 2′), remove leaves, grass, vines by hand. Use your water hose to spray down the coils to remove lint dust and dirt. This is probably one of the most important quick solution to a system that is under performing.
 Outdoor Compressor Connections: There should be two copper pipes and one maybe two electrical conduits. The larger of the two (suction pipe) copper pipes should be properly insulated (all the way to the air handler/evaporator coils in the house. This pipe is delivering the cold freon used to cool the house. The longer it can stay cold, the better. Also look at the electrical connections to ensure they are sealed (sealtite type conduit) and secure. There will also be a small low voltage wire that may or may not be in a conduit, make sure it is not cut chafed or deteriorated.
- Air Ducts: This item deserves an article on its own. Independent studies have shown up to 35% loss in cooling capacity due to poor duct insulation, leaky ducts, leaking air vents and duct splicing. Inspect for air leaks throughout the entire system. All of these components that make up the delivery system should be sealed with the highest degree. Use Aluminum faced tape or mastic paint rated for UL 181 applications to seal any holes. DO NOT USE FABRIC BASED “DUCT” TAPE. TIP: If you are considering replacing your HVAC system look seriously at replacing the duct work as well. Poorly insulated ducts can reduce your SEER rating by 50%.
- Set Back Thermostat: If you don’t have one, you need one. This is one of the most effective ways in managing your heating and air conditioning requirements and costs. Basically, you program it to change the temperature automatically to meet your lifestyle needs by adjusting the temperature for periods when the house is not occupied. Regarding the maintenance? Most are battery equipped and you should change it once a year.
- Attic Insulation: Inadequate attic insulation can also effect the performance of your system. Use this US Gov link to determine if you have enough insulation for your region. Use a straight edge or yard stick to measure the insulation in various places. Avoid compacting it or stepping on it any more than you have to. Use a rake to re-spread and fluff the insulation.
Key Inspection Points Action Items:
- Replace air filters
- Inspect and clean all air grills
- Clean and inspect outdoor compressor unit
- Clean condensate drain
- Inspect ducts for leaks
- Change battery in thermostat
- Check level of attic insulation
6 Comments | Central Heat & Air | Tagged: Air conditioner, air conditioning, air conditioning filters, central heat and air, efficient air conditioning, forced air conditioning, home maintenance, home repair, hvac, inspect, inspection | Permalink
Posted by homeownerbob
August 6, 2015
 Ok, its time to confess…. I’ve been cheating. Yes that’s right, I have another business/webpage.
Several years ago we had the opportunity to acquire a lamp repair business. Granted, its maybe not the most high tech cutting edge opportunity you would first think of, but on the other hand it fits right in my wheel house. My hobbies have always involved building, restoring and repairing; be it motorcycles, houses, lawnmowers, sprinkler systems, mixers, lamps, etc., etc. When I went to college, getting a degree in Industrial Technology just seemed to fit. So, when one of my life long friends that had been repairing lamps and lights decided to give it up and move to the country we jumped at the chance to keep the light burning.
So with that said, we started Dallas Lamp & Light. Dallas Lamp & Light is a locally owned WhiteRock/East Dallas business specializing in light fixture repair as well as complete lamp restoration and redesign. Electrical rewiring is our core competency but we also have the expertise and facilities to perform full rejuvenation including surface restoration of metal, wood and ceramics. Look to Dallas Lamp and Light to bring light back to your lamps and fixtures.
We carry a complete stock of replacement components, including switches, cords, fixture receptacles and brass hardware. We also have a collection of over 35 years of specialty parts that can be used to bring your light back to tip-top shape.
Looking to update the look of a lamp? We can re-coat metal surfaces with traditional metal lamp colors and finishes as well as any color under the rainbow. Typically, we use either acrylic enamels, thermoset and thermoplastic polymer coatings in lieu of plating to reduce exposure to environmental concerns. These coatings are very durable and work well in this application.
Interested in making a lamp from a favorite item? We can do that too! From musical instruments to bowling balls, we can turn that special treasure into a functional part of your household.
If you are local to the Dallas Ft. Worth metroplex, or want to pack up that lamp and send it to me, we can help put the light back into most any lamp.
BOB
Leave a Comment » | Appliances, Electrical, Home Improvement | Tagged: dallas lamp repair, lamp repair, lamp restoration | Permalink
Posted by homeownerbob
June 30, 2015
I think most of the country, with the exception of California has had an extremely wet spring. For us here in the southwest, we are officially out of a 5 year drought (for now). With an annual rain fall of about 30 inches, you don’t really want it all in one month, but we surpassed it by achieving over 35 inches in the month of May. So, summer is officially here! With the 4th of July just around the corner, history could repeat itself as may not see much more rain till September. This seasonal reminder is more about making sure everything continues to work well through the stress and strain of the summer months more than anything. If you live near me, getting these things done before 10 AM in the morning is the best time of the day, otherwise you may wait till after 6 PM or so (stay hydrated; regardless). If you need details on what to look for or what to do, click on the link (if there is one) and it will take you to the post that was written on the subject and provide more detail.
- Heating/Cooling-Air Filters: If you live in a dusty area and/or have been using your air conditioner a lot, inspect you filter and change it if it has noticeable build up from your spring change out.
 HVAC Outdoor Unit: We did this in the spring and it’s good to do it again as vegetation has been growing through the spring months. Get your garden trimmers out and trim away any vines or growth away from the outside condenser. You should have 18″ to 2 feet of clearance around the unit. Airborne particles generated by the blooming of trees and flowers can easily show up around the air conditioning condenser. Take your water hose and wash down the outside coils. Check the condensation drain that comes from the air handler in the house. Ensure that it is clear of obstacles or debris by pouring water through it.
- Water Leaks: Check all water fixtures and toilets for leaks. Inspect fixture drains for water puddles or loose joints in the traps.
- Water Heaters: Make a visual inspection of the water heater. Look for dripping water and rust stains. Look at the exhaust flue to ensure it is still sealed. If its time to drain the tank or replace the anode, check the link for more details.
- Lawn Sprinklers: Even though we performed this maintenance during the spring, yard work and vegetation growth can cause some additional sprinkler maintenance. Exercise the system (again). Look for excessive water traveling down the driveway or sidewalks. Inspect the sprinkler heads, look for blow-by, odd spray patterns, missing heads, pooling water and brown spots. Replace or repair the heads. Chasing Lawn Sprinkler Leaks is the first of the series and covers the inspection, leak detection, repairs and tips in more detail.
 Exterior Inspection: Walk round the house, look for bird and wasp nests, as well as locations that rodents might be using to get in the house. Use caulk to re-seal any breaches in structure that may be an entry point for rodents or bugs. They are all looking for cool locations and possible water. If you are not opposed to using perimeter bug spray, this is a good time.
- Interior Inspection: Flush kitchen and bathroom sinks with scalding hot water for approximately 3-5 minutes to clear out any build up. “Water Leaks”, cover this item too.
- Appliances: Use a hand-held vacuum cleaner to clear the dust bunnies from around all appliances such as washers, dryers and dish washers. Pull you refrigerator out from the wall and do the same. If it’s within your skill set, turn off the unit, pull the back cover off, and vacuum out the condenser coils and all the dirt around the fan.
 Surface Water Drainage: Gutters, culverts, waterways and landscape drainage systems should be cleared of debris and overgrowth that has occurred.
- Electrical Service: Inspect the Entrance, Mast and Weather-head. With tree limbs heavy with leaves, seed pods, fruits and nuts, you may have some limbs that are drooping on your electrical service lines.
- Electrical Service-Smoke Detectors: Clean your smoke detectors of cob webs and change the battery.
- Test your security system: Work with monitoring service to validate all the door, window, glass break, and motion sensors operate properly.
If you are needing some additional information on one of the topics that I have not written about, let me know and I will put it higher on the list of articles to write. Email to HomeownerBOB@gmail.com
Leave a Comment » | Seasonal Reminder | Tagged: Home Inspection, home maintenance, home repair, spring fix up, spring house maintenance | Permalink
Posted by homeownerbob
May 5, 2015
Yes, that is me in the bee suit. Spring is not a great time to do bee remediation, but you will find them swarming this time of year. As for this picture, I found over 20k bees under my shed. Yes I knew they were there and had decided to let them do their thing, but the situation changed and I had to ask them to leave. They were not happy with my request. We did our best to save the hive.
This seasonal reminder provides a list of items you need to review before the summer months set in. If you need details on what to look for or what to do, click on the link (if there is one) and it will take you to the post that was written on the subject and provide more detail.
- Heating/Cooling-Air Filters: Assuming you have a forced air system, change the filter prior to the heavy air conditioning months.
- Roofing-Looking For Leaks: Spring rains are approaching so inspect your roof for leaks, trim away any tree limbs and clean debris off the roof. Look for raised nails and any breaches in the roof surface.
- HVAC Outdoor Unit: Get your garden trimmers out and trim away any vines or growth away from the outside condenser. You should have 18″ to 2 feet clearance around the unit. Also take your water hose and wash down the outside coils that may have accumulated dirt. Check the condensation drain that comes from the air handler in the house. Ensure that it is clear of obstacles or debris by pouring water through it.
- Water Leaks: Check all water fixtures and toilets for leaks. Inspect fixture drains for water puddles or loose joints in the traps.
- Lawn Sprinklers: Exercise the system. Look for excessive water traveling down the driveway or sidewalks. Inspect the sprinkler heads, look for blow-by and odd spray patterns. Replace or repair the heads. If you need more help on this item, click the “lawn sprinklers” tab to see multiple subjects on locating lost heads, valves as well as tune-up recommendations.
- Exterior Inspection: Walk around the house, look for rotted wood, peeling paint and other exposed surfaces. Use caulk to re-seal cracks and touch up paint to reseal the surfaces. Replace rotten wood as necessary.
- Interior Inspection: Winter dry-out will have caused some surface cracks around doorways and windows. Also re-caulk/grout any cracks that may have surfaced in the bathroom and kitchen, especially around the tub and shower. These two areas experience the most use and require the most maintenance. Replace or clean water filters, faucet strainers and vent-a-hood filters in the kitchen. Flush kitchen and bathroom sinks with scalding hot water for approximately 3-5 minutes.
- Water Heaters: Tank type water heaters should have their pressure release valve tested (opened and closed). This will also validate the drain pipe is clear and open.
- Gutters and Downspouts: Clean you gutters of leaves and debris. Flush them with water to ensure they flow freely.
- Surface Water Drainage: Culverts, waterways, landscape drainage systems should be cleared of debris and overgrowth that may have occurred.
- Windows and doors: Look at the edges where the windows and doors connect to the house. Ensure the caulk is in good shape and add caulk as necessary, indoors and outdoors.
- Electrical Service: Inspect the Entrance, Mast and Weather-head. Look for any damage that may have occurred over the winter. Look for tree limbs that may be contacting the entrance cable.
- Electrical Service-Smoke Detectors: Clean your smoke detectors of cob webs and change the battery.
- Test your security system: Work with monitoring service to validate all the door, window, glass break, and motion sensors operate properly.
- Test Smoke Detectors: It’s a good time to clean off the cob webs and change the battery.
If you are needing some additional information on one of the topics that I have not written about, let me know and I will put it higher on the list of articles to write. Email to HomeownerBOB@gmail.com
Leave a Comment » | Seasonal Reminder | Permalink
Posted by homeownerbob
January 1, 2015
The Insurance Industry reports over $200 million in water damages a year related to washing machines each year.
Most of us never think that one event caused by the washing machine can quickly create serious damage to our house in less than a few hours. In fact, if one of the water hoses connected the washer were to break, it will release approximately 600 gallons of water in an hour.
The cheapest insurance to protect against a bursting water hose in the house is to turn the water off at the wall after each use.. Congratulations if you have the conviction and memory to do this on a daily basis…. I don’t.
Most washers are equipped with standard light duty water hoses rated for 3-5 years of service. At the least, a yearly inspection can reduce the risk, but it still not a guarantee that it will protect you from an inevitable flood.
Yearly Inspection: At the least, performing this inspection will further reduce the probability of having a flood associated with the washing machine.
- Clearance: The washer should maintain a 4-5 inch gap between the back of the washer and wall. Ensure the hoses are not crimped or kinked.
 Hoses: With the water on, grab the hoses and move them around to ensure they are still very pliable. Granted, they will be a little stiff since they are under pressure. Run your hands over the entire surface area of both the hot and cold hoses looking for any abnormalities, such as bubbles (like in the picture) or surface cracks. Move the hoses in a circular motion specifically around the collar terminations at the washer and at the wall. Typically this is where the hose will break. Be ready, this inspection may cause the hose to leak or break. If so, be ready to turn the water off. TIP: As with all plumbing work, make sure you can successfully turn the water off before starting the inspection. ANY amount of water detected is enough to warrant replacement of the hoses, unless the leak is at the threaded connections.
- Connections: Make sure the threaded connectors are tight at both the wall and the washer.
- Hose Inspection Part II: Turn the washer on to warm, as the washer is filling up, turn the water off (H&C) at the wall. Turn the washer off allowing the hoses to drain a bit into the washer. Inspect the rubber hoses again for pliability.
- Final Inspection: When finished with #4, turn the water back on and reset the washer; re inspect the hoses and connectors for leaks.
Upgrade Solution:
For those of you that have experienced a flood of this type, or like me, prefer, to fix it before it breaks you have a couple other options to consider. Most of you know, I am kind of a techno-nerd. So at this point, it would be easy for me to jump off into a solution with electric solenoids, wifi based alerting sensors and such, but this one only requires the KISS approach (keep it simple stupid). If you look at my article on “How Long Will They Last“, you will see a clothes washer should last you about 13 years. Lets look at the choices for hoses:
- Standard Replacement Rubber Hoses: With a life expectancy of the 3-5 years and a cost of *** and an hour of labor to do it. If you have to use a professional, add another $75 bucks, it’s about $100 every 3 to 5 years or $300 over the lifetime of the washer. TIP: This is a fairly simple exercise similar to changing a garden hose, but you will have to move the washer around to get to the hoses.
 Metal Braided PVC Hoses: Considered an upgrade, easily acquired at the big box store and priced at approximately $30 for the pair. With a life expectancy of 5 years (at best). These hoses give the appearance of sustainable life, but in reality the stainless steel braiding serves to protect a standard type PVC hose from the natural elements, otherwise it would not be anymore durable than the standard rubber hose. It can break easily at or near the connectors as well.
- High Grade Rubber Hoses: If you have been around much construction equipment, you are well aware of the use of rubber hoses used in hydraulics. These hoses are under constant high pressure at the tune of about 1400 lbs. Our last recommeded supplier of high quality hoses went out of business. HomeownerBOB will investigate another solution and update this post accordingly.
Ok, so this solution wasnt good enough for you, here are some items that are belts and suspenders. However, for me, the upgraded hoses are more than adequate. I say this because the solenoids will stop the water in the even of a flood, they also induce new failure points that are not worth it in my book.
- Electric Solenoids: Floodstop will detect water on the floor and tell the water to shut off at the washer connection.
- Water Alarm Detector: This device works in conjunction with your burglar alarm activating an alarm condition that would report to you or the burglar alarm monitoring company. NOTE: Unfortunately, by the time you get home, the damage is done.
- Whole House Flood Detector: This is the premium solution as it allows sensors any where and everywhere. If you house is over 10,000 sq. feet, you might consider this, otherwise its pretty expensive.
Leave a Comment » | Appliances, Plumbing | Tagged: clothes waher, clothes washer maintenance, water leaks | Permalink
Posted by homeownerbob
September 28, 2014
 The Fall Season has been here for a week and it is still a bit warm. Looking at the long term forecast we may still see 90 degrees! But no complaints. It was a mild summer with only a handful of days over 100. If you are in the northern climates this is your opportunity to “batten down the hatches” by tightening up the house. Re-caulking, sealing, and roof inspections are in order. Checking door and window seals are also a good idea. For the rest of us, the lower temperatures are a relief, summer is mostly over and we can attack those projects we wouldn’t touch during the summer. Click on the heading below to get a more detailed description of an inspection/maintenance item.
- Heating/Cooling-Air Filters:If you live in a dusty area and/or have been using your air conditioner a lot, inspect you filter and change it if it has noticeable build up from your spring change out.
- Exterior Inspection: Walk round the house, look for bird and wasp nests, as well as locations that rodents might be using to get in the house. Remove the nests and use caulk to re-seal any breaches in structure that may be an entry point for rodents or bugs. Dont forget to look at you electrical service entry as spring and summer growth, additional tree trimming may be required.
- Roofing-Looking For Leaks: Winters are a bad time to look for roof leaks so inspect your roof for leaks, trim away any tree limbs and clean debris off the roof. Look for raised nails and any breaches in the roof surface and all the exposed vents.
- Sealing the Leaks: Summertime weather can cause the home exterior to dry out. Look for cracks and voids in building materials. Seal them with a good latex caulk. Larger voids should be filled (first) with a foam spray caulk, then to make it dressed for paint, use the latex caulk to finish it off and paint as necessary.
- Interior Inspection: Flush kitchen and bathroom sinks with scalding hot water for approximately 3-5 minutes to clear out any build up.
- Surface Water Drainage: Culverts, waterways and landscape drainage systems should be cleared of debris and overgrowth that has occurred.
- Electrical Service-Smoke Detectors: Clean your smoke detectors of cob webs and check the condition of the battery.
- Chimney Flue Inspections and Cleaning: For our northern friends this is the time to ensure your stoves and fireplaces are prepared for the winter use. Inspect the stove seals, clean the chimneys and flues.
- Drain and cut-off sprinklers: If you are in the northern climates, its time to turn off these services to protect them through the winter. In the south, southwest and western part of the US, we can wait a few more months. For more details see Winterizing Plumbing.
- Smoke Detectors: As we enter the heating season, it’s a good time to clean the cob webs and change the battery.
- Lawn Sprinkler Adjustment: Whether you have to shut down your sprinkler or just reduce your watering schedule, now is the time.
- Power Outages: For some of us, this time of year can bring extended power outages, check out this post to make sure you are prepared
Leave a Comment » | Home Inspection, Seasonal Reminder | Tagged: Home Inspection, home maintenance, roof inspection | Permalink
Posted by homeownerbob
June 29, 2014
 Summer is officially here, and the good news is we have been getting needed rain. We are still WAY below on annual rainfall, but we’ll take anything we can get. With the 4th of July just around the corner, I suspect we have seen the last of the rain till September. This seasonal reminder is more about making sure everything continues to work well through the stress and strain of the summer months more than anything. If you live near me, getting these things done before 10 AM in the morning is the best time of the day, otherwise you may wait till after 6 PM or so (stay hydrated; regardless). If you need details on what to look for or what to do, click on the link (if there is one) and it will take you to the post that was written on the subject and provide more detail.
- Heating/Cooling-Air Filters: If you live in a dusty area and/or have been using your air conditioner a lot, inspect you filter and change it if it has noticeable build up from your spring change out.
- HVAC Outdoor Unit: We did this in the spring and it’s good to do it again as vegetation has been growing through the spring months. Get your garden trimmers out and trim away any vines or growth away from the outside condenser. You should have 18″ to 2 feet of clearance around the unit. Airborne particles generated by the blooming of trees and flowers can easily show up around the air conditioning condenser. Take your water hose and wash down the outside coils. Check the condensation drain that comes from the air handler in the house. Ensure that it is clear of obstacles or debris by pouring water through it.
- Water Leaks: Check all water fixtures and toilets for leaks. Inspect fixture drains for water puddles or loose joints in the traps.
- Water Heaters: Make a visual inspection of the water heater. Look for dripping water and rust stains. Look at the exhaust flue to ensure it is still sealed. If its time to drain the tank or replace the anode, check the link for more details.
- Lawn Sprinklers: Even though we performed this maintenance during the spring, yard work and vegetation growth can cause some additional sprinkler maintenance. Exercise the system (again). Look for excessive water traveling down the driveway or sidewalks. Inspect the sprinkler heads, look for blow-by, odd spray patterns, missing heads, pooling water and brown spots. Replace or repair the heads. Chasing Lawn Sprinkler Leaks is the first of the series and covers the inspection, leak detection, repairs and tips in more detail.
- Exterior Inspection: Walk round the house, look for bird and wasp nests, as well as locations that rodents might be using to get in the house. Use caulk to re-seal any breaches in structure that may be an entry point for rodents or bugs. They are all looking for cool locations and possible water. If you are not opposed to using perimeter bug spray, this is a good time.
- Interior Inspection: Flush kitchen and bathroom sinks with scalding hot water for approximately 3-5 minutes to clear out any build up. “Water Leaks”, cover this item too.
- Appliances: Use a hand-held vacuum cleaner to clear the dust bunnies from around all appliances such as washers, dryers and dish washers. Pull you refrigerator out from the wall and do the same. If it’s within your skill set, turn off the unit, pull the back cover off, and vacuum out the condenser coils and all the dirt around the fan.
- Surface Water Drainage: Gutters, culverts, waterways and landscape drainage systems should be cleared of debris and overgrowth that has occurred.
- Electrical Service: Inspect the Entrance, Mast and Weather-head. With tree limbs heavy with leaves, seed pods, fruits and nuts, you may have some limbs that are drooping on your electrical service lines.
- Electrical Service-Smoke Detectors: Clean your smoke detectors of cob webs and change the battery.
- Test your security system: Work with monitoring service to validate all the door, window, glass break, and motion sensors operate properly.
If you are needing some additional information on one of the topics that I have not written about, let me know and I will put it higher on the list of articles to write. Email to HomeownerBOB@gmail.com
Leave a Comment » | Seasonal Reminder | Permalink
Posted by homeownerbob
April 11, 2014
 After starting the series on disconnecting from cable TV “Cutting the Cord” , I realized it was a never-ending story. There are so many branches to the story, I decided to just consider it another category and write about it anytime I felt like it.. Granted, this is a little outside of the “prime objective” (Protecting Your Home Through Preventative Maintenance), but what the heck… its my site and I get lots of hits on Internet TV Options :).
The HDMI connector on the rear of your TV is currently the best way to get the highest quality reception from the source (DVD, DVR, Cable Box) to the TV screen. The quality of reception is no better than the cable that carries it. Typically TV’s have 2 maybe 3 HDMI connections. Optimally, for peak performance having a cable from each device to the TV will provide the best performance. However, for many people (me) it might not be practical, especially if your equipment is located in another room (like me). For this reason the best solution may be one good cable and a HDMI splitter (aka switch). By adding this device near your equipment you can connect all the source equipment using short cables, then you only require one cable between the TV and the HDMI splitter.
 How do I choose a HDMI splitter? You can spend as little as 10 bucks to as much as several hundred. I looked throughout the available devices and found the Monoprice products to be moderately priced and include the necessary features. Whether you go with Monoprice or not, here are the important features to include within your selection process.
- Number of ports: Select a device with at least one maybe two or more ports than you need. For only a couple of bucks extra, you can accommodate a future game console or DVR. I would suggest a splitter with at least 4 ports.
- LED indicators: A power-on lamp as well as a source indicator
- IR Remote: If you equipment is located in another room, remotely switching from one source to another will be important. Granted, you now have ANOTHER remote to keep up with. Make sure and read my recent article on remotes.
- HDMI Compliance: Make sure the device you purchase meets the current HDMI standards known as “HDMI 1.3a”. This is an industry standard rating that defines a level of performance. The features associated with HDMI 1.3 or better will provide higher speed and deeper color. It will also support 1080P. If a 3D TV is in your future, change that to HDMI 1.4.
- Supports 1080P: This will ensure, the device will not limit the broadcast ability of the source equipment. Devices compliant with HDMI 1.0 or better will cover this item.
 What do I pick for an HDMI cable? There are lots of choices. It can be very easy to get caught up in the hype of all the flim flam marketing mumbo jumbo.. Most retailers jack the prices of most interconnect cables to recoup the lousy margin they had to take of the DVR they just sold you. (See PM cable comparison) So if you can wait a couple of days, just buy it over the internet.. You will save BOO KOOS of money, especially if you have to buy a long one (like me). Many times, too much information just helps in making the decision difficult. (Some times when I try to explain some techy things to my wife, she reminds me that she really just wants to know what time it is, and not how to know how to build a watch.) The basics are important: Larger wire size for longer distances. The smaller the number = bigger wire size. Here is the simple rules.
- The lower the number, the larger the wire size (20 gauge (ga.) wire is larger than 26 ga.)
- Use the shortest cable length between the connection points, don’t buy extra long ones and just coil them up.
- Cable lengths of 15 feet or less = 24 ga
- Cable lengths of 20 feet or less = 22 ga
- Cable lengths of 45 feet or less = 22 ga (cable lengths over 45 feet will require an amplifier to provide you a quality signal).
- Meets HDMI Standards 1.4
- If you plan to run the cables through the walls, technically they should meet UL Class 2 to meet the fire rating.
 As for a cable source, I have used both Monoprice and Cablestogo with positive results. If you need a booster for lengths over 45 feet, look at Monoprice as well.
Good luck, BOB
Leave a Comment » | Cut the Cord, Techy Things | Tagged: cable TV, CATV, fios, Internet TV, internet tv options, Uverse | Permalink
Posted by homeownerbob
January 9, 2014
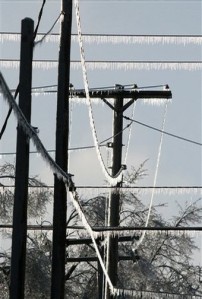 Winter got here with an attitude for 2014, aka Polar Vortex (for what ever that means). Many of us are seeing record low temperatures and for those of us that have been living with mild winters, you should realize you will see some changes you may not have seen for quite some times. Furthermore, the longer it stays below zero, the more impact it can make.
- Plant material that has previously lived through the winters may die, so hopefully you have already covered them up.
- Outdoor faucets may freeze up. Either cover them up with some form of insulation material or turn the faucet off below ground
- Its also a good time to look at the trees that may be near the electrical service drop. Look for limbs that have drooped too close to the service wire. This is not the time to trim them safelty, but you should take not and trim them in early spring. If they are putting excessive stress on the service line you should call a professional.
- Also look at my article on extended vacations.
If that wasn’t enough for you, here are the regular winter items to look at. Take care and stay warm.
Heating/Cooling-Air Filters: Assuming you have a forced air system, change the filters as we enter the heavy heating season.
- Roofing-Looking For Leaks: Winter rain and snow can cause the most marginal leak to show up, If you can still get on your roof, give it a look.
- Attic Inspection: Making a general inspection of your attic is important. Look for rodent tracks, damaged electrical wires and importantly vents and stacks.
- HVAC Indoor Unit: Besides the air filter, look at the general condition of the unit. If the unit uses natural gas look for a good strong flame. If you smell natural gas anywhere, address it immediately.
- Set Back Type Thermostat: If the battery is a year old, replace it.
- Winterize Plumbing: Wrap exposed pipes, fixtures and drain down the automatic sprinkler system.
- Surface Water Drainage: Culverts, waterways, landscape drainage systems should be cleared of debris and overgrowth that may have occurred.
- Caulking and Sealing Windows and Doors: Look at the edges where the windows and doors connect to the house. Ensure the caulk is in good shape and add caulk as necessary, indoors. (leave the outdoor caulking till Spring).
- Tile Grout and Caulk: Take a look in your bathrooms for separation in the tile grout and around the tub and shower. Winter heat will cause those materials to shrink. This is a great time to reapply caulk or grout in those areas.
- Gutters and Downspout: Clean you gutters of leaves and debris. Flush them with water to ensure they flow freely. This is as much a fall issue for the colder climates, but in the warmer states we are still seeing leaves fall. Look for a new article on this one next year. As you may know, I hate gutters, but I found a new product that may reduce my dislike. I will order some of the product and install them on another house that has lots of tree to see if they work.
- Exterior Inspection: Walk around the house, look for those wasp/bird nest and remove them with a broom. At this time of year you will have little resistance from them.
- Electrical Service-Smoke Detectors: Clean your smoke detectors of cob webs and change the battery.
- Seasonal Power Outages: Winter storms can leave many without electricity and other essential services. Review these items for safety sake.
If you are needing some additional information on one of the topics that I have not written about, let me know and I will put it higher on the list of articles to write. Email to HomeownerBOB@gmail.com
Leave a Comment » | Home Improvement, Home Inspection, Plumbing, Seasonal Reminder | Tagged: Home Inspection, home maintenance, home repair, Plumbing | Permalink
Posted by homeownerbob
July 31, 2013
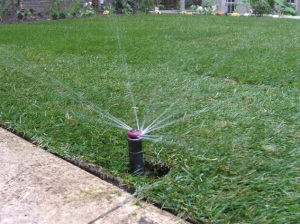 My wife complained the water bill had gone to the moon (again) last month. Even HomeownerBOB has sprinkler leaks!! In this post I hope to show another way to identifiy water leaks in automatic lawn sprinklers. After doing the basics, it was obvious, it would take a little more effort.
At this point, I still had no idea where the leak was other than I was confident it was past the valve as the meter was not moving otherwise.
Most sections should use near the same amount of water except where it might be a very small section or (in my case) I have 3 sections using emitter tube for drip irrigation, but even in this case there should be some relative similarities.
- Access the water meter for the property, clean the meter face or get to where you can watch the meter move.
- Make sure all other water devices are turned off or wont come on during this test
- If you have a controller that has a test sequence, set it to 1 minute. If not, have some one manually operate it at one minute per section.
- Have a friend turn it on while you are positioned to watch the meter
- Once it starts, watch the meter (this is not real scientific, but you are looking for a difference in the trend.
- You should beable to recognize when the watering changes from one zone to the next as the water meter will stop (very briefly) then start again.
- In most cases the meter will briefly run very fast, then (noticeably) slow down.
- Compare the speed and gallons used by each section. (your comparison should be like for like, in other words, pop-up sections to pop-up sections and so on.
- If you find a section that does not trend the same way (i.e. does not slow down after the initial turn up), it is likely that this is your problem zone. In my case, I had two that looked funny.
- Stop the test and run just the sections that appeared perculiar. Walk the entire section, head by head to find larger quantities of water.
 In my case, the problem was in the emitter section. It is not unusual to spring a leak in these sections either due to driving a shovel (my wife) through one, or one of the ends coming open. It ended up being neither, but was caused by an inline filter I installed (below ground under this cover) to keep the emitters clean. This has happened to me before on a different section as I used these fancy filters that self clean them selves, unfortuntly they tend to stick open, and they have to be replaced. I replaced them with a non-self cleaning type. I have one more that could go bad, so its only a mater of time.
Make sure and click on the Lawn Sprinkler tab to see all my articles on lawn sprinklers.
1 Comment | Lawn Sprinklers, Seasonal Reminder | Tagged: Lawn sprinkler facts, lawn sprinkler leaks, lawn sprinkler tune up, lawn sprinkler valve | Permalink
Posted by homeownerbob
July 13, 2013
 Summer is Here!!! You can plan on one thing here in Texas, the weather is always changing. While both the East and West Coasts have been having bad weather, its been quite pleasant here. Being nearly half way through July, we have only seen about 3-4 days over 100. It’s been GREAT!!. This seasonal reminder is more about making sure everything continues to work well through the stress and strain of the summer months more than anything. If you live near me, getting these things done before 10 AM in the morning is the best time of the day, otherwise you may wait till after 6 PM or so (stay hydrated; regardless). If you need details on what to look for or what to do, click on the link (if there is one) and it will take you to the post that was written on the subject and provide more detail.
- Heating/Cooling-Air Filters: If you live in a dusty area and/or have been using your air conditioner a lot, inspect you filter and change it if it has noticeable build up from your spring change out.
- HVAC Outdoor Unit: We did this in the spring and it’s good to do it again as vegetation has been growing through the spring months. Get your garden trimmers out and trim away any vines or growth away from the outside condenser. You should have 18″ to 2 feet of clearance around the unit. Airborne particles generated by the blooming of trees and flowers can easily show up around the air conditioning condenser. Take your water hose and wash down the outside coils. Check the condensation drain that comes from the air handler in the house. Ensure that it is clear of obstacles or debris by pouring water through it.
- Water Leaks: Check all water fixtures and toilets for leaks. Inspect fixture drains for water puddles or loose joints in the traps.
- Water Heaters: Make a visual inspection of the water heater. Look for dripping water and rust stains. Look at the exhaust flue to ensure it is still sealed. If its time to drain the tank or replace the anode, check the link for more details.
- Lawn Sprinklers: Even though we performed this maintenance during the spring, yard work and vegetation growth can cause some additional sprinkler maintenance. Exercise the system (again). Look for excessive water traveling down the driveway or sidewalks. Inspect the sprinkler heads, look for blow-by, odd spray patterns, missing heads, pooling water and brown spots. Replace or repair the heads. Chasing Lawn Sprinkler Leaks is the first of the series and covers the inspection, leak detection, repairs and tips in more detail.
- Exterior Inspection: Walk round the house, look for bird and wasp nests, as well as locations that rodents might be using to get in the house. Use caulk to re-seal any breaches in structure that may be an entry point for rodents or bugs. They are all looking for cool locations and possible water. If you are not opposed to using perimeter bug spray, this is a good time.
- Interior Inspection: Flush kitchen and bathroom sinks with scalding hot water for approximately 3-5 minutes to clear out any build up. “Water Leaks”, cover this item too.
- Appliances: Use a hand-held vacuum cleaner to clear the dust bunnies from around all appliances such as washers, dryers and dish washers. Pull you refrigerator out from the wall and do the same. If it’s within your skill set, turn off the unit, pull the back cover off, and vacuum out the condenser coils and all the dirt around the fan.
- Surface Water Drainage: Gutters, culverts, waterways and landscape drainage systems should be cleared of debris and overgrowth that has occurred.
- Electrical Service: Inspect the Entrance, Mast and Weather-head. With tree limbs heavy with leaves, seed pods, fruits and nuts, you may have some limbs that are drooping on your electrical service lines.
- Electrical Service-Smoke Detectors: Clean your smoke detectors of cob webs and change the battery.
- Test your security system: Work with monitoring service to validate all the door, window, glass break, and motion sensors operate properly.
If you are needing some additional information on one of the topics that I have not written about, let me know and I will put it higher on the list of articles to write. Email to HomeownerBOB@gmail.com
Leave a Comment » | Seasonal Reminder | Tagged: home improvement, Home Inspection, home maintenance, home repairs | Permalink
Posted by homeownerbob
April 10, 2013
 So far Spring is coming in on its own terms… Still seeing some weird weather along the way. Take a day and repair the items that have deteriorated over the last few months and perform a little preventative maintenance around the house. This seasonal reminder provides a list of items you need to review before the summer months set in. If you need details on what to look for or what to do, click on the link (if there is one) and it will take you to the post that was written on the subject and provide more detail.
- Heating/Cooling-Air Filters: Assuming you have a forced air system, change the filter prior to the heavy air conditioning months.
- Roofing-Looking For Leaks: Spring rains are approaching so inspect your roof for leaks, trim away any tree limbs and clean debris off the roof. Look for raised nails and any breaches in the roof surface.
- HVAC Outdoor Unit: Get your garden trimmers out and trim away any vines or growth away from the outside condenser. You should have 18″ to 2 feet clearance around the unit. Also take your water hose and wash down the outside coils that may have accumulated dirt. Check the condensation drain that comes from the air handler in the house. Ensure that it is clear of obstacles or debris by pouring water through it.
- Water Leaks: Check all water fixtures and toilets for leaks. Inspect fixture drains for water puddles or loose joints in the traps.
- Lawn Sprinklers: Exercise the system. Look for excessive water traveling down the driveway or sidewalks. Inspect the sprinkler heads, look for blow-by and odd spray patterns. Replace or repair the heads. If you need more help on this item, click the “lawn sprinklers” tab to see multiple subjects on locating lost heads, valves as well as tune-up recommendations.
- Exterior Inspection: Walk around the house, look for rotted wood, peeling paint and other exposed surfaces. Use caulk to re-seal cracks and touch up paint to reseal the surfaces. Replace rotten wood as necessary.
- Interior Inspection: Winter dry-out will have caused some surface cracks around doorways and windows. Also re-caulk/grout any cracks that may have surfaced in the bathroom and kitchen, especially around the tub and shower. These two areas experience the most use and require the most maintenance. Replace or clean water filters, faucet strainers and vent-a-hood filters in the kitchen. Flush kitchen and bathroom sinks with scalding hot water for approximately 3-5 minutes.
- Water Heaters: Tank type water heaters should have their pressure release valve tested (opened and closed). This will also validate the drain pipe is clear and open.
- Gutters and Downspouts: Clean you gutters of leaves and debris. Flush them with water to ensure they flow freely.
- Surface Water Drainage: Culverts, waterways, landscape drainage systems should be cleared of debris and overgrowth that may have occurred.
- Windows and doors: Look at the edges where the windows and doors connect to the house. Ensure the caulk is in good shape and add caulk as necessary, indoors and outdoors.
- Electrical Service: Inspect the Entrance, Mast and Weather-head. Look for any damage that may have occurred over the winter. Look for tree limbs that may be contacting the entrance cable.
- Electrical Service-Smoke Detectors: Clean your smoke detectors of cob webs and change the battery.
- Test your security system: Work with monitoring service to validate all the door, window, glass break, and motion sensors operate properly.
- Test Smoke Detectors: It’s a good time to clean off the cob webs and change the battery.
If you are needing some additional information on one of the topics that I have not written about, let me know and I will put it higher on the list of articles to write. Email to HomeownerBOB@gmail.com
Leave a Comment » | Seasonal Reminder | Permalink
Posted by homeownerbob
January 21, 2013
 Home Security Alarm Systems are probably one of the most overlooked household safety items. We all assume they will work properly when needed. If you are a follower of this blog, you have figured out that I like to fix it before it breaks and know how to use it when needed. I read most manuals , and try to troubleshoot something before calling a repairman.( I am really not that boring, but fairly predictable) With all that said, many of us spend $100 to $500 a year to have our house monitored, but beyond about 3-5 false alarms a year, we rarely use much of the service provided.
This post will cover the basics of how to inspect your system. Even though you can call out a technician (for a fee) you can do most of analysis yourself. Typically the monitoring service will work with you over the phone as you cycle the system. Since every system is a little different, you need to refer to your owners manuals to validate the exact process or method. My attempt here will be to generically walk you through the various stages and elements of the system.
Pre Inspection Check list
- Registration: Many municipalities require residential security systems be registered with the local police department. Typically, the fee is around $25. per year. Yes, it is an additional method of revenue generation for your local city, however if you fail to register the system they will (excessively) fine you for false alarms, as well as discontinue any dispatches. Ensure your registration is paid and up to date. Some municipalities will just refuse to dispatch without an up to date registration
- Documentation: Locate any/all alarm programming manuals. You might pre-read them prior to calling the alarm monitor center.
- Phone Connection: Assuming the installed system is monitored by an alarm center, there should be either a phone line connected or a Cell phone transmitter. If you don’t have your system monitored, you can still perform most of the tests. The assumed response upon activation will be an audible alarm.
- Phone Dialer: Some DIY systems have an outbound phone dialer. It can be set up to call a cell phone, pager, friend, but the police will not accept these calls direct. Typically this includes a recorded message to the intended receiving party. This is a cheap way to have a monitored system without paying the monthly fee.
- Alarm Monitor Center: Contact your alarm center to make sure all your contact information is current. This would include your primary and secondary contact numbers. As added insurance, ask the Center what number they would call from to contact you in case of an alarm condition. (it may not be the main number). Program this number in your cell phone as “HOME ALARM“, so when you get the call, you will answer it. With all that said, be ready to answer any password protection codes to further the dialog.
Security System Testing: Since there are dozens of alarm system types, they are all a little bit different. This method is generic and you may have to make a few changes or additions for your specific brand. Some tests can be performed without actually creating a real alarm. Most of the tests can be performed without monitor center but they need to be aware of the tests you are preparing to perform. Before you get started, call them and ask them if they can work with you over the phone to test the features of the system. This will get you through most of them. If you are testing anything that will provide an active alarm. Tell them you will be testing within a certain time frame (such as 10A to 10:30A). They can record the condition but not dispatch. When you are finished you can call them to confirm they saw all the conditions.
 Key Pad Alarm: Most key pads include buttons labeled for Fire, Police or just Instant. Work with your alarm center for testing these conditions. Read the documentation on this devices as it will allow you to adjust settings or configurations.
- Phone Dialers: Mentioned above, if you have one of these, make sure the call list is up to date and the phone line is still connected. As you test your system, any alarm activation that would be recognized by the alarm control center would be seen by your call list. If you have a monitored system you will probably not have an independent phone dialer, so skip this step.
 Door/Window Sensors: If the alarm sensor was installed after the house was built, the sensors will look like this. Assuming you have these type sensors, opening and closing the door or window should be recognized by the local touch pad. There may even be a pre-alarm (beep beep) or a code showing up on the key pad. Every system is a little different, but if you get this kind of pre-alarm, you should be able to open all windows and doors equipped with this type sensor. Open and close each and every location that includes a sensor to ensure the panel recognizes the condition. For instance, if every window in your house is monitored, when you have an open door/window, the alarm panel should display or beep, due to the change in the condition. A number code/red lamp or beep should occur of each window and door being monitored . Regardless of the system and type of display; you should have a clear or green condition with all the door/windows closed and a red/alert condition if the door/window is open. Be aware, you may not have sensors on every door and window. If that troubles you, adding a sensor is not that difficult and can be a DIY option or performed by the monitoring company.
 Glass Break Sensors: As pictured these can be very generic looking, and they may look as much like a smoke detector, but their locations will be more room related than smoke detectors, they will also be a little smaller. These can be tested, but a sensor tester is required. Granted the cost of the tester is about the same as calling the technician to come out. So you make the choice. Typically this condition is set up to send an immediate alarm so, you need to contact the Alarm Center prior to testing. Each sensor should identify on the key pad as well as to the Alarm Center. It is good to know what the identification codes are as it will help you understand the failure location.
 Smoke Alarms: Depending on the installation, the smoke detector may or may not be connected to the alarm system. If they are connected to your alarm panel, they are probably connected to each other as well. Once you activate one, it should cause the others to beep. Your documentation or Alarm Center can verify this. Independent detectors will have a test button on the surface, where integrated detectors may not. If it doesnt have a test button, it requires “smoke in a can“. This provides the necessary element to activate the detector. DO NOT us anything like a candle or burnt paper to perform this test. The can of smoke is about $15 and can be used more than once.
 Motion Detection: These can be a bit more tricky to test. Try to find the manufacturers documentation to help understand a specific test plan. Typically they will be mounted on a wall or hung from the ceiling. By nature, they work best when you pass in front of it, not walking toward it. When it was installed, that should have been a big consideration as to its location. Many of them have activation sensor on them (red light that blinks) when it picks up on movement. However, to fully test it, you should arm the alarm and walk in front of it to be activated. Like the smoke alarm this will trigger an instant alarm condition, so work with the monitoring center to test this unit.
 - Audible Alarm: You probably have already heard this by now, however, its important to ensure that the audible alarm comes on conditionally related to the alarm. So, it should be active on any door, window, smoke, or motion detection.
- Non-Audible Alarm: Most alarm systems have a “Silent Activation” feature. Assuming you were involved in the initial installation, you should be aware how this work. Typically its associated with your entry code, but either the Alarm technician or Monitoring Center can walk you through this step.
Hopefully after finishing this exercise you will have a better understanding of the system and feel confident in its performance.
Leave a Comment » | Security | Tagged: alarm system, burglar alarm system, Home Inspection | Permalink
Posted by homeownerbob
December 29, 2012
 Many of us wondered if winter was going to get here at all. Here in Texas, we have had record winter highs, but it looks like it might start getting cold (regularly). The Winter list is fairly short. Mostly indoor stuff, stay warm and safe.
- Heating/Cooling-Air Filters: Assuming you have a forced air system, change the filters as we enter the heavy heating season.
- Roofing-Looking For Leaks: Winter rain and snow can cause the most marginal leak to show up, If you can still get on your roof, give it a look.
- Attic Inspection: I mentioned this item in December. Making a general inspection of your attic is important. Look for rodent tracks, damaged electrical wires and importantly vents and stacks.
- HVAC Indoor Unit: Besides the air filter, look at the general condition of the unit. If the unit uses natural gas look for a good strong flame. If you smell natural gas anywhere, address it immediately.
- Set Back Type Thermostat: If the battery is a year old, replace it.
- Winterize Plumbing: Wrap exposed pipes, fixtures and drain down the automatic sprinkler system.
- Surface Water Drainage: Culverts, waterways, landscape drainage systems should be cleared of debris and overgrowth that may have occurred.
- Caulking and Sealing Windows and Doors: Look at the edges where the windows and doors connect to the house. Ensure the caulk is in good shape and add caulk as necessary, indoors. (leave the outdoor caulking till Spring).
- Tile Grout and Caulk: Take a look in your bathrooms for separation in the tile grout and around the tub and shower. Winter heat will cause those materials to shrink. This is a great time to reapply caulk or grout in those areas.
- Gutters and Downspout: Clean you gutters of leaves and debris. Flush them with water to ensure they flow freely. This is as much a fall issue for the colder climates, but in the warmer states we are still seeing leaves fall. Look for a new article on this one next year. As you may know, I hate gutters, but I found a new product that may reduce my dislike. I will order some of the product and install them on another house that has lots of tree to see if they work.
- Exterior Inspection: Walk around the house, look for those wasp/bird nest and remove them with a broom. At this time of year you will have little resistance from them.
- Electrical Service-Smoke Detectors: Clean your smoke detectors of cob webs and change the battery.
- Seasonal Power Outages: Winter storms can leave many without electricity and other essential services. Review these items for safety sake.
If you are needing some additional information on one of the topics that I have not written about, let me know and I will put it higher on the list of articles to write. Email to HomeownerBOB@gmail.com
Leave a Comment » | Seasonal Reminder | Tagged: home maintenance, home repair, inspect, inspection | Permalink
Posted by homeownerbob
September 24, 2012
The Fall Season has been here for a week. We are still regularly in the high 80’s. But no complaints. It was a mild summer with only a handful of days over 100. We did get to see some rain compared to the Midwest. f you are in the northern climates this is your opportunity to “batten down the hatches” by tightening up the house. Re-caulking, sealing, and roof inspections are in order. Checking door and window seals are also in order. For the rest of us, the lower temperatures are a relief, summer is mostly over and we can attack those projects we wouldn’t touch during the summer.
- Heating/Cooling-Air Filters:If you live in a dusty area and/or have been using your air conditioner a lot, inspect you filter and change it if it has noticeable build up from your spring change out.
- Exterior Inspection: Walk round the house, look for bird and wasp nests, as well as locations that rodents might be using to get in the house. Remove the nests and use caulk to re-seal any breaches in structure that may be an entry point for rodents or bugs. Dont forget to look at you electrical service entry as spring and summer growth, additional tree trimming may be required.
- Roofing-Looking For Leaks: Winters are a bad time to look for roof leaks so inspect your roof for leaks, trim away any tree limbs and clean debris off the roof. Look for raised nails and any breaches in the roof surface and all the exposed vents.
- Sealing the Leaks: Summertime weather can cause the home exterior to dry out. Look for cracks and voids in building materials. Seal them with a good latex caulk. Larger voids should be filled (first) with a foam spray caulk, then to make it dressed for paint, use the latex caulk to finish it off and paint as necessary.
- Interior Inspection: Flush kitchen and bathroom sinks with scalding hot water for approximately 3-5 minutes to clear out any build up.
- Surface Water Drainage: Culverts, waterways and landscape drainage systems should be cleared of debris and overgrowth that has occurred.
- Electrical Service-Smoke Detectors: Clean your smoke detectors of cob webs and check the condition of the battery.
- Chimney Flue Inspections and Cleaning: For our northern friends this is the time to ensure your stoves and fireplaces are prepared for the winter use. Inspect the stove seals, clean the chimneys and flues.
- Drain and cut-off sprinklers: If you are in the northern climates, its time to turn off these services to protect them through the winter. In the south, southwest and western part of the US, we can wait a few more months. For more details see Winterizing Plumbing.
- Smoke Detectors: As we enter the heating season, it’s a good time to clean the cob webs and change the battery.
- Lawn Sprinkler Adjustment: Whether you have to shut down your sprinkler or just reduce your watering schedule, now is the time.
- Power Outages: For some of us, this time of year can bring extended power outages, check out this post to make sure you are prepared
1 Comment | Home Inspection, Seasonal Reminder | Tagged: Home Inspection, home maintenance, home repair | Permalink
Posted by homeownerbob
June 6, 2012
 As mentioned in my last post on watering your foundation; Here in North Texas it is essential. Since this is not a one time event but a regular requirement, you might as well look at a relative permanent approach to the solution. I identified two ways to do this last time, one is fairly quick, where the second one is a bit more involved. This is the quick one.
Soaker Hose Solution: This is a fairly simple homeowner task but there are some limitations and issues that have to be addressed before you start.
- Length Limitation: No one single hose shall be more than 100 ft from the source. In other words, if it is 200 feet to circle you house from one outdoor faucet, you will need to either create two systems or split the line from the faucet with one line going clockwise halfway around the house and the other line going the other way.
- Pressure Regulators: Especially with a porous type soaker hose, high pressure will cause un-equal watering, meaning it will be real wet close to the source and fairly dry at the end of the run. A 10PSI regulator is recommend. Worse case, no more than 30PSI.
- Elevation: Because there is no way to regulate how much comes out of the pores, placing a hoses down (or up) a slope will cause the hose to over water on the low side. (No more than a 2in rise over 100ft) If this is an issue try cris crossing horizontally to get up the hill.
- Backflow: Technically required to protect your water system; the backflow preventer, keeps water from seeping back into the pressurized water system.
- No Kinks: Simply said, do not allow the hose to kink as this will disrupt the flow of water to the system.
 Building a Soaker Hose System: So now with the limitations understood, you should be able to construct a system without too much of an issue. Here are the major elements of the system. This bill of material is based on a one hose system originating from an exterior water faucet. NOTE: Most of the provided links are from Dripworks.com and MrSoakerhose.com. I have never used them, but their materials appear to be high quality, they have been in business for 20/30 years and they will give you a price cut when buying volume. If you have a bad experience with them, let me know and I will pull the references.
- Hose Splitter: (not pictured) Since you will probably still want to use the faucet for regular landscape watering, you will need to split water into two sources using a hose splitter. Spend the money and get a good brass unit with individual cutoffs. This will take a lot of abuse as you will keep the water turned on at this point, most all the time. If you are building a multi-hose system, you will need a splitter with more than two outlets. Look at Dripworks at their selection. Avoid the plastic modes as they will only last a season or two. NOTE: if you need to run multiple soaker hoses, you will need a splitter after the regulator as well.
- Backflow Device: As mentioned above, these are technically required to keep contaminated water from traveling into the household water system.
- Timer: A battery operated single timer should meet most of your needs. You will have to monitor the water output initially to make sure you are getting good saturation. If you find pooling water, cut back the water usage. I would start with an hour a day two to three days a week. The water usage should be about 145 gallons per hour for 100 ft of soaker hose at. Using my current water usage rate of .00020 cents per gallon that’s about 3 cents a day.
- Pressure Regulator: As mentioned above, this is required to promote equal water flow.
- Filter: (optional) on a system using the porous style of water hose, filtering the water for small particulate is fairly insignificant as you dont have limited holes to release the water.
- Garden Hose or Polypipe: Depending on where your water source is, you may need a section of water hose to get you to the foundation. Use the shortest length available or make up your own length. If you need to build one, go the polypipe route. You can cut the hose to length and use the polypipe fittings to make up the ends. Make sure the polypipe and fittings are the same dimensions. Since all these connections are on the low pressure side of the system, these fittings are just simple resistance (chinese finger) snap in connectors.
- Soaker Hoses: Since this is a simple single run you may choose to just buy prebuilt hoses ($30 for 100ft). If you want to build you own, ($9 for 100ft, plus two fittings)
So here is what it looks like in dollars. Admittedly, you can probably do this a little cheaper, but I used high quality components, so this should last for years to come. Additionally, you could upgrade to a solar based timer so you wouldn’t have to worry about changing the battery in the timer as often.

Next time we will look at the HomeowerBOB foundation watering solution that builds the system off your existing lawns sprinkler system. (See Watering Your Foundation Part III) This is the “Tim the Tool Man Taylor” version and may be a bit extensive, but I have had little to no problems since installation. We will use the existing sprinkler timer, add a new solenoid valve and a different style of distribution hose for more equal disbursement of water.
2 Comments | Foundations | Tagged: home improvement, home repair, soaker hoses, watering foundation, watering your foundation | Permalink
Posted by homeownerbob
April 7, 2012
Hopefully you read my articles on landscape drainage. In that article, I covered the fundamental components of any good drainage system. Gutters and downspout are the part of any good foundation drainage. If properly inpspected and maintained, gutters and downspout will properly catch water and move it away from the house foundation. If they are not properly taken care of, they can cause more damage than not having them at all.
Okay, here is my secret. No, I don’t have gutters, nor do I want to put them on my house cause they are ugly. So, now that we all know that, I can continue the article. Lets look at all the good and bad reasons to have gutters.
Gutter Goods:
- Gutters remove water from the house and keep from damaging the ground below the roof line.
- Excessive water around the foundation can also damage the siding and wood structure of the house
- The constant change in moisture content can cause constant movement. This can make pier and beams move around causing the house to shift.
- Gutters reduce the chances of allowing excessive water under the foundation. If you have a basement or crawl space; this excessive water can cause foundation, mold and eventual termite issues as they love moist soil.
- With some modification, you can contain the water from the roof in rain barrels for landscape watering.
Gutter Bads:
- Gutters are ugly.
- They can easily clog if not maintained
- If the gutter downspout drain into an underground french drain, they can also clog the underground drains
- Gutters are high maintenance if not shielded from leaves and debris
- Without shielding, gutters must be cleaned throughly twice a year
- Gutters are ugly; or did I already say that
Inspection of Gutters and Drains: Assuming you have gutters, lets look at the inspection points and thing to consider important.
- Gutters should naturally drain based on a designed fall toward the downspout. The gutter should fall 1/4 of an inch for every 10 feet. Assuming the gutter is clear and clean, stand on a ladder at the furthest point from the downspout. Run water through the gutter and visually watch the water move toward the downspout
- Based on the above inspection, if you find water standing, inspect the hangers in the vicinity to ensure they are installed every 2 feet, tight and secure to the house fascia board.
Roof Gutters: Ugly as they may be, they serve a purpose. During a heavy rain fall the surface area of the roof takes on a lot of water. Naturally it will run down the roof to the edge. Without gutters, this water and the lack of a proper grade can cause excessive water to pool under the house. The number one reason for gutters is to move the water away from the house. Hopefully its path takes it to the street, alley or drainage ditch. Additionally, the gutter downspout should extend away from the house at least 10′ with a fall of 6″ over the 10′ distance. This will ensure the water moves away from the structure.
 Roof Gutters combined with sub surface drain pipes: To reduce the ugliness of the roof gutter downspout, adding sub-surface drains can help. Granted, this can be expensive as these pipes must be ditched into the ground and run far enough away from the house for the water to naturally drain.
 Dry Creeks: This may be a stone or rock drainage ditch that is normally dry until the rain water needs a place to go. Creating a Dry Creek to channel the water will assist in moving the water around or away from the residential structure. Read more about how to build a dry creek.
 French Drains: Similar to sub-surface drains, but the pipes are normally perforated. These 4″ pipes pick up the water that is seeping into the ground; like the sub surface drains, these pipes must be ditched away from the house with a fall and run far enough away to allow the water to drain naturally. TIP: It is not unusual to have both sub-surface and french drains, but they should not be mixed; in other words do not combine them into just one pipe system. This item is easily a topic in its self. Read more about how to build a french drain for more details.
So, ugly as they may be, they are very important. Gutters are relatively inexpensive for what they provide. It’s not uncommon to find gutter systems in need of help as they are easily neglected. Maintain them well and they will take care of you and your house.
So you may be wondering, I dont have gutters but I must be doing something, right? You are correct, but that is another story for another post.
2 Comments | Drainage, Foundations, Home Improvement | Tagged: downspouts, gutters, home maintenance, home repair, landscape drainage, poor drainage | Permalink
Posted by homeownerbob
April 1, 2012
 Spring time is riding time but it’s also time to fix all those items that broke during the winter months. Take a day and repair the items that have deteriorated over the last few months and perform a little preventative maintenance around the house. This seasonal reminder provides a list of items you need to review before the summer months set in. If you need details on what to look for or what to do, click on the link (if there is one) and it will take you to the post that was written on the subject and provide more detail.
- Heating/Cooling-Air Filters: Assuming you have a forced air system, change the filter prior to the heavy air conditioning months.
- Roofing-Looking For Leaks: Spring rains are approaching so inspect your roof for leaks, trim away any tree limbs and clean debris off the roof. Look for raised nails and any breaches in the roof surface.
- HVAC Outdoor Unit: Get your garden trimmers out and trim away any vines or growth away from the outside condenser. You should have 18″ to 2 feet clearance around the unit. Also take your water hose and wash down the outside coils that may have accumulated dirt. Check the condensation drain that comes from the air handler in the house. Ensure that it is clear of obstacles or debris by pouring water through it.
- Water Leaks: Check all water fixtures and toilets for leaks. Inspect fixture drains for water puddles or loose joints in the traps.
- Lawn Sprinklers: Exercise the system. Look for excessive water traveling down the driveway or sidewalks. Inspect the sprinkler heads, look for blow-by and odd spray patterns. Replace or repair the heads. If you need more help on this item, click the “lawn sprinklers” tab to see multiple subjects on locating lost heads, valves as well as tune-up recommendations.
- Exterior Inspection: Walk around the house, look for rotted wood, peeling paint and other exposed surfaces. Use caulk to re-seal cracks and touch up paint to reseal the surfaces. Replace rotten wood as necessary.
- Interior Inspection: Winter dry-out will have caused some surface cracks around doorways and windows. Also re-caulk/grout any cracks that may have surfaced in the bathroom and kitchen, especially around the tub and shower. These two areas experience the most use and require the most maintenance. Replace or clean water filters, faucet strainers and vent-a-hood filters in the kitchen. Flush kitchen and bathroom sinks with scalding hot water for approximately 3-5 minutes.
- Water Heaters: Tank type water heaters should have their pressure release valve tested (opened and closed). This will also validate the drain pipe is clear and open.
- Gutters and Downspouts: Clean you gutters of leaves and debris. Flush them with water to ensure they flow freely.
- Surface Water Drainage: Culverts, waterways, landscape drainage systems should be cleared of debris and overgrowth that may have occurred.
- Windows and doors: Look at the edges where the windows and doors connect to the house. Ensure the caulk is in good shape and add caulk as necessary, indoors and outdoors.
- Electrical Service: Inspect the Entrance, Mast and Weather-head. Look for any damage that may have occurred over the winter. Look for tree limbs that may be contacting the entrance cable.
- Electrical Service-Smoke Detectors: Clean your smoke detectors of cob webs and change the battery.
- Test your security system: Work with monitoring service to validate all the door, window, glass break, and motion sensors operate properly.
- Test Smoke Detectors: Its a good time to clean off the cob webs and change the battery.
If you are needing some additional information on one of the topics that I have not written about, let me know and I will put it higher on the list of articles to write. Email to HomeownerBOB@gmail.com
Leave a Comment » | Seasonal Reminder | Tagged: home repairs, Household maintenance, spring house maintenance | Permalink
Posted by homeownerbob
March 18, 2012
 Ten percent of homes have water leaks that waste 90 gallons or more water per day. Participate in National Fix-a-Leak Week by fixing a water leak this month.
The Silent Thief
A leaky faucet that drips at the rate of one drip per second can waste more than 3,000 gallons of water per year. If you have a dripping faucet or running toilet, these need to be fixed first and will solve the obvious water leaks. If you need to call a handyman or plumber.. the time is now. If you want to give it the DIY try, visit EHow.com for a straight forward method for fixing common faucet and toilet leaks. However before you start, make sure you have already read my post on Water Supply Cut Off and City Water Cut Off.
Even though fixing water leaks is not normally what I would consider as preventative maintenance, fixing a faucet or toilet is something that is hard to miss, if you see it leaking….fix it. However, some water leaks can occur in places you would not normally view. Under the sink, behind the refrigerator, and under the house are just some of the places. These type water leaks can go unnoticed for weeks, months or even years. These leaks not only waste water but can cause structural damage to wood floors as well as foundations. If you have no leaks, this inspection is about 5 minutes. If you do, plan on a good part of the day. Good luck .
The Inspection
 This inspection method is really about finding those hidden leaks. Insure that nothing will be turned on (dishwasher, toilet, sprinklers, etc.), or activated during this test. Before performing the inspection you must gain access to the meter. This may require a meter key that can be purchased in the plumbing section of any home improvement center. Once you have the meter box open, the meter should be visible. There are at least a dozen different water meters having different dials and gauges. Look for the “Low Flow” gauge in the meter (in the meter pictured here, the low flow indicator is the little red blob to the left of the large sweep hand, between the 7 and 8 on the dial). If you are unsure which gauge it is, turn on a faucet, leave it on and look at the meter. One of the gauges in the meter will be moving faster than any other part of the dial; this is the low flow gauge. Turn off the fixture, return to the water meter and watch the low flow indicator for approximately 3-5 minutes. If the meter progressively moves forward, you have some form of leak, if not no further investigations are required. If you do have a leak, you can call a professional or try to further isolate the problem. Either way, it may take some time as some the leak may not be visible. $TIP$: Isolating the leak before calling the plumber will save you some money as the plumber will charge you by the hour whether he is looking or fixing a leak.
 Before we start the leak isolation test, turn the water off here (to make sure you can). It may seem like a simple task and why should you do it just to say you can? Because when you really need to, time is of the essence, and you don’t have time to search for the right tool. This cut-off (on the street side of the meter head may be hard to get to, so find the right wrench that will work for you). A crescent type wrench works best for me. The cut-off is probably a ball valve and you will only need to turn it 90 degrees from its current position.
Leak Isolation Group I (fixtures, faucets and toilets):
If you find a lot of water or condensation on the fixtures, save the test for a dry or warmer day as this condition will make it difficult to find your problem.
As mentioned in the beginning of the article, you should have already fixed any obvious dripping faucets. This isolation method is for the hard to find leaks. If the low flow meter stops after any one of the isolation steps, you have found the source of the leak.
- One at a time, turn off each fixture at the wall and return to the meter to watch the low flow gauge. This should include all faucets, toilets, ice makers, water filters, dish washer and water heater (inspect last). If the meter stops, there is a leak between the cut off and the fixture.
- If you find water dripping or puddles, take some unused toilet paper and wipe down the hose, pip, cut-off, fixture and both ends of the connection; everything under the sink. TRICK: Why use TP you ask? TP is very absorbent, very pliable and you can see any water trace in the paper. Water travels down hill so look at the joints above the first sign of water.
- With the water turned on, start your inspection from the highest joint/connection. Look at the TP after wiping down each joint/connection/pipe section/cut-off. If you find any water deposits on the TP, you may have found the leak. Leaks are usually found at joints, couplings and connections. Assuming it can be tightened, do so by hand if possible or with a wrench, or call a plumber. TIP: Most plumbing connection are made with soft plastic, copper or brass, only tighten the joint to the point of not leaking, over tightening can cause it to leak worse. Many plastic joints ca be tightened by hand. After tightening the joint, dry it completely and perform the TP test again. Perform the test at least twice. If the leak persists, replacing the rubber washer or seal at this joint may be required.
- Toilets: Toilets require the TP test as well. Since most residential toilets have a tank, you will have to verify that water is not leaking from the tank to the bowl. Remove the lid from the tank and add some colored tank bowl cleaner to the tank water (do not flush). Give it about 5 minutes, then see if any of the color has leaked in the bowl. You may have a leaky flapper valve.
- Check the water meter again. Hopefully you fixed it, but you could still have more leaks.
- Perform this series of tests as required for each water fixture in the house. This will include all faucets, toilets refrigerator mounted ice maker, dishwashers and any other water consuming or delivering device.
Just to visually understand the relation to size of hole to amount of water loss, check out this table.

Look for articles on Sprinklers Leaks and Plumbing-Chasing Leaks Part II for additional leak detection methods.
Leave a Comment » | Plumbing | Tagged: alliance for water efficiency, Conserve Water, fix a leak, fix water leak, Plumbing, watersense | Permalink
Posted by homeownerbob
March 5, 2012
If you are new to North Central Texas you may have never seen soil quite like this. Known locally as Black Gumbo, this clay soil has a Jekyll and Hyde personality. In the fall, winter and spring it can be tolerable even though it will stick to everything that it touches it. But dry summers will change its personality. It can create cracks in the ground large enough to swallow small animals. Break it up into small pieces and it become a weapon of mass destruction…. throw a clod at some one and you can easily put some ones eye out (as my mom would say). I have never met a shovel that liked it. The weapon of choice to dig in black gumbo? A Pic.
With all that said, what does that have to do with home foundations you ask? A lot; the properties of this soil allows it to shrink more than 15%. For this reason, the soil surrounding the foundation can easily pull away and leave it un supported or cause footings to permanently move. Because of these characteristics, foundation repairing is a big business in Texas.
The two most common foundations are pier and beam and post tension slab foundations. Both can be repaired but slab foundations tend to be the ones with the most dramatic problems. If foundation concerns are not addressed BEFORE they start, it can cost 10’s of thousands of dollars to repair them. To protect your foundation (regardless of the types mentioned), you must water your foundation. Even though most sprinkler systems will help, most were designed to spray water away from the house. To complicate it further, many cities are enforcing landscape watering restrictions. Probably the most important fact associated with watering foundations is to do it 12 months a year. It is very import to maintain a constant moisture content to retain soil consistency. Even if you only have minor issue (sticking doors, squeaky floors), managing the porosity of soil will even out the issues for a more stable foundation.
How to Water a Foundation: There are several methods.
- Hand Watering: I dont recommend this method, but it can work. It can be difficult to consistently apply the same amount of water around the entire foundation with a systematic approach.
- Soaker Hoses: By far the most popular, “soaker hoses”, are easily attached to water outlet and draped around the foundation of the
 house. These come in 25 and 50 foot length and can be connected in series. Try to place them within about 6 inches of the foundation. (TIP:Keep bare landscaped areas covered with a natural mulch (pine or hardwood bark, etc) This too will assist in retaining the moisture content around the structure. Covering the soaker hose with the mulch is acceptable.). You will need to inspect these regularly as I have found they deteriorate fairly quick (less than 3-5 years). Additionally, neighboring visitors (rats, mice, raccoons and such) have found a liking to chew on hoses, in turn puncturing them causing excessive water to come out in one place. Once broken, I have not seen a good way to repair them, so you will have to replace the hose.
- Drip Lines: These hoses are designed with drip emitters in the hose every 12 inches. You can deploy them in the same method as mentioned for the soaker hoses, but the hose
 material is a bit more stiff. Staking them will help as they do not like to lay flat to the ground. You can purchase the hose in bulk from the Orange Box store of Sprinkler Warehouse. You will need to also purchase inter-hose connectors as well as a way to connect to your water source.
 Regardless of the method of disbursement, doing it consistently is just as important as the watering itself.
Take a look at Watering Your Foundation to see a semi-permanent installation guide to foundation watering.
1 Comment | Drainage, Foundations | Tagged: black gumbo dirt, foundation cracks, texas drought, watering your foundation | Permalink
Posted by homeownerbob
January 15, 2012

The Winter list is fairly short. Mostly indoor stuff, stay warm and safe.
- Heating/Cooling-Air Filters: Assuming you have a forced air system, change the filters as we enter the heavy heating season.
- Roofing-Looking For Leaks: Winter rain and snow can cause the most marginal leak to show up, If you can still get on your roof, give it a look.
- Attic Inspection: I mentioned this item in December. Making a general inspection of your attic is important. Look for rodent tracks, damaged electrical wires and importantly vents and stacks.
- HVAC Indoor Unit: Besides the air filter, look at the general condition of the unit. If the unit uses natural gas look for a good strong flame. If you smell natural gas anywhere, address it immediately.
- Set Back Type Thermostat: If the battery is a year old, replace it.
- Winterize Plumbing: Wrap exposed pipes, fixtures and drain down the automatic sprinkler system.
- Surface Water Drainage: Culverts, waterways, landscape drainage systems should be cleared of debris and overgrowth that may have occurred.
- Caulking and Sealing Windows and Doors: Look at the edges where the windows and doors connect to the house. Ensure the caulk is in good shape and add caulk as necessary, indoors. (leave the outdoor caulking till Spring).
- Tile Grout and Caulk: Take a look in your bathrooms for separation in the tile grout and around the tub and shower. Winter heat will cause those materials to shrink. This is a great time to reapply caulk or grout in those areas.
- Gutters and Downspout: Clean you gutters of leaves and debris. Flush them with water to ensure they flow freely. This is as much a fall issue for the colder climates, but in the warmer states we are still seeing leaves fall.
- Exterior Inspection: Walk around the house, look for those wasp/bird nest and remove them with a broom. At this time of year you will have little resistance from them.
- Electrical Service-Smoke Detectors: Clean your smoke detectors of cob webs and change the battery.
- Seasonal Power Outages: Winter storms can leave many without electricity and other essential services. Review these items for safety sake.
If you are needing some additional information on one of the topics that I have not written about, let me know and I will put it higher on the list of articles to write. Email to HomeownerBOB@gmail.com
Leave a Comment » | Seasonal Reminder | Tagged: home maintenance, home repair, inspection | Permalink
Posted by homeownerbob
December 23, 2011
 U.S. EPA studies report unintentional carbon monoxide exposure accounts for an estimated 15,000 emergency department visits and 500 unintentional deaths in the United States each year.
Many of us only go to the attic for one reason; to get Christmas decorations. Its real easy to get the boxes and go, but there are good reasons to check things out while you are there. This picture is a combination of venting that should not occur. Hopefully you won’t find this during your inspection.
Reasons to inspect your attic:
- Recent activity: HVAC technicians, roofing activity, telephone repairman or remodeling activity are all reasons to make these inspections.
- Rat, rodent infestation.
- Once a year “at Christmas Time”!!
What to inspect in your attic: As you should know, there are several devices in your home that requires venting, including water heaters, stoves, vent-a-hoods, wall heaters, clothes dryers and bathroom vents. Catagoricly these have different function as well as outcome associated with it, if it is not functioning properly. The following 4 pictures show what good vent pipes should look like. The bad ones are all together at the end.
 Water Heaters, vent-a-hoods, wall heaters, stoves and HVAC systems: Any of these devices that use natural gas and require proper venting to exhaust the fumes from the burners (carbon monoxide) require an outlet. Typical vents consist of a tin pipe 2″-8″ in diameter connected from the top of the unit, then exits directly above through a roof vent cap. For years it was common to find these tin pipes just loosely fitted to each other on their way out. For this reason they are very easily knocked loose or disconnected. Current building codes now require the joints of these pipe to be
  secured and air tight. As seen in the first picture, the bends have been coated with HVAC mastic to complete the seal. The second picture is a water heater that was secured (screws holding the pipe together), but lacked the seal. We used standard HVAC aluminum tape to properly seal it.
- Clothes Dryers: If the dryer is electric, the only vent would be the standard dryer vent. If it uses natural gas it would have a vent similar to those in item #1. It could be vented out the roof or to an outside wall. All the pipe joints should be securely connected and sealed to be air tight. Read the link on Clothes Dryer Design for details of the
 standard dryer vent. An unsealed dryer vent can cause excessive moisture, humidity as well as an ugly mess.
- Bathroom Vents: Typically 2″-3″ tin pipe. It too can be vented through the roof or wall. Unsealed bathroom vents are similar to Dryers in that they can cause excessive moisture and humidity.
 Plumbing Vents: These will have a different appearance than other vents as they will be either PVC plastic, cast iron or heavy galvanized pipes. They are typically very rigid and will be near or above almost all plumbing drains, toilets, sinks, showers and tubs. It’s not as common to find these vents disconnected or unsealed, but possible. Unsealed plumbing vents will release unwanted sewer gas including a mixture of ammonia, methane, carbon dioxide, hydrogen sulfide and a little sulfur dioxide, all considered toxic.
- Wood Stoves and Fireplaces: Many new style non-masonry style chimneys are just huge vent pipes (6″ to 12″). These pipes are designed a bit different and if installed correctly will typically not be an issue, but should be inspected in the same manner as any fuel using device exhaust vent pipe. Masonry flues are typically double walled (or should be). If you have had foundation issues or see cracks with gaps of 1/8″or larger, there may be a reason to be concerned. A leaky chimney flue will emit CO into the attic like #1.
- Portable Heating devices: Kerosene heaters were very popular in the 1980’s, (yes, I still have one). In cases like this, you must crack open a window or door to ensure fresh air is brought into the room as the heater will easily displace the oxygen.
- Attached Garages: Idling cars with the garage door closed can be a source of CO as it can migrate through the attic into the house.
Carbon monoxide is produced by common household appliances. When not properly ventilated, carbon monoxide emitted by these appliances can build up. Red blood cells in the body pick up CO quicker than they pick up oxygen. If there is a lot of CO in the air, the body may replace oxygen in blood with CO. This blocks oxygen from getting into the body, which can damage tissues and result in death.
Inspection Method:
- Before entering the attic, (especially the first time), write a note of what vents or stacks you are looking for. It’s very easy to get disoriented once in the attic. The first time you perform this inspection, it could take 45 minutes. Take a good flashlight with you. You may also want to wear a long sleeve shirt and pants to avoid contact with attic insulation. Also wear a dust mask and safety glasses. Make sure and stay on the wood rafters or plank pathways as you may put your foot through the ceiling.
- Note that you may not find a vent stack for each and every device. Especially plumbing devices. Many times plumbers will combine these together before they enter the attic. This is an acceptable method.
- Any one of the following eight pictures is somethings you may find. Unsealed, disconnected, open-ended pipes, pulled connections and just flat-out don’t exist. You may even find a section of pipe just laying in the attic. If so, look for a buried vent stack coming out of the ceiling and an associated roof vent with nothing connected.
- The intent with any of these vents is to achieve an air tight seal. In cases where the joints are secure but open, using Aluminum Foil Tape will properly seal the joint. If the joint is disconnected, secure it with screws or expanding hose clamps, then seal with the tape.
- If the pipe does not go anywhere, you will need to build or create one. This is a mid-level DIY project, professional handyman or even plumber. If you plan to do it your self, look for data on the device being vented for recommendations or requirements for the associated venting.
- And lastly, buy a CO detector for the interior of the house. These look very simular to a smoke detector and can be installed on wall ceiling of placed on top of a piece of furniture. They can be purchased on line or at the orange box store.


2 Comments | Appliances, Attics, Chimneys, Home Inspection | Tagged: attic vents, bathroom vents, carbon monixide poisoning, clothes dryer vents, CO detection, vent a hood | Permalink
Posted by homeownerbob
October 27, 2011
 The Fall Season has been here for a month, but with baseball still in season (go Rangers) and the temperatures barely below 60, it still feels like late summer. If you are in the northern climates this is your opportunity to “batten down the hatches” by tightening up the house. Re-caulking, sealing, and roof inspections are in order. Checking door and window seals are also in order. For the rest of us, the lower temperatures are a relief, summer is mostly over and we can attack those projects we wouldn’t touch during the summer.
- Heating/Cooling-Air Filters:If you live in a dusty area and/or have been using your air conditioner a lot, inspect you filter and change it if it has noticeable build up from your spring change out.
- Exterior Inspection: Walk round the house, look for bird and wasp nests, as well as locations that rodents might be using to get in the house. Remove the nests and use caulk to re-seal any breaches in structure that may be an entry point for rodents or bugs. Dont forget to look at you electrical service entry as spring and summer growth, additional tree trimming may be required.
- Roofing-Looking For Leaks: Winters are a bad time to look for roof leaks so inspect your roof for leaks, trim away any tree limbs and clean debris off the roof. Look for raised nails and any breaches in the roof surface and all the exposed vents.
- Sealing the Leaks: Summertime weather can cause the home exterior to dry out. Look for cracks and voids in building materials. Seal them with a good latex caulk. Larger voids should be filled (first) with a foam spray caulk, then to make it dressed for paint, use the latex caulk to finish it off and paint as necessary.
- Interior Inspection: Flush kitchen and bathroom sinks with scalding hot water for approximately 3-5 minutes to clear out any build up.
- Surface Water Drainage: Culverts, waterways and landscape drainage systems should be cleared of debris and overgrowth that has occurred.
- Electrical Service-Smoke Detectors: Clean your smoke detectors of cob webs and check the condition of the battery.
- Chimney Flue Inspections and Cleaning: For our northern friends this is the time to ensure your stoves and fireplaces are prepared for the winter use. Inspect the stove seals, clean the chimneys and flues.
- Drain and cut-off sprinklers: If you are in the northern climates, its time to turn off these services to protect them through the winter. In the south, southwest and western part of the US, we can wait a few more months. For more details see Winterizing Plumbing.
- Smoke Detectors: As we enter the heating season, it’s a good time to clean the cob webs and change the battery.
- Lawn Sprinkler Adjustment: Whether you have to shut down your sprinkler or just reduce your watering schedule, now is the time.
- Power Outages: For some of us, this time of year can bring extended power outages, check out this post to make sure you are prepared
Leave a Comment » | Seasonal Reminder | Permalink
Posted by homeownerbob
August 28, 2011
 As a refresher; this is my trek to recreate a non cable, alternative TV solution to replace the $100 a month cable habit. Admittedly, I take a bit longer than your average media reviewer to make a decision or evaluate something. As I mentioned back in Part IV.I, one of the hooks with the Cable TV option is the (relatively) seamless use of cable box provided remote control and access to programing. As mentioned, the solution I have been creating is a bit more complex. To achieve a similar viewing experience, you need an antenna, an internet connection, a separate DVR, and maybe a DVD player. While building this solution, I have been collecting additional remote controls and as of this moment I am up to 7 for one TV.
 Houston We Have a Problem: Even for a techno geek, 7 remotes is over the top. Here are the devices in my solution requiring a remote:
- Cable Box, yes its still hooked up
- TV remote; used to shift from one source to another
- DVD; to pause and play those redbox rentals
- ROKU Box; Once you are in ROKU mode, you have to surf around through the selection menus
- HDMI Switch; Since all my equipment is remote from the TV, I use one HDMI cable from the A/V closet to the TV, so the switcher allows me to redirect the source from the cable box, DVR or ROKU box
- A/V receiver; I use this device when I want to use the surround sound speakers to watch movies
- CD Player; not really part of the TV solution, but a remote that is used to turn on the CD player
So needless to say, it was time to consider my options. Here are my concerns:
- My current solution is fairly complex. It may require 2 to 3 different remotes to switch between the various sources.
- If my solution is too complex or takes to many hands and remotes, its way too inconvenient. Two or three remotes might work, but 7 is way over the limit
- If my wife wont accept the procedures required to get to the various sources, she will push back.
 Universal Remotes: These all in one controllers have been around nearly as long as multiple remotes. I have to admit, being cheap, I never considered any of them good enough to justify the expense. However, it was worth some research to see where the technology currently is.
The good news is, there have been dramatic strides in this category of electronic devices and by most sources, the Logitech brand is viewed as the bench mark product by many professional equipment reviewers.
Looking at the Logitech family of remotes (at least 3 to choose from), they all function the same way but the 650 model only supports 5 devices and the 900 supports 15. In the middle is the Harmony One. The major differences with the more expensive 900 is the RF control. The Harmony One is very similar to the Model 600, but will control 15 vs. 5 remotes. Do you need the RF version? What is RF vs IR. IR (InferRed Light) devices require line-of-sight to see all the devices vs. RF (radio frequency) that can transmit through walls. So, if you have all your equipment in a cabinet or closet, the RF device will project through the wall (granted you will still require a device to convert the RF to IR to talk to all the equipment since IR is the most common communications path for residential grade AV equipment. The Harmony One appeared to be the best choice for me since I already had an IR pipe to my equipment closet and I needed to control more than 5 devices.
Here is what makes the Logitech standout:
- The tactical buttons to move around the devices (DVR, DVD, Cable Box) are pretty common. Such as; forward, back, up down, fast forward etc. So, no mater what device you are using, those common command buttons remain the same.
- Device specific command are through a touch screen that allows you to access specific buttons to further customize your request. (i.e. choose a CD track or access specific segments of a DVD). These commands are not near as regularly used as the ones mentioned above.
- Activity based commands: This is the icing on the cake. With programing, you set one button to perform multiple functions on multiple devices. For instance; to watch a DVD with my system this is what happens: TV=On, TV=Video 1, DVD=On, DVD=Play, A/V Reciever=On, A/V receiver= Video 1. That is 6 commands over 3 different components with ONE BUTTON. This is AWESOME… MY WIFE CAN DO THIS!!!!!! SHE DID THIS BEFORE I SHOWED HER HOW!!!!!!
- The downside: I got excited in the last bullet point, so as you can imagine there is a “But”. You must use your PC to program the remote. Actually I see this as a plus. I found the program fairly easy to negotiate. With installed programing, it walks you through the various components to perform the set ups… Yes, it will take the better part of a day to complete this function, but it is TOTALLY worth it. With Logitech library of remotes, the program remains updated so, if you buy a new DVD in 2 years, they will probably have the code set , so all you have to do is upload the new instructions.
I have to admit, this part of “Cutting the Cable” caught me off guard. I did not figure this into the equation. However, if you look at my original formulas (Part I) on cost and budget, we had some room to make some adjustments. The Harmony One has been out a couple of years, so the price has dropped from its original price of approximately $239 to about $165. The model 900 is fairly new, so they are still pricy ($349). Granted if your equipment is concealed you will need either the RF version remote or an IR Repeater (Channel Vision or Smarthome both have decent solution for under $100). If your equipment is in a remote closet, the RF version will keep you from having to run wires from the TV to the remote location and there is no receptor located at the TV. For me, I had already wired for IR, so it worked out better for me to use the IR.
I am approaching to final step, so stay tuned to see if we can make the final cut.
Leave a Comment » | Cut the Cord, Structured wiring, Techy Things | Tagged: CATV, cut the cable, Internet TV, internet tv options, Universal TV Remote, Uverse | Permalink
Posted by homeownerbob
August 13, 2011
Indoor Air quality is between 2 to 5 times more polluted than the outdoor air (US Environmental Protection Agency, September 1999)
I am invoking the 90/10 rule on this subject. Good basic air filtration will reduce dust and keep your HVAC equipment in good working order. For the other 10%, specialized filtering may be required to obtain hospital grade filtration, reduce allergies or conditions that have caused your house to be considered sick. If you have concerns of that level you may try some expensive HEPA type filters or consult an air quality specialist.

MERV 1-4
To help us understand filter performance, the standards body ASHRA created the 52.2 standard for rating replacement air filters. MERV or Minimum Efficiency Rating Value defines filtration performance with a 1-16 scale with 16 being the most efficient. However, “efficient” in this context is about the amount of particulate collected through the filter at the cost of reduced air flow. Using a filter with the highest rating will require more service as it may 1) clog more quickly, 2) require more regular replacements, 3) be more expensive, and 4) add undue wear to HVAC components, 5) cause your system to over work, in-turn use more electricity. So, if you do not have specialized filtering needs, finding a happy medium between efficiency and air flow is the prime objective.
MERV Rating 1-4: Typically a very thin membrane made of fiberglass strands. This filter will picks up the big stuff and will reduce particulate to your system but will not provide any real air quality value. The efficiency rating is <20%. A MERV 1-4 filter can be purchased for a around $1 each.

MERV 5-8
MERV Rating 5-8: Typically a pleated cloth type membrane is more efficient and should meet most normal needs. With an efficiency rating of >20 but <50% these pleated panel type filter will provide adequate filtration as well as keep your equipment in good shape. They are about $3 each.
MERV Rating 9-14: Used in commercial or industrial applications based on their ability to remove certain smells and oders are becoming more popular for the home market. Assuming you can find the size you are looking for it will cost you $8 or more. When you get past a MERV11 they can be more difficult to find and expensive. See the ASHRA MERV table for specific filtering requirements.
TIP: When you jump from a MERV7 to a 11, the price triples. The biggest difference is the amount of efficiency. Based on the NAHB (National Association of Home Builders) Green Building Program they recommend a MERV 9 or better. ASHRA 62.2P also recognizes proper air filter efficiency at 60% or 3 microns ( MERV 9).
When you visit your home center they will probably limit your selection to 3 or 4.
- The cheap fiberglass stran filter, MERV 1-4
- A large selection of MERV 5-7. They may even be packaged in quantity priced at about $3 each or a little less in quantity.
- A MERV 9-11. Fewer sizes but still a reasonable selection. About $7.95 each. If you are struggling with allergies, something greater than a 10 may help.
- Maybe a HEPA (MERV14-15) or another high-end disposable filter at $15 to $100. These may be recommended to you for specific algeric conditions.

Lifetime Electrostatic
Reusable or Life-time filters: Unfortunately there is not a standardized rating method for these type filters and I have failed to find enough independent data to support their use. Depending on who you listen to, an electrostatic filter could be similar to a MERV 4 on the low end and a MERV12 on the high. An electrostatic filter can cost between $60 to $300. If you are using a MERV 9 or better you may consider a reusable electrostatic type filter. You will have to be the judge as to it meeting your needs. HomeownerBOB has no recommendation here but I have read more positive comments about the BOAIR brand. If it works for you, it will pay for itself in less than 2 years and you won’t be throwing filters in the trash. The biggest advantages of electrostatic filter are 1) they can be washed out and reused, 2) their efficiency rating is in the 90% range and 3) the airflow is excellent and does not deteriorate at the same rate as a pleated filter. Once you wash it, it is completely restored. Many times electrostatic filters come with a lifetime warranty.
Hybrid pleated/electrostatic charged filters: MERV does not rate this type filter either. The manufacturers market this filter by having the attributes of both pleated and electrostatic filters, but at $17, its still a disposable filter.
Many professional will encourage you to change filters on a monthly basis and depending on where you live, that may be the right thing to do. HomeownerBOB recommends that you replace your filter some where between 2 to 4 times a year. You will need to be the judge on the conditions that may warrant more or less frequent changes.
Reasons to change/clean your filter more frequently may include:
- Continued use of heating or air conditioning throughout the year
- Living on or near a busy street, highway, airports or rail road track
- Living in a dry/arid part of the country
- Living in an area with a low percentage of annual rain and or high winds (Texas, New Mexico, California, etc)
- Living on rural property with a lot of exposed dirt
- Living on an unpaved road
As I said in the beginning of this article, these filter recommendations are based on the larger body of population that does not have health related conditions. There are many more filters, filtering systems, filtering strategy (cascading) and air exchange studies that can be used to solve air quality issues.
Recomendation:
It should be pretty obvious, unless you have special needs, or live in a very dusty enviornment, the MERV 5-7 should work fine.
Key Inspection Points and Action Items:
- Change, or clean your HVAC filter at least 2 to 4 times per year.
4 Comments | Central Heat & Air, Seasonal Reminder | Tagged: air filter, dryout, efficiency, electrostatic, home maintenance, home repair, inspect, inspection | Permalink
Posted by homeownerbob
July 30, 2011
 Proper attic insulation can make a drastic impact on your utility bills. Any home over 5 years old should have the attic insulation evaluated as settling insulation and higher summer temperatures can degrade its ability to protect your home from the summer heat.
7 reasons to be concerned about the condition of your attic insulation.
- High utility bills.
- Its been more than 5 years since the house was built.
- You have lived in the house for more than 10 years and never evaluated it.
- Some thermal insulation materials settle more than others.
- Increasing summer temperatures require more insulation.
- Recent contractor activity in the attic (i.e. telephone, CATV, Security, HVAC). These workers can matt down the insulation while performing their job.
- Rodent infiltration. These buggers will easily pack down the insulation to get to various points of interest.
Acceptable attic insulation 10 years ago is not the same as it is today. In fact, in just 3 years, my region has been increased from an acceptable value of R31 to R38.
The Inspection:
- Determine how much insulation is required. Use this Insulation Chart to determine how much is enough.
- Enter the attic with great care. Attic entrances may be through a door or attic stair case or possibly a hatch in the closet. WARNING: You must keep your feet/body on the wood joists (beams) as stepping on the sheet rock will cause damage, and possibly cause you to fall through the ceiling.
- With a flashlight and yard stick: Randomly check the depth of the material. Ensure the measuring device (yard stick) touches the sheet rock and measure to top edge of the insulation material. Try not to crush the insulation while performing the inspection.
- Determine the type of insulation. Different material have different R values.
 If you can see the ceiling joist as in this picture, you probably do not have enough insulation. Typical ceiling joists can range from 2 X4’s, 2X6’s to 2X10’s. For instances, if you have 2X6 beams with loose fill rock wool, you would have a R value of 16.5 (3.0X5.5″=16.5). Newer houses typically have larger beams. Determine the material type as this will help in figuring out how much insulation to add. Use the chart below to calculate the R value of the existing insulation. TIP: If you find you have enough insulation in areas that have not been disturbed, but you find areas matted down due to activity or construction work. Use a soft plastic rake to fluff it back up.

Common Types of Insulation in Residential Attics
 Fiberglass: Comes in batts, blankets, and loose fill, either pink, white or yellow in color. Fibrous in nature and can leave you with microscopic splinters. TIP: Before working with fiberglass insulation, spread a heavy coat of baby powder over any exposed skin, this will fill your pores briefly while working with the material.
 Rock Wool (or Mineral Wool):Loose fill used aggressively prior to 1970. Usually brown or dark gray in color.
- Cellulose:Loose fill made of recycled paper. Blue or gray in color. With close inspection you will find small pieces
 of newspapers. The product is treated with a fire-retardant solution for safety.
- Combination:This is not a type, but you may find a combination of two or all three types. Previous owners may have added insulation over the life of the house. This is not a problem, but you should determine how many inches of each type to calculate the value of the existing insulation.
By now, you should know, how much insulation you have vs. what you need. Assuming you need to add insulation, HomeownerBOB highly recommends hiring a professional for this task even though the home centers will provide you tools to perform the work. Once you determine what type of new insulation you prefer, you can easily bid shop the work over the phone. The professional will need to know 1) square footage of the house, 2) type of insulation material you would like, 3) how many inches to apply.
So how do you determine what type of insulation to use? Read my article on “The Choices“.
4 Comments | Attics, Central Heat & Air, Home Inspection, Insulation | Tagged: attic, attic insulation, cellulose insulation, fiberglass insulation, Home Inspection, home maintenance, home repair, inspect, inspection, Insulation, rockwool insulation | Permalink
Posted by homeownerbob
July 1, 2011
 Summer is Here!!! We have hit 100 almost every day for the last two weeks and it not even July 4th yet. This seasonal reminder is more about making sure everything continues to work well through the stress and strain of the summer months more than anything. If you live near me, getting these things done before 10 AM in the morning is the best time of the day, otherwise you may wait till after 6 PM or so (stay hydrated; regardless). If you need details on what to look for or what to do, click on the link (if there is one) and it will take you to the post that was written on the subject and provide more detail.
- Heating/Cooling-Air Filters: If you live in a dusty area and/or have been using your air conditioner a lot, inspect you filter and change it if it has noticeable build up from your spring change out.
- HVAC Outdoor Unit: We did this in the spring and it’s good to do it again as vegetation has been growing through the spring months. Get your garden trimmers out and trim away any vines or growth away from the outside condenser. You should have 18″ to 2 feet of clearance around the unit. Airborne particles generated by the blooming of trees and flowers can easily show up around the air conditioning condenser. Take your water hose and wash down the outside coils. Check the condensation drain that comes from the air handler in the house. Ensure that it is clear of obstacles or debris by pouring water through it.
- Water Leaks: Check all water fixtures and toilets for leaks. Inspect fixture drains for water puddles or loose joints in the traps.
- Water Heaters: Make a visual inspection of the water heater. Look for dripping water and rust stains. Look at the exhaust flue to ensure it is still sealed. If its time to drain the tank or replace the anode, check the link for more details.
- Lawn Sprinklers: Even though we performed this maintenance during the spring, yard work and vegetation growth can cause some additional sprinkler maintenance. Exercise the system (again). Look for excessive water traveling down the driveway or sidewalks. Inspect the sprinkler heads, look for blow-by, odd spray patterns, missing heads, pooling water and brown spots. Replace or repair the heads. Chasing Lawn Sprinkler Leaks is the first of the series and covers the inspection, leak detection, repairs and tips in more detail.
- Exterior Inspection: Walk round the house, look for bird and wasp nests, as well as locations that rodents might be using to get in the house. Use caulk to re-seal any breaches in structure that may be an entry point for rodents or bugs. They are all looking for cool locations and possible water. If you are not opposed to using perimeter bug spray, this is a good time.
- Interior Inspection: Flush kitchen and bathroom sinks with scalding hot water for approximately 3-5 minutes to clear out any build up. “Water Leaks”, cover this item too.
- Appliances: Use a hand-held vacuum cleaner to clear the dust bunnies from around all appliances such as washers, dryers and dish washers. Pull you refrigerator out from the wall and do the same. If it’s within your skill set, turn off the unit, pull the back cover off, and vacuum out the condenser coils and all the dirt around the fan.
- Surface Water Drainage: Gutters, culverts, waterways and landscape drainage systems should be cleared of debris and overgrowth that has occurred.
- Electrical Service: Inspect the Entrance, Mast and Weather-head. With tree limbs heavy with leaves, seed pods, fruits and nuts, you may have some limbs that are drooping on your electrical service lines.
- Electrical Service-Smoke Detectors: Clean your smoke detectors of cob webs and change the battery.
- Test your security system: Work with monitoring service to validate all the door, window, glass break, and motion sensors operate properly.
If you are needing some additional information on one of the topics that I have not written about, let me know and I will put it higher on the list of articles to write. Email to HomeownerBOB@gmail.com
Leave a Comment » | Seasonal Reminder | Tagged: diy, spring house maintenance | Permalink
Posted by homeownerbob
June 17, 2011
 Energy Phantoms or Vampires account for approximately 5% of the electrical energy used in every household, spread that across every home in the US and it adds ups up to 65 billion kilowatt-hours of wasted electricity each year.
As quoted from the Investigations of Leaky Electricity in the USA paper ….. the average US house leaks constantly about 50 Watts. This is approximately five percent of the residential electricity use in the US. Leaking electricity falls into three major categories: video, audio and communication. Video equipment such as TVs, VCRs, cable boxes and satellite earth stations account for the largest share of residential leaking electricity, approximately 35%. Audio equipment accounts for 25% of standby consumption, and communication devices (answering machines, cordless phones and fax machines) are responsible for an additional 10%.
Energy vampires can be defined as electrical devices that consume an amount of energy by doing nothing but waiting to be activated or used. This standby mode can be most recognizable in TV’s, video and audio equipment. But it really goes way beyond that.
Some of the common energy wasters in most homes are the adapters (aka: wall warts) that come with rechargeable battery-powered cordless phones, cell phones, digital cameras. You will also find them with many music players, power tools, and other electronic devices.
Conceptually, if you can just unplug all of them when not in use, this would solve much of the problem. Easier said than done. Being the techno geek that I am, there will always be a another way.
 Techno Solutions:
- Individual Timers: You can use traditional electrical timers or this new style like this Belkin unit. It is designed specifically for applications that only need to be on for a certain amount of time where the specific time of the day is not important. At $10 bucks, it might be a good solution for your clothes iron, electric tooth-brush or MP3 player.
- Group Timers: Combined with a surge protector, these devices will not only protect the equipment connected, but also shut them down to cut off the phantom load. Price wise, they are still in the same range as a regular surge protector/power strip. Additionally, many of them include a couple of priority plugs that stay energized all the time.
- X10 Technology: If you read my article on X10 Technology, you may have already figured this out. Combined with your X10 units and the software package, you can set timed events for all of these devices. Or combine one with a power strip. If its possible; try to cluster all of these type devices into groups. Plug all of them into a power strip, then plug the power strip into the X10 timer. Schedule the timer to run only a certain amount of hours per day. Probably 3-5 hours max. For devices like televisions, DVR’s and audio equipment; try to do the same thing. If you dont use X10 timers, any traditional timer will work as well. (TIP: If you have a cable box, U-Verse or satellite receiver, it would be best, not to cycle this device on and off. It is very normal for the service providers to perform late night downloads to update your software, turning them off at night may be problematic and cause you to have some service interruptions or cause you to miss some updates.)
- Energy Star Equipment: As part of the design specification, most energy star devices do a good job in reducing the phantom loads. However, because devices like televisions, microwaves and DVR’s usually have clocks in them, they will still use a little bit of energy. If you choose to shut these devices down, just understand that the device might require you to re-set the clock every time. The only way to find out, is to try it.
Managing Other Electric Devices: Here are a few tips for keeping the energy usage in check on the non-techy type equipment:
- Refrigerators: This device can use as much as 20% of your total consumed AC energy. Most new refrigerators with electronic thermostats come preprogrammed to run 0F and 40F (freezer/refrigerator). If you have an older style, use a thermometer to make the adjustment. Set the freezer between 0-3F. TIP: Energy Star rated refrigerators will make a significant impact on your energy usage.
- Clothes Dryers: Use the cold or warm cycle s as much as you can. Avoid the hot cycle.
- Dishwasher: Always run it full. Dry them cool instead of hot. Drying cool does not impact the dishwashers ability to sanitize the dishes. However, you may have to wipe them off before you store them. Doing this will reduce the dishwasher energy used by 20%.
- Water Heater Thermostats: The default setting for water heaters is 140F, 120 will work in most cases. If you live in the southern part of the US, it is easy to drop the temperature during the summer. You will never notice the difference.
- Set Back Thermostat: Even though this does not technically fit into this article, it is a pivotal element in energy reduction. Worth an article on its own!!
- Energy Star Rating: Look here first when replacing appliances. These subtle changes will make positive affect on your overall energy usage
 The Gas Gauge (Geek Overload): Believe it or not; studies show that if we are able to monitor the amount of usage of a product (while in use) it will cause us to use less. There are multiple devices on the market today; such as TED, Power Cost Monitor, and Energy Monitor that will provide instant feed back on energy usage. You will be able to see all the energy vampires at any time of the day. Some of them have software with data loging history, peak demand and the list goes on. Its pretty cool (geeky) to walk around the house and start yanking plugs and watching the meter drop. (NOTE: The devices mentioned may require installation, in some cases they only work with certain brand of meters. Read the webpages carefully before purchasing).
Google Power Meter: In their “save the world mentality” Goggle has teamed with some utilitiy and equipment providers to allow you to view your usage on line. Neat idea and its free, but has limited availability.
TOP Household Electricity Vampires (Courtesy of Lawrence Berkley Laboratory)
| Appliance |
Saturation |
Watts |
Watts / House |
| TV |
180% |
6 |
10.8 |
| Cable boxes |
50% |
20 |
10.0 |
| VCR |
80% |
10 |
8.0 |
| Compact audio |
67% |
10 |
6.7 |
| Answering machines |
60% |
5 |
3.0 |
| Alarms |
19% |
15 |
2.9 |
| Video games |
55% |
5 |
2.8 |
| Portable stereos |
65% |
3 |
2.0 |
| Rechargeable vacuum |
20% |
5 |
1.0 |
| Cordless phones |
49% |
2 |
1.0 |
| Fax |
4% |
15 |
0.6 |
| Satellite |
5% |
11 |
0.6 |
| Toothbrush |
13% |
3 |
0.4 |
| Smoke detectors |
84% |
0.4 |
0.3 |
| TOTAL |
|
|
50.0 |
So what is this in dollars and cents. For example; if you use 1000kW per month at .12 per kW, that works out to be about $6 bucks a month. (1000X.12)*.05=6. Unless you are prepared to take some drastic measures, you may be lucky to cut 50 to 60% of that number. So look for $3-5 per 1000kW used as a target.
Okay, this article might be a little anal, to gain back $6 bucks a month as a payback period is not worth recognizing. However; look at it like a leaky faucet. Its not a bad idea, and long term its will save you a couple of bucks and if everyone did it we would have less dependency on the grid.
Leave a Comment » | Product Review, Surge Protection, Techy Things | Tagged: electricty leakage, electricty reduction, energy bandit, energy conservation, energy phantom, energy vampire | Permalink
Posted by homeownerbob
May 8, 2011
 If you have read my posts on this subject, cutting the cable cord is a growing interest. CNET correspondent David Katzmaier revealed the reality of his journey that resulted in returning to cable. Cutting the cord can be difficult and you may/may not be a candidate for the transition. Since I am not complete with the cut over, I thought I would do a state-of-the-transition of my own, but more in a techno-nerd sort of way. Here are some things I have learned along the way as well as some concerns and considerations:
- Cold Turkey: As the author of the CNET article mentioned, he went cold turkey in one fail swoop and besides the immediate cable withdrawals he also struggled with antenna adjustment issues. A broadcast antenna can experience similar reception issues found with satellite services more so than cable or phone based services.
 Antenna Reception: As noted in my earlier entries, having a good antenna and good broadcast antenna service will be paramount. This is the core of your (off cable) service. If you have poor reception, pixeling, or blocking you will get quite frustrated with the service. If your antenna service is marginal on a good day, it will be poor on a bad day. Wind, rain, tree’s with large leaves in the summer will all negatively impact the reception. If you are old enough to remember depending on a TV antenna for all of your broadcast television, you will remember fuzzy, scratchy and intermittent service. This can also occur with the digital antenna.
- Limited Reception: Some channels will not show up. Obtaining ABC, CBS, NBC and FOX are the big broadcast providers. However, due to antenna placement, you may have difficulty receiving all of them. Even being relatively close you may find it difficult to get good reception. Spend the money on a good antenna, mast, coax, splitters and amplifiers to ensure high quality reception. If you are not a much of a technogeek, consider hiring a professional to establish your antenna service. As a DIYer project, its quite a trial and error process.
- Antenna Placement: Even though having an antenna on a 10 ft. mast may work for many urban dwellers, antenna masts of greater proportion may be required. In my case, I have struggled with getting adequate reception of the 4 major networks off of a 10 ft. mast (and I live in the city). I have continued to tweak my arrangement and after about 2 months. I have been monitoring the quality during some spring showers and it appears to be working pretty well.
- It’s Not the Same: To put it bluntly, cable TV services do a decent job to create a seamless one remote solution. Without the cable box, you will have to manage your watching habits a bit more. Using the tuner built into the TV, you will have to select different input sources that you have to move across to see what you want. For instance: the Broadcast antenna will be source one, where the Roku box will be another as well as a DVD player. Most modern TV’s have multiple input sources built into the tuner .
- No Online TV Schedule: With Cable, it got real convenient to channel surf the TV guide to see what else is on. Right now, an online TV schedule does not exist in my arrangement. However, as an option, TV Guide has a mobile app for Iphones and Itouch devices. You can program in your zip code to see localized TV programing. (NOTE: Once I install the Channel Master DVR, the TV guide is part of the programing, so I assume I will regain the surfing feature.)
- Multiple TV’s: Much like the cable boxes, if you want to watch multiple viewings through the Roku box, you will need more that one (there are other methods to use one centralized Roku box, but it will cost as much as just adding a second box). However, if you are just looking at broadcast TV on a specific set; no additional boxes are required.
- Sports: If you are tied to live time sports beyond your normal region or programing area; cutting the cord will be an issue. If you are still committed to making the move, you might consider looking at the online sources for real-time sports outside of your region
Cut the Cord Gradually: This would be my biggest recommendation. It’s best to wean the household off the cable instead of the flash cut.
- Dedicate one television to the conversion: This will allow you to gradually move toward using this solution as an acceptable viewing solution.
- Connect the new antenna to this TV to work out any bugs found in the reception. As I mentioned, we struggled with getting adequate antenna service to work a reliably as the Cable Service. For that reason we continued to go back to the other room. Since it appears we have cleared up the problem, we dont find it necessary to go to the other TV to watch broadcast television. This process will also help you identify what programing you are really watching. If you find you have to watch Overhauling, or the DIY network, it may be a struggle to make the final cut.
- Live with the solution for a month or so: Get the antenna service working well. Purchase the Roku box and use that to watch on demand movies. We got the Roku box and we have watched a few movies, but maybe 3 over the last week, which is a lot less than I thought I would be watching.
- The good news: Broadcast and Internet TV options continue to grow. Stay tuned for my next installment of “Cutting the Cord”. My next step is to purchase the Channel Master DVR (recently reduced to $299 on Amazon).
Stay tuned!
BOB
2 Comments | Techy Things | Tagged: cable TV, cutting the cord, fios, Internet TV, interntet tv options, living without cable tv, Uverse | Permalink
Posted by homeownerbob
August 28, 2010
It takes approximately 27,154 gallons of water to apply one inch of water to one acre of land.
After writing so many articles on lawn sprinklers, repair and maintenance, I was approached to write an article on things to know or consider before installing a new sprinkler system. This is not a ” How To” install a sprinkler system but what questions to ask yourself and a contractor prior to having a system installed.
It can be very difficult to judge one design/bid against another as no one irrigator will design a system exactly the same as another. You can limit the difference by requesting certain components or brands, but this may add to the difficulty as many companies will play off any differences between them. You might find it more beneficial to define performance and expectation over specific components.
- Watering Concrete: As a cost cutting method, some contractors may elect to spray water across a narrow walkway or sidewalk in lieu of boring under the concrete to set a head. If this is important to you, make this point clear: No or minimal watering side walks or driveways. Ask for examples for better understanding.
- Zones Designed Specific to the Needs: All lawns have micro climates where more or less water is needed. The contractor can use different heads and design methods to provide more or less water. Basically, you would not want a sprinkler head that is in the deep shade on the same zone as one that is watering in the full-sun; as the full sun area will require more cycle time than the shaded area. Additionally flower beds have different watering needs over turf. Segregating flower beds into their own zones will allow you to manage your water better. TIP: In the extreme heat of the summer, it can be difficult (and costly) to keep the turf green. For me, I go into survival mode, by reducing the watering time to just keep the turf alive. On the otherhand, since my flower beds are covered with drip emitters, I increase their duration. It may save you a bit of water.
 Drip Line Emitters: Consider using drip or emitter lines for flower beds. This style of watering will bring the water to the plant roots without wasting water through the air. I installed drip line emitter style in both the flower beds and parkways over 3 years ago and have been very pleased with the results. TIP: They can be damaged easily, so you have to be careful when digging around them.
- Name Brand Components: If the contractor can not provide you with material literature, ask them to provide the name and model numbers of the major material to be used. Specifically: Backflow preventer, valves, sprinkler heads/nozzles, the controller and any additional ancillary equipment you may request. Do some research on the internet regarding the models, performance and any customer complaint issues.
- Efficient water nozzles: If you have read any of my sprinkler articles you know that stream heads over spray heads do not atomize the water as much, putting more water on the ground and less in the air. Low Arc heads also increase efficiency. See Lawn Sprinkler Nozzles.
 Irrigation Controllers Are a Subject Within Itself. Unless you request specific features, most contractors will provide you a “builders grade” controller. This is also the grade of controller you will find at the orange box store. If you have read any of my articles, I am an advocate of the Sprinkler Warehouse as they provide multiple types, styles, models and brands of all sprinkler supplies. Look at the site for a controller you like or features that you find necessary.
- Basic Controller: Basic controllers will provide a minimum number of stations to support the number of sprinkler zones installed. Additionally they will include timed events, day of week, time of day type stuff. Most basic controllers can accept an external rain gauge. The controller should include a 9V battery backup to ensure the clock remains current.
 External Sensors: Even basic controllers will support external sensors and typically they do not have to be the same brand. So if you find a sensor you like, it will usually state it will work with any basic controller. The most popular sensors are rain, wind and freeze. In some municipalities, rain/freeze sensors are required by code and you can receive a citation for the system being active during those times. Additionally, time of day has become an issue, but that can be easily controlled by the clock settings on the basic controller. If your municipality requires a rain/freeze sensor, have it included in the contractor bid.
- Intuitive controller: To go to the next step, you may consider a controller that uses weather data to determine watering cycles. Some Wifi connected controllers simply use the collected data to just turn the unit off in anticipation of rain or freeze. However, some can be more intelligent and actively manage the water distribution to the point of deciding when and when not to water. There are a lot of new Wifi enabled devices out there and at this point I dont have a specific recommendation, so you will just have to read the feature set as described by the manufacturer. So far, I am a fan of the moisture sensor over the weather feature as I see the sensor measurement as being real-time over the weather report still being a bit of a speculation. Many times equipment manufacturers add features to controllers with more zones. You may have to consider a controller with a greater number of stations than required to get some of the feature sets. Ask the contractor if they have any form of reasonably priced moisture content sensors as part of their package.
- Test Function: May not be found in the very basic controllers but it is a valuable tool. It is basically an additional run program that is based on very short watering sessions. Setting the Controller to “TEST” will allow you to walk the yard while the sprinklers are running through all the zones. This allows you to visit each head to identify any problems that need correcting. An enhanced feature is “Remote Control”. Using a hand-held transmitter, the user can turn on/off sections without returning to the controller. You may find this desirable if you have a very large lot, otherwise the test feature will probably work fine. This is one of the big selling features of the the Wifi enabled controllers as you can use your phone to activate the system.
- Water Usage: How ever you spin it, your water usage will dramatically increase. Even with a good efficient system, you will be watering more thoroughly than in the past. Managing your system electronically will ensure the most efficient use of water.
Here are some things you need to know or ask yourself before you start the process.
- Water Usage: It takes approximately 27,154 gallons of water to apply one inch of water to one acre of land. No mater how you cut it; using an automatic lawn sprinkler system will increase your water bills. Using the number listed above as the basis; that works out to about .623 gallons of water per square foot. So; take your property lot size (ex. 50×100=5000) minus the square footage covered by the house, driveway, sidewalk and garage (ex. 1500H + 800D + 200S + 400G = 2900 sq ft.) Property size minus non-landscape surfaces equals area to be watered. (ex. 5000-2900=2100 sq.ft.). Multiply .623 times the remaining square footage (ex. 2100 x .623= 1308 gallons of water to achieve 1″ per watering cycle). Climate and rainfall will impact the amount of watering but if you figure watering 3 times per week, it would work out to 15,699 gallons per month figured at 100% efficiency. Most typical sprinkler systems are 50-80% efficient (adjusted to 23,548 to 28,258 gallons per month). It all adds up.
- Existing Water Meter: Most of the time, sprinkler systems are installed using the existing water meter as the cost of a new meter can cost over $500 to have the city install one.
- New Water Meter: Because of the initial cost, most people will use the existing meter, but consider these facts as part of your decision: 1)Many cities calculate the sewage charges in your water bill based on water used, even though they may provide a summer time allowance, it may only be for 3 months. Here where I live, it is not uncommon to use the sprinklers 9 months of the year. 2) Older homes with 3/4 in meter may not provide your system adequate water pressure, 3) Using a larger meter with higher pressure may actually reduce the amount of equipment required for the system. Additionally, pressure and volume will impact the amount of zones and heads needed to water the property. In the initial evaluation, the irrigator will validate the meter and the water pressure. If it is border line, they will normally recommend an upgrade or an additional meter. You may also ask if upgrading the meter to the next larger size will impact the bid in a way to reduce his cost. This may come into play especially with large properties vs. small lots.
 Sprinkler Head Styles: If you have a small residential city lot, expect the bid to include pop-up style of heads. If your property is over 1/3 of an acre expect to see a mixture of pop-up and rotary or oscillating heads. Typically, properties with open landscape (large turf areas) will be designed with head that can throw water further than 15 feet. This saves water and material. TIP: It is acceptable to have different type heads in a system but not acceptable to have different type heads in the same zone.
 - Warranty: Ask for at least a year, but two is better. Most any problem will surface in the first two years.
- Spare parts: Honestly; sprinklers require a lot of maintenance to retain peak performance. Damage from lawn mowing is the biggest culprit. Using the exact same heads and nozzles will ensure peak performance. Most contractors will be using a different grade of sprinkler head than found at the orange box store. Ask the contractor to provide extra sprinkler heads, nozzles and risers (ask for minimum of 1 of each or 10% in heads/nozzles/risers used in the system). Some where around 10-20% extra sprinkler bodies and 2-3 each of the different nozzles. Also ask for at least one extra sprinkler valve for every 10. Whether you do the maintenance yourself, hire the same contractor or someone else, this will guarantee that you retain the integrity of the original design.
Assuming you are dealing with a reputable licenced irrigator they will appreciate your preparation and gained knowledge.. However, some of the questions and requirements provided may not set well with others. That alone, will help in weeding out the undesirables.
If you are looking for more information or greater detail, take a look at this site as it does a great job of explaining Efficient Irrigation.
Leave a Comment » | Lawn Sprinklers | Tagged: how to install lawn sprinklers, Installing Lawn Sprinklers, Lawn sprinkler facts, Lawn Sprinklers | Permalink
Posted by homeownerbob
July 28, 2010
 10% of all homes have some sort of water leak, and can be repaired quite easily. However, hidden leaks are hard to find but can go un-noticed for years and cause significant structural damage.
To continue with the “Chasing Water Leaks” theme for March, Part II of this article is directed at the real hard to find category. By now you should have fixed any leaks associated with faucets, toilets, and any other water delivery devices (dishwashers, ice makers, lawn sprinklers, etc.). If not, make sure and read the posts on Chasing Water Leaks Part I and lawn sprinklers and resolve those issues first before going any further. This Part II inspection will help you discover leaks that may be in the ground, in a wall or very small leaks that can go unnoticed in or around the house. Even if you decide not to do any of the work, isolating the leak for the plumber will save you significant $$’s.
Leak Isolation Group II (main lines and concealed leaks)
- Main water line: Typically houses have a service cut-off immediately before the water service enters the house. Turn off the service cut-off and re-inspect the water meter low flow gauges to see if the meter is still running or not. If the meter still runs, walk the path of the water line looking for dark green grass (in the summer) or wet spots. TIP: Use caution in operating this cut-off if it has not been operated for a year or so, do not force it. You can still walk-out the path without using the cut off. Obviously, if you find something here it will need to be fixed before you can complete the inspection. Finding the leak here may conclude your inspection. Considered rare, finding a leak here can typically be associated with recent digging.

- At this point, the leak you are searching for is probably very small. You will be looking for traces of water, in the form of moisture or mold. You may just find slight discoloration or the surface may be cold to touch compared to the rest of the surface. Inspect baseboards and walls near or around where water pipes enter the house. Make sure and look on both sides of a wall that may have water pipes in them. Look for moisture on the walls and floors surrounding all the water fixtures. You may also find distortion on the wall or floor surface as water will cause the building materials to expand. If you find solid evidence, you may have to open the wall to get to it to expose the pipes, but before you do, try to isolate the problem further by following the Foundation methods. (TIP: Experiencing foundation movement could have been the cause of a leaky pipes in a wall.) If you were unable to locate the leak based on the previous inspection you may eventually require a professional but before you call them try these inspection methods for further isolation.
Pier & Beam Foundations: Houses with pier and beam foundations usually have a crawl space with an access hole. Possibly in a closet or outside around the foundation. If you are claustrophobic, don’t like bugs spiders and crawling things, you want to stop here and call a professional. If you choose to continue, take a good flashlight and crawl in.
- Start at the end of the house where the water line enters the house and crawl the path of the pipes. Look for puddles, wet soil and wet pipes. If you suspect
 a leak in the wall , look up at the floor boards and all locations where the pipes enter the house above you. Moisture, dampness, mold is the give away. If it has been leaking for an extended period of time, you may find rotten wood. If the pipe is leaking within the wall, you will probably see water trickling down the pipe to the ground.
- If you find water or water damage around the large drain pipes under the toilets, shower, tub or sinks, this will have to be addressed, but is not the cause of water loss through the meter.
Slab Foundations: With slab foundations; walk the perimeter of the house.
- Look for damp areas or pools of water
- Look for damp conditions or green moss on the concrete and brick. This would not be associated with any gutter downspouts or roof run offs.
- At this point, if you haven’t found it, you may have a leak in an interior wall or under the foundation. If you have had recent foundation movement or foundation repairs, this would increase the chances of this type of leak.
- Calling in a professional may be your only choice because it may require specialized test gear designed to measure for small amounts of water. When you are interviewing a plumber over the phone, insure they are equipped for this type of diagnostics. Otherwise they will come out and do pretty much the same things you did, then call another plumber (as a sub-contractor) to perform the tests and charge you for both his time and the other plumber.
Key Inspection Points and Action Items:
- Use the water mter to determine if any water leaks exist.
- Inspect in, around, and underneath the house.
- Once the leak(s) have been isolated, repair them or call a professional.
Leave a Comment » | Plumbing | Tagged: home maintenance, home repair, inspect, inspection, Plumbing, water cut off, water leak, water meter, water pressure | Permalink
Posted by homeownerbob


