Christmas Lights and Electrical Safety

December 10, 2023

The U.S. Fire Administration (USFA), estimates  240 home fires involving Christmas trees and another 150 home fires involving holiday lights and other decorative lighting occur each year. Together, these fires result in 21 deaths and $25.2 million in direct property damage.

For some reason, I am believed to be a Scrooge when it comes to decorating for Christmas. Normally, I let my family deal with all the  details including unpacking all the decorations, placing ornaments on the tree, getting the doggie Christmas collars out, etc. But I do serve as the pack mule in unloading the attic to get it downstairs out of the attic,  but a Scrooge I’m not!!… Ok, maybe curmudgeon.

Point One: Christmas lights in all their glory are a huge waste of energy. Four strings of C9 (old school) regular Christmas lights can consume 1800 watts of power or 1.8 kwh. On an individual house basis, it may not seem like much but add it to about 25% of all households and it works out to be a lot electricity. Not to mention, the selected idiots that adorn their house to the point that you can no longer recognize it. Ok, so you kind of get me at this point, so lets move on.

I have officially changed my tune!!!!!!!!Believe it or not, I bought Christmas C7 lights (on sale) to hang outside. We’re talking outline the house type lights… This is a big step for me. So with all this lead-in, where am I headed you ask. Dont forget, this is a blog about home maintenance anyway!!

Before we go to far, let it be known what amount of lights I have installed.

  • 3 – Strings of 200 count C7 outdoor LED lights
  • Total bulbs= 600
  • Wattage per string 19.2W
  • Total waste of energy 57.6Wh
  • About the equivalent of one 60W light bulb, most of us waste that much energy on any given day

I will contain my excitement to exterior decorations and electrical load, but lets remember what the NEC code says about connected devices:

NEC 210-23  15 and 20 Amp branch circuits: …The rating of any one cord and plug connected utilization equipment shall not exceed 80% of the branch circuit rating. Furthermore… the total rating of equipment fastened in place shall not exceed 50% of the branch-circuit. In short, no one plug should exceed more than 80% of the circuit rating and that any stationary equipment (i.e. dishwashers, waste disposer) that constantly draws power should not exceed 50% of the rated circuit. Typical residential branch circuits (outlets, wall switches and fixtures) may be rated at 15 or 20 Amps.

So, we have a circuit budget of roughly 1100 watts for a standard plugged outlet ((15A*120V*.8pf)*80%).

Choosing the Lights: If you dont already own exterior lights, go for  the LED versions (C7 or C9). By far, they will last the longest and cost the least to run. C7 and C9 are bigger bulbs and are easier to manage. If you take care of them, they could last a life time. Additionally, the prices have continued to fall over the last few years.

The following chart is a general guideline is fairly conservative. Most Christmas lights will provide the limitations and wattage. As mentioned in my calculation above, at 80% you have a budget of 1100 watts, at 50% your budget would be 720 watts.

C7 or C9 Lamp Wattage Lamps per Outlet Lamps per 15 Amp Circuit Lamps per 20 Amp Circuit
.6 Watts (LED) 250 Lamps(bulbs dim the farther
your runs are from main power source)
2400 Lamps 3200 Lamps
1 Watt (LED) 250 Lamps(bulbs dim the farther
your runs are from main power source)
1440 Lamps 1920 Lamps
2.5 Watts 300 Lamps 576 Lamps 768 Lamps
3.7 Watts 250 Lamps 389 Lamps 519 Lamps
5 Watts 175 Lamps 288 Lamps 384 Lamps
7 Watts 125 Lamps 205 Lamps 274 Lamps

Key Points to Christmas Light Installations:

  1. Stay within the wattage limitations mentioned; 1000W at 80% and 720W at 50%. The light packaging should provide you to total wattage. Just subtract it from your total wattage budget as you organize your lighting plan.
  2. Attempt to either use a dedicated electrical circuit  or one that does not have a lot of static or dedicated load.
  3.  Limit the string to string connection to no more than 3 or what is provided as the manufacturers recommendations.
  4. Limit the per outlet load to no more than 50% of the per circuit limitation. 80% rule: 500W. 50% rule: 360W
  5. Use timers or remote control switches to turn the lights on and off to limit the energy usage.
  6. Dont fall off the roof
  7. Merry Christmas… BOB

Wall Outlets Feel Warm?

April 20, 2020

According to the United States Fire Association (USFA) Electrical fires in our homes claim the lives of 485 Americans each year and injure 2,305 more. Some of these fires are caused by electrical system failures and appliance defects, but many more are caused by the misuse and poor maintenance of electrical appliances, incorrectly installed wiring, and overloaded circuits and extension cords.

A day doesn’t go by that I don’t get a comment on the webpage about warm or hot electrical outlets.  Before we get into the guts of the issue, lets define what most (residential) electrical branch circuits are designed to provide.

NEC 210-23  15 and 20 Amp branch circuits: …The rating of any one cord- and -plug connected utilization equipment shall not exceed 80% of the branch circuit rating. Furthermore… the total rating of equipment fastened in place shall not exceed 50% of the branch-circuit. In short, no one plug should exceed more than 80% of the circuit rating and that any stationary equipment (i.e. dishwashers, waste disposers) that constantly draws power should not exceed 50% of the rated circuit. Typical residential branch circuits (outlets, wall switches and fixtures) may be rated at 15 or 20 Amps.  Typically things like window air conditioners, washing machines and refrigerators are on their own circuit.

NOTE: This is a very basic description of this code requirement and how it is applied to typical residential branch circuits. There are numerous differences when applying the code to specific uses. Greater detail can be found in sections 210 and 220 of the NEC. 

 The National Electric Code (NEC) was originally developed in 1897. As the housing market continues to respond to new demands and changes in the industry, the Code is continually updated. However, as with most houses, the electrical system installed in the house was designed based on the code of the era and unless the house has had the electrical system upgraded, either all or part of the system is still based on the original design.  The most noticeable change to the average homeowner is that older homes have fewer outlets per room, and for this reason, it can be common to find excessive extension cords and power strips. All of these item place greater strain on a system that may have been designed and built 50 years ago.

Why is the electrical outlet warm?

  1. What’s plugged in: Things  like  cell phone chargers, computer printers, lawn sprinkler controllers, DLS Modem, video cameras, MP3 players, cordless drills and some small appliance. All these products use a “transformer” (aka: wall wart). Based on what they do (change the voltage input to a different voltage output) will cause them to be warm. Unplug it, wait about an hour and check the outlet again. The outlet should be normal ambient temperature. It is not uncommon to find these wall warts as much as 20 degrees warmer than ambient. However if you find one that is too hot to touch, it should be replaced.
  2. Excessive Demand At An Outlet: As stated above, no one device plugged in to a single outlet (receptacle) should exceed 80% of the rated circuit.  To get perspective, residential grade appliances that are designed to plug directly into a standard (15A) wall plug will normally not exceed 1500W; such as a blow dryer (1500W/110V)/.95=14.35A  ((Watts/Voltage)/PowerFactor =Amps).  With two blow dryers in the same outlet or on the same circuit the circuit breaker should trip (e.g. turn off).  Add in the fact that in many older homes it is very common to find extension cords, outlet multipliers, outlet extenders or un-fused power strips. All of these items can increase the opportunity to overload an outlet.
  3. yellowstone-0111Excessive Demand on the Circuit: Most standard residential electrical circuits are wired in a series where the circuit wires loop through the electrical box, terminate on the outlet, then continue on to the next outlet.  In other words, the electrical current being used by one outlet (on the same circuit) may pass through terminations of another receptacle. If the current is excessive, the outlet may be warm without anything attached at the receptacle.  As part of an electrical design, it is normal  to have at least one outlet in the same room to be on a different circuit.  This allows you to share the load requirement from one room into multiple electrical circuits.
  4. Poor Electrical Terminations: If electrical terminations (at the receptacle) are loose, or the wires are damaged, this too can cause excessive heat at both the point of use as well as in the circuit described in #2. Additionally, outlets terminated using the spring-loaded  stab-lock on the rear vs. the screw-down attachment can cause excessive heat.
  5. Oversized fuse or breaker:  Typically these values can be compromised in older homes as there are fewer outlets per room, and the circuits are not designed to support all the electronic gear we find in the modern home. Assuming the circuit was installed correctly, the circuit breaker should be the lowest rated item in the circuit and the wire in the wall should be the highest. For obvious reasons, if there was a fault or failure, you want the circuit breaker to fail first. If a breaker was replaced with a higher ampacity breaker, the circuit has been compromised potentially creating a fire risk by allowing higher current levels to pass through the circuit that was designed at a lower level. In this case finding a warm outlet is a warning that the wiring may be operating above its rating.
  6. Physical Deterioration of Plug: Outlet that appear worn, broken, cracked or chipped are all conditions that can compromise the function its function and can create heat at the outlet.

In urban areas, faulty wiring accounts for 33% of residential electrical fires.

What to Do?  Analyze the problem within your capabilities. Some of these suggestions may be beyond your comfort (experience) level, so you may want to contact an electrician at this point.

  1. Identify all the receptacles associated with the warm outlet.  After turning off the circuit breaker use an outlet tester to find all the outlets. Identify the circuit breaker rating found on the paddle of the switch. TIP: Inspect the entire house, both outlets and light fixtures. With the circuit breaker off you will be looking for dead outlets.
  2. Do any of the outlets have extension cords, power strips or outlet multipliers? Ensure the extension cord is rated  for its use.  Replace all unfused power strips or outlet multipliers with a fused power strip  as these devices include a circuit breaker to add further protection. Do not daisy chain multiple power strips or extension cords. Try to de load the outlet by re-associating the plugs to different circuits.
  3. Follow the testing methods as found in Electrical Switches and Outlets. These testing methods will identify any wiring issues that should be resolved as well.
  4. By now, you may have found the problems associated with an outlet, fixture or receptacle. If you still have problems, the outlets may be internally bad, the connections may have deteriorated or may be loose. With the electricity off, inspect the wiring of all suspect outlets. Check for tightness of the screw terminations, crimped or cut wires. You can also perform this test by using a digital thermometer gun with a laser site. Scan the electrical outlet, specifically the wiring terminations,  without disturbing the wiring. The probe should identify the problem by indicating a noticeably higher temperature.
  5. Replace suspect receptacles with higher quality equivalent receptacles using the screw down connection point.
  6. If you still have problems, review the tests found in the Electrical Service Panel post. Perform the tests that apply to the condition.
  7. If you still have problems, the circuit may have been compromised by enlarging the breaker, you may consider hiring an electrician to validate the condition and to correct the problem.

Additional Items to Consider

With over 15% of all electrical fires originating in the bedroom, municipalities have adopted local electrical code requirements that include arc fault circuit interruption (AFCI) circuit breakers to be installed in new construction. These breakers have the ability to recognize an arc usually due to a defective cord appliance or wiring.

One of the newest concern with electrical fires is the fact that many extension cords, plug adapters, power strips, appliances and etc. are coming from overseas areas that use counterfeit certifications. Here in the U.S., agencies such as UL, ETL, CSA are recognized as certified testers of electrical products. Unfortunately, many items are filtering in with fake labeling.  Always purchase name brand products from reputable stores and inspect the product for the safety agency’s certification.


LED Bulb Technology, More Light, Less Wattage

February 17, 2018

Unless you have been under a rock for the past 3-4 years, LED light bulbs have been creeping into the stores for about the last 8 years. As with any new technology, the initial cost is higher than normal, however, as manufacturing processes are refined the prices start falling. As an early adopter, I started fiddling with LED bulbs in 2008 and wrote my first article on using LED bulbs in a landscape lighting system in 2009. Back then, a MR16 based bulb was about $25. Today that same bulb is  less than $6.  (See Whole House Landscape Lighting)

Additional incentive to move away from incandescent bulbs driven by our government will result in incandescent bulbs being just specialty bulbs and less for general use. The prime directive in their initiative is to reduce consumption of electricity, and for the most part this is what most of the published propaganda supports. Most all written documentation shows you a comparison chart to reach a near equivalent lighting level with a huge savings in consumption.  HOWEVER there is a secret the government is not telling you. With this change in technology, many existing fixtures can actually supply more light (using LED’s), without being dangerous or exceeding the wattage limitations of the fixture design. So, what does this really mean; With traditional lighting wattage limitation in fixtures are all based on using incandescent bulbs. In older houses, it can be difficult to get more light in certain places of a home without making major upgrades or adding more fixtures. If you live in a house built before the 2000’s there are typically fewer light fixtures and outlets causing it to be difficult to get more light in a room without calling an electrician by adding lights or outlets.  With an LED bulb replacement you may be able to get a lot more light out of the same fixture without risk without exceeding the wattage limitation of the existing fixture. There is one simple rule: Never exceed the manufacturers wattage limitation of an outlet or fixture. This rating is usually stamped or labeled on the socket or fixture

Just for a moment, lets get in the weeds to understand why this will work. Here are a couple of definitions that will help in understanding the concept.

  • Wattage: In simple terms, a watt is considered a unit of power. It is not really a measurement of light. But since the invention of the incandescent light bulb we have used the consumption of power (wattage) rating as a reference to the light output. As for an incandescent light it consumes a lot more power than  light produced. An incandescent light consumes (by generating heat) about 90-95% of its power to produce the amount of light it produces. In other words, its about 5% efficient.
  • Lumens: Simply put; Lumens is as a measurement of the total amount of visible light, regardless of the consumed power or wattage. So, even though there is a relation, they don’t exactly correlate.  

An incandescent bulb heats up a metal filament (tungsten) in a controlled environment (bulb). That metal turns super hot resulting in both visible and non visible light as well as a lot of heat. Where a LED (light emitting diode), radiates light in a narrow spectrum, without the high amount of heat found with the incandescent bulb.

Heat: Since LEDs radiate light, they emit very little heat. In comparison, incandescent bulbs release 90% of their energy as heat and CFLs release about 80% of their energy as heat. LED’s use about 75% less energy to produce the same amount of visible light. This should be the  AH-HA moment for you. 

LED Chart

Taking advantage of the LED:  Lets say you have a fixture that is rated at 60 watts, like maybe an old recessed kitchen light found back in the 1950’s. Its in the correct location, but you want more light. So without changing the fixture (assuming the socket and wiring is intact), you can upsize the bulb to a 2600 lumens equivalent, and still only use 30 watts of power. As a measurement of light you went from 800 lumens to 2,600 lumens with an increase of over 3 times the light of the original 60 watt bulb!! Impressive huh!! Granted the government will recommend that you replace the bulb with the 7 watts (800 Lumens)LED bulb. By using the 2600 lumens bulb you can increase your available lighting without having to change the fixture or exceed the wattage limitation. Granted you will about 23  additional watts of  power, but I don’t even have to do the math to tell you its a lot cheaper than having an electrician add new fixtures. The chart to the left is a simple conversion of standard bulb wattage’s vs. lumens.

The LED bulb is a great advancement and we will continue to see new uses and options with the technology. Hopefully I’ll have reasons to write future articles about LED’s.


Seasonal Reminder-Power Outages: Part 1

November 19, 2016

By human nature; we do not appreciate certain things until they are gone.

The blizzard conditions in the central west area this week reminded me of being prepared for the weather as it begins to change. Hopefully you have not already been effected by these conditions. But, it serves as a reminder that good preparation can ease the difficulty. The items mentioned don’t even come close for those that might be caught in the direct path of devastating weather conditions, but can help the rest of us that may be near the areas.

If you have suffered issues of direct impact, look at  the Disaster Safety site mentioned below as well as the Red Cross for assistance as well as a way to pitch in and help.

Regardless of the weather condition, it most common for it to impact the power grid.  Many times, these conditions can be related to tornado’s, hurricanes, thunderstorms, snow, ice and the list goes on. Several of these type disasters can be devastating especially if you experience a direct impact. Look at the Disaster Safety site for concerns of direct impact. Statistically, secondary effect outages has a broader impact but is typically resolved in a short time frame. A loss of power will impact your life immediately, and you do not have a lot of control on the time or day it will occur.  According to the IEEE standard 1366-1998, the median outage in North America is 1.36 hours per year per household.  In other words, half the households in the U.S. will experience  power outages totaling 1.36 hours or greater. That could be in small segments or one event.   For the purpose of this article I will break down preparedness by duration of loss, 1) 8 hours or less, 2) 72 hours or less,  3) 7 days or less, and 4) Long term. Granted, knowing how long the event will last is the biggest question that none of us really know. However, shorter outages are usually related to severe storms. The greater the coverage of the storm will impact the length of time for restoration. More severe conditions such as hurricanes, tornadoes and long duration storms will all impact the length of restoration.

8 hours or less: An outage of 8 hours can pass pretty quick but having a few essentials will smooth out most issues.

  1. Where is my flashlight? I have dozens of normal flashlights (the kind with no batteries) and one large rechargeable unit. But if an outage were to go beyond a couple of hours I might be in trouble. Use candles for stationary locations throughout the house and save your flashlight for moving around or going outside but keep candles away for other combustible items (curtains, cloth, paper, etc.)  As for flashlights, there has been a recent revolution in small lighting. It’s the LED bulb. The LED uses less than a 1/10 the power of a normal resistance (incandescent) type bulb.   Due to the low power requirements of LED bulbs they can be powered by different sources such as wind up flywheels, super capacitors or rechargeable batteries. radiolightchargerThe American Red Cross has endorsed several, but I like the RF150  that combines an LED Flashlight, radio and cell phone charger. It’s a bit pricey at $30 and up but it is truly an emergency tool that will last for years with little maintenance. This one unit will cover item #1, 4 and 5  all in one unit allowing you to find it quickly or lose everything all at one time. Pretty cool, wind it for a minute and get an hour of service. There are several other choice on the market that cover the requirement.  If you have one or plan to get one, storing it near a window with lots of sun will keep it well charged. Look for my review of this product under techy things.
  2.  Where is the phone number to the Utility?  This sounds simple, but if you don’t have number 1 covered it makes #2 that much harder. If you live in a state where electricity and natural gas  is deregulated, knowing the name or number of your utility companies could be a 15 minute discussion. Locate your phone bill, electricity bill, gas bill, and etc. they should have a number posted; “In case of an outage call this number“.  Make a label, sticker or note and place it on your new emergency flashlight. TIP: You need to call them and report the outage even if you know your neighbor has already reported it. Utilities will increase the severity of the condition by the number of reports (phone calls) logged against the outage. Most utilities can provide you a reasonable status of the condition. The smaller the problem, the easier it is for them to estimate the length of the outage. If you know the outage is wide spread and they continue to be vague on how long, you may need to prepare for a longer outage than 8 hours. Also, continue to check the news on the radio.
  3. I need heat!! In the winter this can be critical, not only for you but your house.  If you have forced air central heating, you’re screwed as you will need both electricity and natural gas  to make the system work. Having a fire-place, oven or bathroom heater  with natural gas will get you through an 8 hour period unless you live in the northern climates.  These little camp heaters have hit the mainstream. With a small propane bottle, you can get about 6 hours of heat on the low setting. For longer duration, with an added hose, you can adapt the propane tank off your gas grill. These units are clean, safe, don’t smell and can be stored for a very long time.  portable-heaterTIP: In the winter, crack open the water faucets to a slow drip in the kitchen and bathrooms (especially those based on the exterior walls) to ensure they do not freeze. Also make sure you have a source of fresh air when using these heating devices as they can consume the oxygen. Even with these devices, the house is going to be cold, so the likelihood of freezing a pipe is greater.
  4. My phone does not work! If you still have a traditional telephone (land line) plugged in the wall it should still work assuming your phone does not require power from a wall outlet, this includes cordless phones. TIP: Always have at least one telephone that is like the one your mother had. Just plugged in the wall, no features,  lights, caller id, just a phone (aka POTS, plain old telephone set). The phone company does a great job of ensuring traditional dial tone, but this does not include Internet service, VoIP (voice over Internet protocol) or any other non-traditional, non-regulated services.
  5. Where is my cell phone? Cell phone service is becoming more reliable as the consumer is becoming more dependent on it.  In many cases, the cell phone has taken the place of the POTS.  For the most part, if you use your cell phone sparingly, you can make 8 hours. Besides the unit mentioned in item 1, there are many solar phone chargers on the market, or you can use your car for short duration’s as well assuming you have a car adapter. Since most people keep their phone nearby, you can use a flashlight app to find your flashlight when you first loose power. Don’t use the phone long term for light as it will quickly kill the battery.
  6. Do I have a radio that works? Probably not other than the car. Mine has a battery that will protect the memory of stations and time setting but that’s about it.  You will need a radio like a flash light that does not require an electric cord. Weather specific radios are great, but some music sure passes the time. The radio (news) will help you gauge your needs beyond 8 hours. See item 1.
  7. We have no hot water! Maybe, maybe not. If you have an 1)electric water heater, 2)gas-fired tank-less water heater or 3) some pilotless gas water heaters, you could have limited or no hot water. I have a tank-less water heater so for me its a big NO for hot water. However, I have a gas stove so I can cover the small requirements. With an 8 hour failure, a 50 gallon water heater can cover your immediate needs.

You probably already recognized some items are missing. The list is based on an 8 hour or less outage. For longer outages look at my post for Electrical Power Outages Part II, as  things start to get more interesting as time goes on.


Lamp and Light Fixture Inspections: Is it Safe?

April 29, 2016

With all the Restoration, Repurpose and Reclamation programs on TV, its easy to get inspired to pick up an old fixture and bring it home. However, buying used fixtures/lamps that appear to be working correctly might still have hidden problems. I thought it might be a good idea to devote an article to inspecting a lamp/light fixture.  As with any of my projects, safety is number 1, and with any electrical appliance, lamp or light fixture, insuring it remains compliant with the  electric code and the original UL listing  is very important.

pre purchaseWe recently picked up the swag lamp pictured to the side. The picture is from the location we bought it. As you can see it was working. So why would I want to take it apart? Just to check it out!  So, I disassembled it to clean, inspect, repaint the metal surfaces and total rewire if required. As with most any hanging type fixture with the bulb below the socket, there is a natural tendency for the rising heat to make an impact on the above wiring. As expected, I found brittle and decayed wiring above the socket. After seeing the condition of the wiring  I wondered why the fixture was working at all! Overheated wiring is the sleeping giant of lamp and light problems.  Most wiring is rated at 105C (or 221F), and in most correct applications will be fine, however when a bulb wattage is greater than the lamp rating is used, the wiring will be the first component to suffer.  You may never know it until the wiring is disturbed. Once disturbed, the insulation can disintegrate and potentially cause the wires to touch each other. You know where the story bad wiregoes from here. Always follow the bulb ratings requirements as listed on the fixture.

Without knowing the history on a light fixture, it never hurts to confirm that it is in good working order before you use it. Here is my basic check list: 

  1. Physical Review of the Lamp: Is it relatively clean, does it appear to have been stored inside or outside? Fixtures left outside can rust as well as rodents can get to places unseen to chew on the plastic wire insulation.
  2. Manufactured or Custom: In general, lamps that were manufactured in mass generally were designed and built to a specification. Typically they use standard lamp parts and overall meet the design criteria necessary for long term use. Custom lamps can be made from most anything (bowling balls, table legs, vases, etc.). Good custom manufacturers follow the same criteria. On the other hand, I regularly run across lamps that were hand built, but failed to ensure proper safety for long term usage. Many of them I can fix, but for various reasons a bad design can cause premature failure, in turn, it may not be a good lamp. The two most important items with custom lamps is 1)quality of workmanship and 2) proper heat dissipation.
  3. good bad wire comparoWiring terminations: Most failed wiring is at the terminations. Frayed/broken wires, premature insulation failure, loose connection can all impact the safety and performance of the light. In this picture the bottom wire has decayed insulation and has turned black in color due to excessive heat. The one on top is in good condition.
  4. Polarity: In a simply lighting circuit there is a “line or hot” side and a “neutral”. Those terminations should be consistent from the plug to the socket to ensure the hot termination is in the base of the socket not the shell. This is tested with a VOM meter.
  5. Polarized Plug: Similar to #4. The larger prong on the plug goes in the larger hole in the wall socket, which is the neutral side, maintaining the polarity through the entire circuit. If it is a lamp and has a plug on the cord and it is not polarized, it is a good idea to change it out.
  6. Wiring Size: Not usually a problem with US manufactured lights, but most lamps/lights originally designed to work in a different country could have undersized wiring for use in the US. After determining the wire gauge, this can be addressed in multiple ways including, 1)rewiring the lamp or 2)simply lowering the wattage of the light bulb to be used.
  7. Bulb Sockets: Sockets show wear for various reasons, including the cardboard insulator and the metal contact surfaces. Regardless of the reason; noticeable wear in the socket should be resolved by replacing it.
  8. Grounding circuit: Lamps have polarized plugs, but light fixtures require a grounding circuit. This could be a green wire, or a small bare wire, or even a black wire with green tape that is attached to the body of the light fixture. With a VOM meter, continuity between the conductor and the bare metal surface of the fixture can be confirmed.
  9. Switches: Most switches tell you when they are bad and there is little indication they are going bad; not a lot of  in-between. They can be good today, and bad tomorrow. If you have taken the lamp apart, changing the switch/socket is cheap insurance.
  10. Dimmers: Many times dimmers start to act up before total failure. Inspect for 1)free movement between clicks, 2)ambient temperature to touch, 3) full range of light from the bottom to the top of the dimmer movement. If it is just dead, some large dimmers have internal fuses that can go open.
  11. Physical Integrity: Most all manufactured lamps include metal parts. Many of them are soft metals such as brass or pot metal which can be fairly easy to bend or break. With that said it is not uncommon to have to occasionally tighten up some of the parts to keep everything in alignment. Do not over tighten the parts, the soft metal can break and be difficult to repair. FYI: Pot metal can be difficult to fix, so if you are thinking of buying a  lamp that is physically broken, you might think twice.
  12. Top capVentilation: As you can see in this picture of the top cap of the same swag lamp; there is virtually no ventilation for the heat to escape. Just for safety sake, I added some ventilation holes in the top cover.
  13. Light it up: The final test is to power it up and let if run. Depending on the type of lamp, I may let them run for 30 minutes or so with the highest rated bulb. Mainly looking for heat problems with components and if it smells.

Here is the finished lamp.  You can see the small holes I added to the top section for heat dissipation. Since heat is a major issue in this style fixture,  I used an LED bulb and it drastically cut down the amount of heat. LED bulbs have become a game changer for multiple reasons; look for a later post on LED bulbs.

Finished LampFinished Lamp 2

This article was originally published in my other blog found at DallasLampandLight.com


Lamp Repair and Restoration

August 6, 2015

DLandL FinalV2aOk, its time to confess…. I’ve been cheating. Yes that’s right, I have another business/webpage.

Several years ago we had the opportunity to acquire a lamp repair business. Granted, its maybe not the most high tech cutting edge opportunity you would first think of, but on the other hand it fits right in my wheel house.  My hobbies have always involved building, restoring and repairing; be it motorcycles, houses, lawnmowers, sprinkler systems, mixers, lamps, etc., etc. When I went to college, getting a degree in Industrial Technology just seemed to fit.  So, when one of my life long friends that had been repairing lamps and lights decided to give it up and move to the country we jumped at the chance to keep the light burning.

So with that said, we started Dallas Lamp & Light.  Dallas Lamp & Light is a locally owned WhiteRock/East Dallas business specializing in light fixture repair as well as complete lamp restoration and redesign. Electrical rewiring is our  core competency but we also have the expertise and facilities to perform full rejuvenation including surface restoration of metal, wood and ceramics. Look to Dallas Lamp and Light to bring light back to your lamps and fixtures.

We carry a complete stock of  replacement components, including switches, cords, fixture receptacles and brass hardware. We also have a collection of over 35 years of specialty parts that can be used to bring your light back to tip-top shape.

Looking to update the look of a lamp? We can re-coat metal surfaces with traditional metal lamp colors and finishes as well as any color under the rainbow. Typically, we use either acrylic enamels,  thermoset and thermoplastic polymer coatings in lieu of plating to reduce exposure to environmental concerns. These coatings are very durable and work well in this application.

Interested in making a lamp from a favorite item? We can do that too! From musical instruments to bowling balls, we can turn that special treasure into a functional part of your household.

If you are local to the  Dallas Ft. Worth metroplex, or want to pack up that lamp and send it to me, we can help put the light back into most any lamp.

BOB


Electrical Switches and Outlets

September 17, 2011

light-bulbLight Switches and outlets are taken for granted by providing endless amount of light and electricity at a moments notice. With proper care, these electrical elements will serve you and your house for 20 years or better. 

For the most part, we do not consider these items a problem until they are broken or when failure occurs. However, recognizing conditions than can be resolved today will allow you to fix the issue on your own schedule and ensure adequate safety to you and your home. We all know that failure typically won’t occur until you really need it. So take a look at your electrical outlets and switches today, you may be surprised to find that some of them are starting to show indications of wear that will eventually result in failure.  Replacement or repairing them now will ensure uninterrupted service.

Light Switches: This inspection involves visiting every light switch in the house. Go through each room, one at a time.

  1. Standard Light Switches: Operate every light switch in every room. It should operate smoothly. If it is warm, makes noise, won’t stay in the on or off position or feels mushy, it should be replaced.
  2. Dimmer Switches: There are different styles of dimmer switches,  they include standards/with secondary sliders, full sliders and rotary switches. Compared to standard light switches, it is not uncommon to find dimmer switches warmer than ambient. This is normal. Operate the switch through its full range. It should transition from off to 100% (on) smoothly. Some switches may have clicks or notches in the transition from 0% to 100%. If the light interrupts  or flickers during transition from off to 100% the switch should be replaced. TIPDimmer switches and CFL (compact florescent lights) don’t mix unless the switch and bulb is rated for it. This improper switch/bulb combination may act like a bad bulb or switch. 
  3. 3-way Switches: Are defined as two switches with one light circuit. Either switch on this light circuit should be able to turn the light on or off no matter the position of the other switch.
  4.  4-way Switches: Are three switches with one light circuit. Any one of the three switches should work the same as the 3-way switch and should operate the lights regardless the position of the other two switches.

TIP: If the 3&4 way switches do not operate as described, they could be bad or wired incorrectly. It is not unusual to find a 3 or 4 way switch to be previously replaced and not re-wired correctly. See Wiring a 3-Way switch or Wiring a 4-Way electrical switch

Electric Outlets: This inspection involves visiting every electrical outlet in the house.  Electrical outlets are very durable and can last a life time, however the excessive wear and abuse can cause damage to them.c140_product1

  1. Testing: Test each and every outlet to validate voltage and polarity. Purchase a low cost outlet tester much like the one pictured to the right for this inspection. They are self explanatory in their use. Generally you plug them in the outlet and they will provide a self check set of lights that will provide a go-no-go indication. TIP: Make sure you check both outlets on the receptacle as they can be wired separately.  An outlet can fail a test and appear to work properly. The three most common failures are, 1) reversed polarity, 2) open ground, 3) open neutral, 4) Hot open.
  2. Reversed Polarity: Hot and neutral are terminated on the wrong connectors. The outlet may still appear to work correctly. 
  3. Open Ground: The ground circuit is not complete. This usually happens when a grounded type (3 holes) outlet was used to replace a faulty 2-wire receptacle. TIP: Even though this outlet will appear to be working properly and will not cause an issue when using a lamp, this open condition can create issues with electronic devices such as computers, TV’s or stereo receivers.
  4. Open Neutral: Similar to Open ground.  TIP: Even though this outlet will appear to be working properly and will not cause an issue when using a lamp, this open condition can create issues with electronic devices such as computers, TV’s or stereo receivers.
  5. Hot Open: The outlet will be dead.
  6. Receptacles: 2 prong vs. 3-prong outlets were prevalent in houses built prior to 1965 and without an adaptor, you will not be able to properly use a plug cord with 3-prongs. The NEC code changed around 1965 requiring grounded outlets be part of new construction. If your house was built around 1965 and you find 3 prong outlets or a mix of both and the wiring was not upgraded, the tests performed in item 1 will reveal those problems for you (typically open ground). Even though the receptacles may appear to work properly, ghost problems may occur. If your electrical system is based on a a 2-wire system, 2 wire outlets and adapters yellowstone-0111are still considered acceptable. However, proper grounding for today’s electronics may not be compatible and rewiring your house may be considered.   
  7. Physical Damage: Inspect each outlet for physical damage. If the outlet or the face plate is damaged, they should be replaced.
  8. Warm Outlets: If the outlet feels warm to the touch, the outlet or the wire connection may be faulty. Replacing the outlet should resolve the problem. Purchase a higher quality version of the same receptacle (about 3 bucks) and used the screw down terminations. For more detail testing of this condition, see the article on Warm Outlets
  9. Overloaded Outlet: Most residential outlets are rated for 15 Amps maximum. Installing an excessive amount of electrical devices can cause problems. TIP: In these occasions where you need more outlets from the same receptacle, use a fused power strip. The power strip will include a fused breaker on the device. If an overload occurs, it will trip and protect the wall plug and the circuit from damage.
  10. GFI (Ground Fault Interruption) Outlets: GFI outlets are found in newer (or remodeled) houses. Typically GFI outlets will be found in the kitchen, bathrooms, garage, outside outlets or areas where the homeowner may be exposed to water while using the outlet. GFI outlets look a littleoutlet different and should be labeled as such and will have a self test button. The test button should disable the outlet and expose a reset light or button. Press the reset button and power should be restored. If the outlet does not disable and reset during the test, it should be replaced. In some cases, GFI outlets may be wired together and will cause multiple outlets to be disabled at the same time. TIP: These additional outlets may look like regular outlets but SHOULD be labeled as GFI, but don’t be surprised if they are not. Additionally the controlling GFI outlet may or may not be located in the same room.

Key Inspection Points and Action Items:

  1. Inspect and operate all electrical switches to ensure they operate properly
  2. Inspect and test all outlet using an outlet tester.
  3. Replace or repair the outlets and switches as necessary.
  4. Read my article on Warm Outlets.

Energy Vampires: Ways to Reduce Energy Consumption Around the House

June 17, 2011

Energy Phantoms or Vampires account for approximately 5% of the electrical energy used in every household, spread that across every home in the US and it adds ups up to 65 billion kilowatt-hours of wasted electricity each year.

As quoted from the Investigations of Leaky Electricity in the USA  paper ….. the average US house leaks constantly about 50 Watts. This is approximately five percent of the residential electricity use in the US. Leaking electricity falls into three major categories: video, audio and communication. Video equipment such as TVs, VCRs, cable boxes and satellite earth stations account for the largest share of residential leaking electricity, approximately 35%. Audio equipment accounts for 25% of standby consumption, and communication devices (answering machines, cordless phones and fax machines) are responsible for an additional 10%.

Energy vampires  can be defined as electrical devices that consume an amount of energy by doing nothing but waiting to be activated or used. This standby mode can be most recognizable in TV’s, video and audio equipment. But it really goes way beyond that.

Some of the common energy wasters in most homes are the adapters (aka: wall warts) that come with rechargeable battery-powered cordless phones, cell phones, digital cameras. You will also find them with many music players, power tools, and other electronic devices.

Conceptually, if you can just unplug all of  them when not in use, this would solve much of the problem. Easier said than done. Being the techno geek that I am, there will always be a another way.

Techno Solutions:

  1. Individual Timers: You can use traditional electrical timers or this new style like this Belkin unit. It is designed specifically for applications that only need to be on for a certain amount of time where the specific time of the day is not important. At $10 bucks, it might be a good solution for your clothes iron, electric tooth-brush or MP3 player.
  2. Group Timers: Combined with a surge protector, these devices will not only protect the equipment connected, but also shut them down to cut off the phantom load. Price wise, they are still in the same range as a regular surge protector/power strip. Additionally, many of them include a couple of priority plugs that stay energized all the time.
  3. X10 Technology:  If you read my article on X10 Technology, you may  have already figured this out. Combined with your X10 units and the software package, you can set timed events for all of these devices. Or combine one with a power strip. If its possible; try to cluster all of these type devices into groups. Plug all of them into a  power strip, then plug the power strip into the X10 timer. Schedule the timer to run only a certain amount of hours per day. Probably 3-5 hours max.  For devices like televisions, DVR’s and audio equipment; try to do the same thing. If you dont use X10 timers, any traditional timer will work as well.   (TIP: If you have a cable box, U-Verse or satellite receiver, it would be best, not to cycle this device on and off. It is very normal for the service providers to perform late night downloads to update your software, turning them off at night may be problematic and cause you to have some service interruptions or cause you to miss some updates.)
  4. Energy Star Equipment: As part of the design specification, most energy star devices do a good job in reducing the phantom loads. However, because devices like televisions, microwaves and DVR’s usually have clocks in them, they will still use a little bit of energy. If you choose to shut these devices down, just understand that the device might require you to re-set the clock every time. The only way to find out, is to try it.

Managing Other Electric Devices: Here are a few tips for keeping the energy usage in check on the non-techy type equipment:

  1. Refrigerators: This device can use as much as 20% of your total consumed AC energy.   Most new refrigerators with electronic thermostats come preprogrammed to run 0F and 40F (freezer/refrigerator). If you have an older style, use a thermometer to make the adjustment. Set the freezer between 0-3F. TIP: Energy Star rated  refrigerators will make a significant impact on your energy usage.
  2. Clothes Dryers: Use the cold or warm cycle s as much as you can. Avoid the hot cycle.
  3. Dishwasher: Always run it full. Dry them cool instead of hot. Drying cool does not impact the dishwashers ability to sanitize the dishes. However, you may have to wipe them off before you store them. Doing this will reduce the dishwasher energy used by 20%.
  4.  Water Heater Thermostats: The default setting for water heaters is 140F, 120 will work in most cases. If you live in the southern part of the US, it is easy to drop the temperature during the summer. You will never notice the difference.
  5. Set Back Thermostat: Even though this does not technically fit into this article, it is a pivotal element in energy reduction. Worth an article on its own!!
  6. Energy Star Rating: Look here first when replacing appliances. These subtle changes will make positive affect on your overall energy usage

The Gas Gauge (Geek Overload): Believe it or not; studies show that if we are able to monitor the amount of usage of a product (while in use) it will cause us to use less. There are multiple devices on the market today; such as TED, Power Cost Monitor, and Energy Monitor that will provide instant feed back on energy usage. You will be able to see all the energy vampires at any time of the day. Some of them have software with data loging history, peak demand and the list goes on. Its pretty cool (geeky) to walk around the house and start yanking plugs and watching the meter drop. (NOTE: The devices mentioned may require  installation, in some cases they only work with certain brand of meters. Read the webpages carefully before purchasing).

Google Power Meter: In their “save the world mentality” Goggle has teamed with some utilitiy and equipment providers to allow you to view your usage on line. Neat idea and its free, but has limited availability.

TOP Household Electricity Vampires (Courtesy of Lawrence Berkley Laboratory)

Appliance Saturation Watts Watts / House
TV 180% 6 10.8
Cable boxes 50% 20 10.0
VCR 80% 10 8.0
Compact audio 67% 10 6.7
Answering machines 60% 5 3.0
Alarms 19% 15 2.9
Video games 55% 5 2.8
Portable stereos 65% 3 2.0
Rechargeable vacuum 20% 5 1.0
Cordless phones 49% 2 1.0
Fax 4% 15 0.6
Satellite 5% 11 0.6
Toothbrush 13% 3 0.4
Smoke detectors 84% 0.4 0.3
TOTAL 50.0

So what is this in dollars and cents. For example; if you use 1000kW per month at .12 per kW, that works out to be about $6 bucks a month. (1000X.12)*.05=6. Unless you are prepared to take some drastic measures, you may be lucky to cut 50 to 60% of that number. So look for $3-5 per 1000kW used as a target.

Okay, this article might be a little anal, to gain back $6 bucks a month as a payback period is not worth recognizing. However; look at it like a leaky faucet. Its not a bad idea, and long term its will save you a couple of bucks and if everyone did it we would have less dependency on the grid.


Residential Surge Protection Using TVSS’s SPD’s Part II

June 7, 2009

damaged modemAn  analysis commissioned by State Farm Insurance found of 5500 detailed claims, more than half of the loss was related to telephone and electronic appliances.

As we become more connected through smart technology, AC power and low voltage or non-voltage carrying conductors become intertwined through the technology. When you think about it, more and more devices have an AC power cord  and a communications port for the transmission/reception of an external signal (video, DSL, etc.). Known as  “multi-port” equipment (AV Receivers, TV’s Modems, Computers, etc.) these devices add complexity to the transient voltage issue by creating additional doorways into the equipment. As we saw  in the AC Ground and Bonding article, external surges can enter the house as easily through the Telephone line, CATV or Satellite Dish as the AC utility. Studies show, even with a TVSS in the AC circuit, micro-electronics embedded in the equipment have failed due to transient voltages passing through the communications link. According to the same insurance study mentioned above, equipment including micro-electronics such as computers, TV’s, VCR’s and Satellite receivers recorded more significant losses than single-port equipment. This is not news to most of us. However, the point to recognize here is that any incoming services that arrive inside the house on a current carrying conductor (copper wire) has the potential to allow a voltage surge into the house and into our electronic equipment.

To make matters worse, having proper surge protection on the AC service and not on non-power related services may actually enhance the opportunity for a fault to occur in the multi-port equipment through surge current.  This  surge current  can create a  voltage shift  at the secondary-port on the equipment producing damage in the equipment. This voltage shift condition can also be rooted to a difference in voltage potential or ground reference at (you guessed it) the service entrance ground. This is the reason why we have seen more emphasis from the standards bodies (National Electric Code and National Institute of Standards Institute)  on the common grounding and bonding of all the incoming services (Telephone, CATV and Satellite TV) found in a typical residence. For this reason, in 1992 the IEEE  recognized this potential fault condition and coined the term Surge Reference Equalizer. Even though the industry has not really picked up on the term nor have they created a specific standard, the  UL1449 listing for this Class B surge protectors is acceptable for the time being.

 Proper Bonding and Grounding  Remain the Key Contributor to Both the Problem and the Solution

If you have read the four articles up to this point, you may think I am beating this subject to death, but grounding/bonding  remains the key contributor to both the problem and the solution. Complete the 8 point check list found in the AC Service Bond and Ground Part II.  If your house is less than 10 years old, it would be a fair assumption that all the incoming services enter near or at the AC service meter. Assuming all the services are bonded correctly as mentioned, you should be in good shape with the Telephone and CATV. For the rest of us, these services could attach any where around the house this also includes Satellite TV Antennas.  If possible, bringing all of these services within 20 feet of the AC Service entrance and attaching them as mentioned will assist in improving the ground system. (TIP: Satellite installations are typically located where they provide the best signal, bringing the ground termination from AC service entrance is important here as well).

Surge Reference Equalizer

surge protector class b 2At this point, we will assume that you have a good common ground with an equal ground reference. With that said you have successfully reduced the risk to multi-port equipment, BUT, both the IEEE and the NIST support the use of the Surge Reference Equalizer. As pictured, it looks like a typical Class B surge protector, but also has ports for communications ( RJ45 terminal, and threaded CATV terminal. With this type of TVSS there will be a PORT-IN and PORT-OUT set of connections.  Consider a Class B surge protector that includes both communication ports and CATV connections collectively in the same product for home theater equipment, set top boxes, satellite equipment, computers and any other mutli-port electrical equipment.  

Additionally Square D has release a whole house model that includes a Class C surge protector and the connections for Telco and CATV services. Tiered protection is still recommended if you decide to follow the whole house approach. (Square D Model SDSB1175C). NOTE: This method of reference equalizer is fairly new as previous practices supported keeping the services segregated until the point of termination, (CATV, Phone) independently until they reach the point of  use or the device that is common (i.e. TV, PC). As you will note, that is how I built my system. This is still an acceptable solution. 

Additional Choices – Surge Protection for Communication, CATV and Satellite:

Telephone Service: Most wire-line telephone service companies provide surge protection. If your telephone service was installed less NIDthan 10 years ago or has been worked on in that time frame you will probably have a NID (Network Interface Device) at the telephone entrance.  Telephone companies typically use “Gas filled arrestors”. Even though you may not have a NID, you probably have gas arrestors  if your phone  has been serviced in the last 20 years. Gas arrestors replace Carbon arrestors as the gas style will defeat the surge without a long term loss in service as they will self restore automatically. Since I built my grounding system before the Surge Reference Equalizer was readily available,  I placed an additional surge suppresor on my telephone line (Channel Vision C-0410). Much like the Telco provided unit it will disconnect the line in the event of a surge then restore it momentarily. Based on the performance characteristics of a Surge Reference Equalizer (SRE), in theory, I may still have a fault occur if my ground reference is not equalized and my Category A, B and C surge protectors are unable to defeat the surge prior to entering any of the protected equipment.  Since the current UL1449 is the only published document and it seems to favor an AC type failure,  for now, I am staying with my current system architecture using the C-0410  surge protection. TIP: You may have communications and/or video services provided by fiber optics. They will not have surge protection as optical services are unable to carry voltage or surge current.  If you are unsure if you have fiber optic services, the NID will have a consumer replaceable battery pack that you were informed about during the installation of the services.
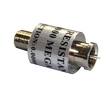
4EDHICCAOT4EQ5CAS0S8SJCAJTJ6C8CATZJ50ECAZ5INCICAHEAI1MCAUYSD7KCAH7U0MDCAW5L3WSCA19XS37CAG3S3RACAVHVBMWCAXWUAI6CAED0UDWCAI9J2UFCAR71UZ8CA65BE4DCAQB2POKCATV and Satillite Services:In practice, the gas style arrestor  is used in these services as well. Because they use coax as a cable medium the arrestor looks a little different but perform in a similar fashion as the communications arrestor.

Theory vs. Science

One of the difficulties with this subject is it is very difficult to test your solution. To replicate a surge equivalent to a lightning strike is not feasible nor recommended. For this reason, surge protection, TVSS’s, SPD’s and bonding and grounding is not as black and white as we would like it to be and neither are the solutions. As you have seen in this article , there may be multiple solutions to the methods I have described. But overall, the method should still retain the same theme.   I have engineered large systems in multi story buildings and spent hundreds of thousands of dollars (not mine) to create the right grounding network  and still had recordable faults, so don’t think you will ever be 100% protected.  

One of the best articles written to date for residential bonding/grounding and surge protection is “Surges Happen”   produced by the Institute of Standards and Technology. This article covers the topic in very simple language and easy to understand instructions.

If you haven’t already, you may also want to read my 4 previous articles; AC Ground and Bonding, Electrical Switches and Outlets, AC Service Bond and Ground Part II, Residential AC Surge Protectors,

Key Inspection Points and Action Items:

  1. Annually check all your TVSS devices to insure the they remain in the protected mode (LED indicator).
  2. Follow the inspection routines as defined in AC Service Ground and Bonding Network by inspecting the mechanical connections and terminations.

In writing this series, it became apparent that I could not cover the subject in 1 or 2 postings. I hope I kept your attention and it made sense. Feel free to comment or send specific questions to Homeownerbob@gmail.com


Residential AC Surge Protection Using SPD’s and TVSS’s

May 31, 2009

lightningNeither the IEEE (Institute for Electrical and Electronic Engineers) or ANSI (American National Standards Institute) recognize Joule Rating as a means to determine any level of surge protection.

The best way to deal with electrical surges and spikes is to divert them from entering the house in the first place. This is why the external ground system mentioned in Part II is so important. Spikes and surges look for the quickest and shortest path to ground.  Industry Standards recognize that creating a tiered or layered approach to transient voltage  management for your house will provide the best protection, but it’s still no guarantee. Lightning strikes and surges can appear to have their own mind when it comes to seeking ground.  Following the recommendations that I have mentioned in this series of articles will assist in properly protecting  you and your house.

Layered Approach to Surge Suppression

Approaching  surge protection with tiers serves to create layers of  filtering .  ANSI and IEEE acknowledge 3 tiers, A, B and C.  Each level is recognized to provide protection for a defined application. Look at the following drawing to visualize the different tiers and location of the protection device. Class C is located at the service entrance or meter, Class B serves sub-panels and points of distribution (power strips), and Class A provides protection at the source or point of use (POU).

 TVSSv2

Most whole house residential grade TVSS’s  (transient voltage surge suppressor) use MOV’s (metal oxide varistors) for protection. By design, the TVSS does not absorb the fault but divert it to ground. By doing so, these faults erode the MOV’s over time. For this reason, most high quality TVSS’s include some form of “wellness” indicator or failure alarm (red or green LED lamp). Once the MOV’s are destroyed, the lamp indicator is extinguished or in some cases sets off an alarm. Studies show these MOV equipped TVSS’s can last up to 10 years. Granted, this life expectancy is directly impacted by the number of spikes and surges diverted by the MOV’s. So if you live near me in Texas, Oklahoma or places with lots of lightning, don’t count on the 10 years of life. 

The IEEE  recognizes three classes of surge protection and they all perform a defined task, but regardless of the class, all the surge protectors should meet these standards.

  • Listed  with UL 1449 Second addition (not meets, complies or designed to). TIP: If a product is “listed” with UL, Underwriters Labratory actully tested it for compliance to the standard.
  • Comply with ANSI/IEEE C62.41 as it pertains to the class category (C, B or A)
  • SVR rating of 400V or less (probably the most important rating)
  • Per phase rating of 70,000A or less
  • TVSS shall protect against line to line, line to ground  and neutral to ground voltage transients
  • Include visual indicators (red or green LED) for proper operation or failure of the TVSS
  • Class C & B devices shall operate bi-directional and treat both positive and negative impulses, yielding line control and short fliker ride-through. If the Class A does this that’s good too, but more important in the Class B and C
  • In shopping for a TVSS (aka SPD or Surge Protection Device) look for this information on the box or possibly in the fine print with the instructions.

    Surge Protection Devices come in many shapes and sizes at each class allowing you different choices. If you choose to install a Class C unit, you may have to employe an electrician, otherwise  you can use plug-in modules for the other two levels. 

    Class C Whole House TVSS Suppressors for Service Entrance Applications: Intended to be located at the incoming AC service or AC service panel. For various reasons, there are multiple types and styles for Class C residential TVSS’s. Hopefully one of these styles can be integrated into you electrical system.

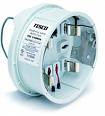
    8MLB34CAXTULUCCA683WXWCAZ9RMICCAAJD0LLCA2TBUMZCAJP70R2CAQBLV90CAXW8Z0KCAD3SO8UCAWLMVA8CAW85X0MCA09XOTYCAIKMTBACAXK0BG6CAGJA7AICA11C7C0CAZRGZN5CASXME2QMeter Base TVSS: In some municipalities the utility carrier may offer to sell or lease you this type of TVSS. Other than the fact they will probably want to charge you a monthly fee, I like the meter base style. This TVSS is placed in the circuit prior to entering the house service panel. This allows the TVSS to divert any external surge to ground prior to entering the AC Service Panel where a surge could go through the house instead of the intended ground source.   I spoke with my electric provider but they did not offer this service nor would they allow me to supply my own.

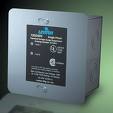
     Circuit Breaker Derived TVSS: With this design, the TVSS is wired into the house AC Service panel. Like most, it is equipped KGXLCICAK8YY0ACA4Y6SENCAT00S0QCA8ILWGGCAI4RG93CAPL7N6JCAIOLQEOCA89V8DICADV5D7SCAFP6C2ZCA6SSVLQCACWP20OCA0IU2YTCARFBJFUCAW6A4B2CABBYFDICAZGFPHTCAIU4OGSwith MOV’s and a state of health LED lamps. These styles can be purchased for both indoor and outdoor applications (indoor model pictured). The key here is to keep the TVSS installation as close as possible to the service panel and the connection wire should be as with the short as possible (6″ or less). For my house I also re-arranged my circuit breakers in the panel to allow me to place the TVSS circuit breakers as close to the incoming mains as possible. This is just a little added work to divert the surge as soon as it enters the panel. 

    QO Breaker TVSSAC Panel Based TVSS: Similar to the circuit breaker design previously mentioned. This breaker style TVSS consumes 2 breaker positions to provide panel protection. The advantage of this type is that it connects directly to the bus terminations in the AC Service panel. The disadvantage is that it consumes two positions and you may not be able to locate one that fits your AC service panel. 

    Power StripClass B  TVSS Suppressors for Distribution and Short Branch Circuits: As a classification the “B” type is recognized to serve electrical sub-panels and distribution, meaning a power strip with multiple outlet with a collection of devices to protect.   The Class B is the most common type found in electronics, computer stores and home centers. You will have numerous to choose from. Just remember to use the criteria listed above to  help with your choice. I would not use the joules rating as part of your decision making process.  Belkin surge protector

      Class A TVSS Point of Use Surge Protection Device for Outlet and Long Branch Circuits:  As a Class A TVSS, this device can either be an individual plug-in module (as pictured) or the outlet itself. I have used both and depending on the application the outlet version can be a better choice when you have limited space, such as behind a refrigerator or Plasma TV. Additionally, I found the outlet style more difficult to obtain and more than double the cost of the plug-in style. They both include the proper operation indicator. 

     By this point you should recognize two major points. 1)  Having proper grounding is imperative and, 2) surge suppression goes beyond point of use (POU) devices, 3) implementing a tiered approach is necessary to protect you and your household adequately. 

    Believe it or not…. there is still more. Next time I will discuss specific surge protection for your CATV and Telephone service.

    You may also want to read: Electrical Switches and Outlets, AC Service Ground and Bonding, AC Service Ground Part II,