Watering your Foundation – Its a Texas Thing Part III

March 23, 2016

Texas-Drought-2011
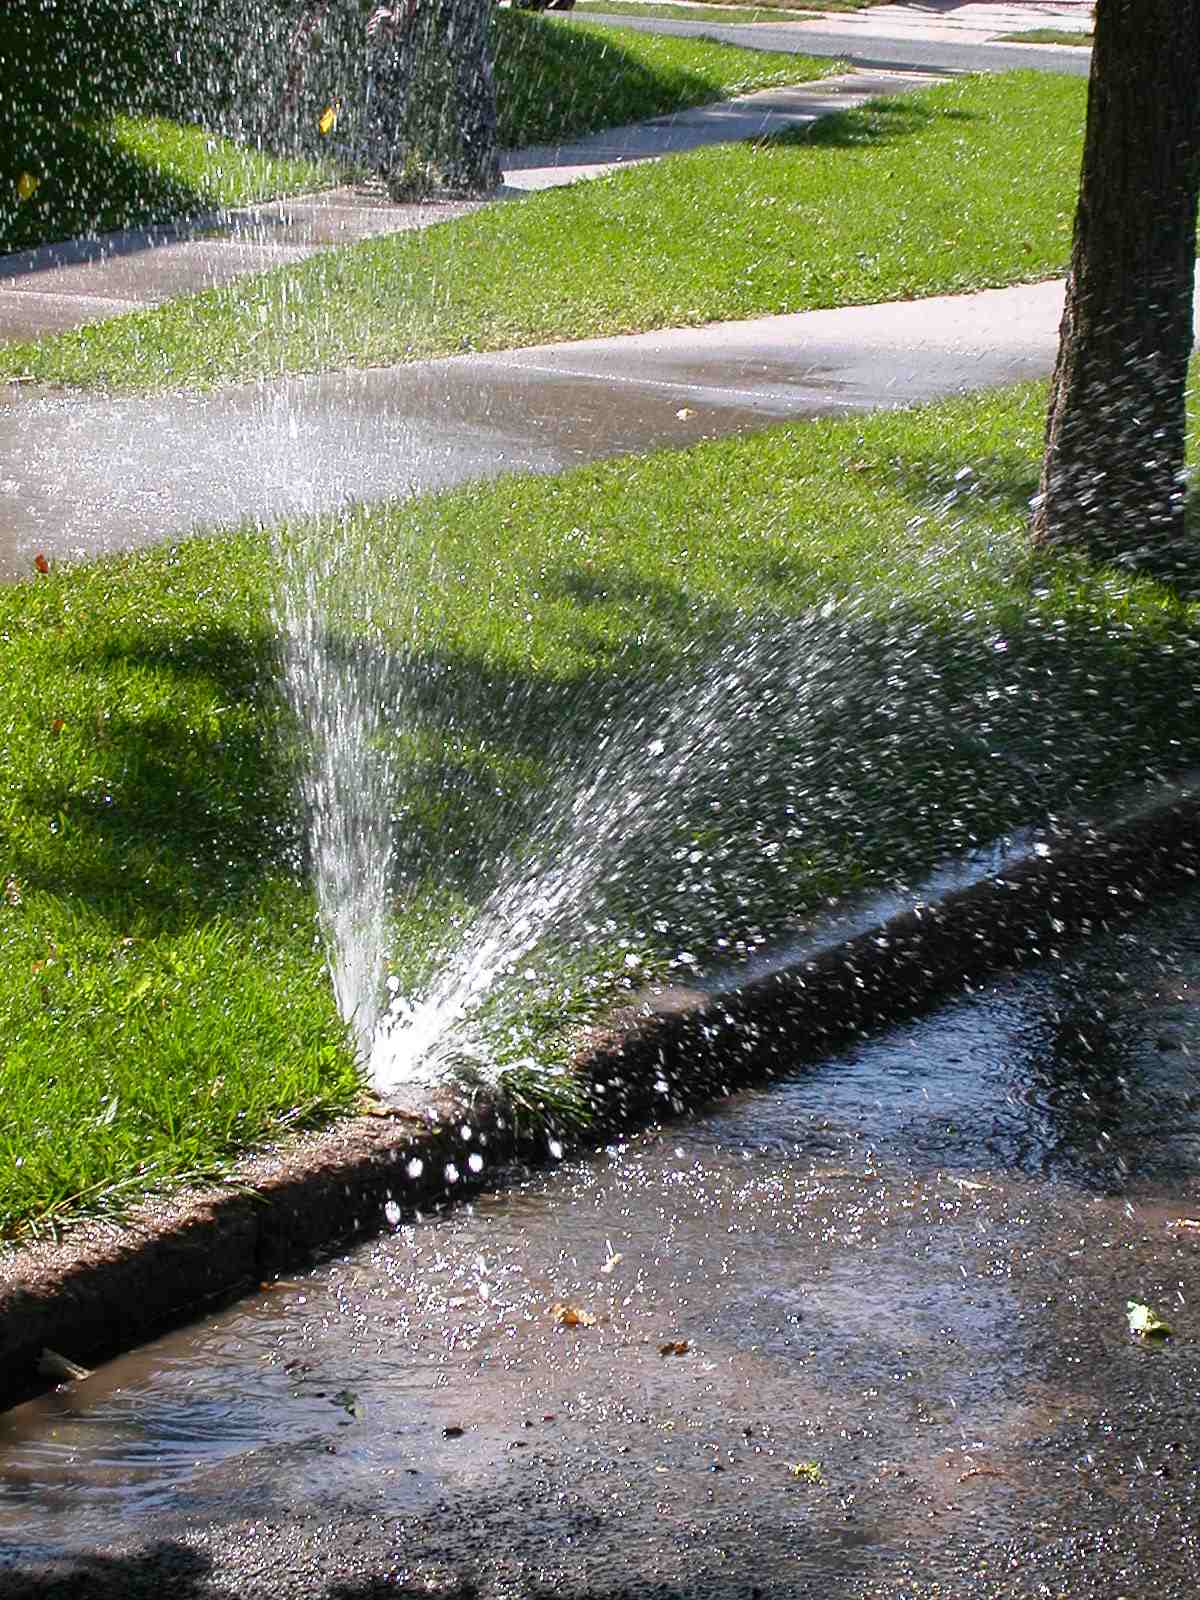
As mentioned in my last post on watering your foundation; Here in North Texas it is essential.  Since this is not a one time event but a regular requirement, you might as well look at a relative permanent approach to the solution. I identified several ways to do this in my last posts on the subject but I wanted to share a bit more permanent method. The concept is the same, but its a bit more work, and you may want to hire an irrigation specialist to do it.

The biggest difference in this solution is capitalizing on the fact that you may already have a permanent in-ground sprinkler system. With this system, you operate it as any other section to your irrigation system profile and its no longer a separate system to take care of.

Criteria of existing lawn sprinkler system: For this to work, you need an automatic lawn sprinkler system and a couple more conditions to make it work.

  1. sprinkler controllerElectronic Irrigation controller: The irrigation controller will be the source of the schedule to water the foundation.
    1. Spare Zone: Most controllers come in 4, 6, 8, 12 (and so on) zones. You will need at least one vacant zone position for this to work. You can query the controller by stepping through the zones. When you select the zone with the controller, look for statements in the readout that could say things like; vacant, not-wired, turned off, etc. It that doesn’t work, open the back half of the controller and look at the incoming wiring. Each position that has a number on it represents a zone. If you find a number with no wire, you should have a vacant zone. If you don’t have any vacant zones, your forward path from this point would be to replace the controller with more zones. This may exceed your budgetary limitations
    2. Spare Wire: In many cases during the initial installation, the cable with the zone wires in it, may exceed the number of connected zones. So look for some coiled up wires in the base of the controller.  If that is the case, you are in luck and can use one of the spare wires. If you have no spare wires but a spare zone on the controller, you would have to add a pair for the new zone. (a colored wire and a common (white) wire).
  2. sprinkler-valveAdding a New Valve: At this point, you have a 1)zone position in the controller, 2) a spare wire for the new zone. Now, locate all the existing valves in the yard. Specifically ones that are close to the house.
    1. In that valve box, look for the same color wire you identified in the controller, if it is not there, check the other valves. Worst case, you may have to bring a new wire to your chosen location.
    2. Dig up around the existing valve and identify which pipe is under pressure all the time. Once identified, turn the main water supply off that feeds the sprinkler system (probably near the water meter), you will cut into the pipe and add a new valve. You may have to run a short piece of wire from the existing valve to the new one to hook it up. The connection will be one colored wire and one “Common”.
    3. When you buy the new valve, make sure it has (low) flow control, and or is designed to work with zones that don’t use a lot of water pressure. The drip lines you use have a low GPM (gallon per minute) rating as well as low pressure.
  3.  Polypipe: Depending on where you locate the new valve, you may need a section of polypipe to get you to the foundation.  You can cut the hose to length and use the polypipe fittings to make up the ends. Make sure the polypipe and fittings are the same dimensions. Since all these connections are on the low pressure side of the system, these fittings are just simple resistance (chinese finger) snap in connectors.
  4. Drip Lines:  From the poly pipe, use the same fitting to transition to the Drip Line. These hoses are designed with drip emitters in the hose every 12 inches.  Run it around the house keeping it about 6 inches from the foundation.  You can bury them a couple of inches or hide them with mulch. Staking them with landscape stakes will help keep them in place as this product does not like to lay flat to the ground. You can purchase the hose in bulk from the Orange Box store of Sprinkler Warehouse. You will need to also purchase inter-hose connectors as well as a way to connect to your water. If you have to make a sharp turn it is better to use a fitting than bending the pipe. You do not want to crimp the hose. Splitting the line with a Tee is totally acceptable, and it will also allow a little better flow control if the go half way around the house with one feed and half with the other.


So here is what it looks like in dollars. Admittedly, you can probably do this a little cheaper, but I used high quality components, so this should last for years to come.

DripSys for house

Related articles:https://homeownerbob.wordpress.com/2012/03/05/watering-your-foundation-its-a-texas-thing/

Watering Your Foundation – Getting Ready for the Summer


Finding a Lost Sprinkler Head

July 18, 2009

Lawn Sprinkler4Finding a lost sprinkler head can be a challenge, simple in concept but difficult if you don’t have a plan.  Sprinkler heads can fail to rise to the occasion when under pressure. The longer they fail to operate the harder they may be to find. 

Perform these items first:

  1. If available, look at the drawing used during the installation system, it may work as a road map in identify the general location.
  2. Look for an obvious brown/dry spot. Run the sprinkler, it may pop up but be clogged. If so, disassemble it, clean it, reassemble it, install it and you are done. If not, go to #3.
  3. If the entire zone appears to be weak, you may find water pooling. This could actually be a broken head or pipe as in this condition you are consuming way more water than the design.
  4. With the sprinklers running, look for mushy ground  and water pooling. The head may be working, but it is too covered up to rise above the grass. Use a shovel to work the dirt (carefully). It may pop up once the dirt around it has been loosened up.

Missing SprinklerOkay, that was the easy stuff, now it gets hard. Go to the Orange Box store and purchase some sprinkler flags. Place a flag at each known head. Measure the distances between the heads as shown in the drawing.  You should find an area that does not measure (in relative terms) like the other ones. Start poking around with a shovel (carefully) in an attempt to expose the head 

Still no luck? Using the same method described in Finding Leaks in Sprinkler Zones and Common Leaks. You will need to turn off all the heads in that zone. Let the water run, hopefully,  it will show up since you are concentrating all the pressure to the missing head. Check your meter and look for moderate movement in the meter. If you have no movement in the meter the sprinkler head could be capped or not there at all.

Still didn’t find it?  You may not have a head there at all and the design just did not cover it well. So you may consider adding a head if the zone can accommodate the additional water use.

You may also take a look at one of my other articles for help in the Lawn Sprinkler catagory.


Lawn Sprinkler Nozzles, Can Changing Them Make a Difference?

July 12, 2009

sprinklers-01   

Heavy misting of the sprinkler heads can result in as much as a 25% loss in water.    

New sprinkler heads and nozzles coming on the market are claiming sizable water savings, but how much water can you really save (if any)?  Stream sprayers are normally found only in orbital or rotary heads and are typically found in larger landscaped areas and can be spaced 20′ to 30′ apart. With an open landscape, these heads can water more ground with less water. Up until now, there have been few options for smaller residential properties other than traditional pop-up heads using spray type nozzles. Spray nozzles are designed for spacing limitation from 8′ to 15′ and as with any type water sprayer, there is a correlation between distance and trajectory or arc necessary to obtain the distance. The greater the distance, the greater the height of the arc to obtain the distance. Greater distance = greater misting.    

But trajectory alone is not the only culprit to misting. High winds, high pressure, evaporation and excessive overspray all contribute to the water loss factor associated with misting. This misting can account for a loss of 10-25%. It’s this misting factor (more characteristic of spray nozzles over stream nozzles) that contributes to a lower efficiency found with the spray nozzle.  And its the low misting factor found with the stream sprayer that makes for an attractive alternative.     

In an attempt to make automatic sprinkler systems more efficient, some manufacturers have created a stream type nozzle designed as a direct replacements for the standard spray nozzle (aka pop-up sprayer). If you have read my earlier posts on lawn sprinklers you know that pop-up type spray heads can lose 10% or more of their water spray to the wind and evaporation.   Before we look at the differences between spray nozzles and stream nozzles, lets consider the ways to reduce sprinkler misting. Some of these items can be readily addressed, some are design considerations.    

Standard Spray Nozzles: Standard spray nozzles atomize the water to equally spray or spread the water out in an even flow throughout their spray pattern. They are great choice for small residential properties as they provide good water distribution in a reasonable amount of time. Additionally they have many different nozzles to fit the various application requirements.   

012106_lwn_sprinkler02_dt   

  1. To much pressure: Optimally pop-up sprayers work best at 30 psi. High pressure can cause excessive misting.  TIP: To test the zone water pressure, you have to remove a head, replace it with a riser and thread on a water pressure gauge, then run the zone and check the pressure while the zone is spraying water.
  2. Don’t water during high winds:   This can be managed manually or you can add a wind anemometer to your sprinkler controller that will shut down the system at certain wind speeds. Even though we typically water in the night-time hours (to avoid excessive evaporation), windy conditions are as common during the night-time as during the day.
  3. Keep water spray output close to the ground: This can be achieved by designing a system where the heads are closer (such as 10′ apart compared to 15′ apart)  Spray nozzles with shorter patterns use lower trajectories, will atomize the water less and have less distance to fall to the ground.  This item has to be addressed during the initial design as shortening patterns in an existing system could be considered a “do over”. I designed and installed my current system prior to stream sprayers, I took this approach by using 10′ radii heads. The water stays very close to the ground when the system is running. Granted, it caused me to use a lot more heads and zones. If I were to tackle it today, the stream sprayers would not only impact my water  usage, but cut back on material and zones installed. 
  4. Deliver the water in streams not in a spray or mist: The more you atomize the water, the lighter it becomes, allowing the wind to cause the water to drift away and evaporate before it has time to absorb into the ground or plant material.
  5. Deliver water directly to the roots through drip irrigation.  Flower beds can be easily converted (assuming your sprinkler system has specific zones for flower beds). For grass and turf this is a bit more involved but plausible.  In my current system I created specific zones for the parkway and driveway. Using direct bury drip lines, I am able to keep the turf green with virtually no run off. This is another condition that would need to be addressed in the original design.
  6. Refer to the  Alliance of Water Efficiency, for additional water saving tips. 

Water Use and Abuse   

There is a fine line between efficient water delivery and adequate water coverage. Many irrigators will “over cover” an installation to ensure all the grounds receive adequate water. The Irrigator wants to over-saturate the turf to avoid brown spots or low coverage areas, as making a re-trip to install additional heads can be costly. Creating a system that uses excessive water will cause them less problems in the long run. But in doing so, there may be a high degree of waste associated with the design. Don’t get me wrong, the lawn sprinkler business is very competitive and most people won’t spend the money to get a system with high-efficiency. Since water is still cheap and fairly plentiful this methodology will be with us for a while. However, the purpose of this article is to attempt to make your existing system more efficient and if you have a decent design, you can make some reasonable changes that will not terribly affect the performance of the system.   

Lawn%20edge%20pop%20up%201Stream Sprayers: Stream spray nozzles provides multiple streams from the nozzle in the defined pattern (90, 180, 360 degree pattern). To provide adequate coverage, the streams spray in a rotation throughout the pattern.  The beauty of the stream type nozzle over the spray nozzle is it will project water similar distances without high levels of misting. However, based on their delivery you may actually have to run the systems longer to get similar watering results, but since they are more efficient, it will not negatively impact the system performance.  With the move toward greater efficiency, the stream principle has been introduced to traditional pop-up sprayer. Some manufacturers provide them as replacement nozzles, where others require you to change out the complete head. TIP: Look at one of your spray heads to determine the brand, go online to see if the manufacturer makes a replacement nozzle, don’t be surprised if your local orange box store does not carry them. I have used Sprinkler Warehouse for many of my sprinkler parts and speciality items.   

The Test Case: I created a model zone with 4 heads, 2-180 degree heads and 2-360 degree heads.  I used the Toro 570 model body as it can be equipped with either the spray nozzle  or retrofitted with the stream nozzle. Optimally, the comparison is based on a 30 psi rating at the head.    

In converting the system from spray to stream we need to match the pattern as close as possible. Since spray heads are a mature product, many patterns and styles are available, but with the stream nozzles, the available styles are still limited. With the Toro brand, the new stream nozzles are not a direct comparison in spray distances and the stream nozzles may have to be tuned to reduce the pattern to avoid excessive over-spray onto the sidewalk. But they were pretty close.   

Stream Spray Matrix

Spray Nozzles De-rated by 10%


Sprinkler Table2

Spray Nozzles De-rated by 25%%


 From a cost comparison, it is beneficial to be able to re-use your existing spray heads if at all possible,  as having to buy new heads as well as the nozzles will add up quickly. When you look at the water saved vs. the cost of the change, it did not prove out (for me) since water is still very cheap. However many municipalities tack on additional charges based on water usage, so it could make a difference for you. If you are interested in seeing how much difference it makes, take the water saved (listed in the table and calculate it against your dollar per gallon charges found on your water bill.   

Based on the results of the chart, here is my observations using the 10% de-ration chart.   

  1. It requires 86.72 minutes using the stream spray nozzles to provide the same precipitation value as the spray nozzle provides in 60 minutes.
  2. Even though it requires 26.72 minutes more, the stream sprayers use 393 less gallons
  3. Factoring in a 10% misting factor, the stream sprayers use 5.77% less water or 471.63 gallons of water per month.

At a 25% deration the numbers are a bit more dramatic as you could save over 1700 gallons of water per month.   

Conclusion:    

  • Consider using the stream sprayers in a new design as you can use less heads, less zones, less pipe, less fittings as well as less water. 
  • Convert existing sprinkler zones to stream sprays where high wind is normal or misting is excessive.

Recommendation: If you choose to replace your existing nozzles/heads, change one zone at a time. Let it run through part of the season, compare the results by looking at your turf . For proper watering don’t mix spray nozzles with the stream nozzles in the same zone. To obtain an adequate amount of water similar to the spray nozzles zones, the watering time may have to be increased on the stream nozzle section.   

To see the entire series of lawn sprinkler articles go to Lawn Sprinkler tab on the HomeownerBOB web page.   

Good Luck   


Finding Leaks in Sprinkler Zones and Common Problems

June 13, 2009

bad sprinklerRecognizing a water leaks within a sprinkler zone can be  difficult as they may not reveal their location until  under pressure.

How do  you recognize a minor leak  in the sprinkler zone if it’s not obvious?

  1. The first noticeable trait would be the zone does not appear to cover the ground as well as it used to. You may also recognize plant material or turf that appears dry or starving for water.
  2. Moist mucky dirt, soggy spongy area(s) in the yard. Someplace that never seems to be dry.
  3. New or additional brown patches  in the turf indicating low water coverage.

If you have read any of my sprinkler articles you know that most sprinkler problems are with heads and valves. Both provide obvious indicators of water loss. Here is a recap of the most common problems: 

  1. Weeping heads: A slight amount of water is passing through the valve when it should be closed. The sprinkler heads remain wet well after the sprinklers have run. Typically, disassembling the valve and cleaning will correct it.
  2. Dirty heads: Dirt, pebbles and grunge can lodge itself in the sprinkler nozzle as well as the body and shaft of the sprinkler head. These problems will modifiy the pattern, providing excessive water in the wrong places. Start by replacing or disassembling the head and cleaning it.  TIP: Like for like heads and nozzles will reduce complications in future repairs. When a sprinkler zone is turned off,  typically the lowest head in the zone becomes the relief valve causing water left in the lines to drain out. This is very normal. However, in doing so, a suction is created that can pull in surface water, and dirt from around the other heads. This dirt can migrate throughout the zone clogging the other heads. TIP: If the location of the low head is in a bad place, an in-line drain can be installed in the pipe, but you will have to dig up the pipe to do it.
  3. Broken head: Obvious water spray outside the defined pattern. This can be corrected by replacing the head or the broken parts.  TIP: Keep extra sprinkler heads to replace bad ones. Rebuild the old ones if you can. Remember to reuse or replace the nozzle like for like. Many times you can replace the entire head without disturbing the surrounding dirt. This reduces the opportunity of allowing new dirt into the system and keep you from having to to dig the head up. 
  4. Lawn butchers: Weed Eaters and edgers are the death of lawn sprinklers. They can easily destroy several heads over a season of mowing.
  5. Allowing dirt in the system: No different than the water system in your house, allowing dirt in the pipes creates opportunities to clog valves and heads, creating more work for you. When working on sprinkler heads and valves avoid this by taking the appropriate steps  to stop surface water back into the system. When you run a zone and identify a head that needs attention, removing the head may create a suction that will pull water and dirt into the pipes. Admittedly more work, by digging up the dirt from around the head and getting the hole deeper than the head connection can reduce the opportunitiy of allowing dirty water into the sprinkler system. TIP: If there is no standing water at the head, attempt to change it without digging it up as described in number #3, this will save you some time.

If you have corrected the problems associated with the above list and you still have problems, its time to look deeper into the system. Most likely, if you have gone this far you are recognizing that a specific zone does not present the same pressure, or cover its area as well as the others.  This trait is an indication of a pipe, joint or fitting leak, and the leak is large enough to reduce the zone pressure but not enough to create a pool or hole in the lawn. 

water poolTry this method to further isolate the leak:

  1. Assuming you have pop-up type heads, adjust the screw on the top of the nozzle  (on every head in the active zone)  to shut off the water on that head(s) TOTALLY. This increased pressure may be enough to cause the small leak to burst. Continue to walk the sprinkler zone looking for mushy ground and water pools.  Also, go look at your water meter for measured water usage.  Look for the meter to be moving at a medium to  rapid pace (make sure everything in the house is turned off). TIP: Since lawn sprinkler heads are not rated to hold full pressure like a faucet, some small degree of water oozing is acceptable.
  2. If you have other styles of heads or #1 didn’t find it, this step #2 will be dirty wet work.  Conceptually, it’s the same as #1 but requires you to expose each and every head on the zone and install a threaded cap to replace each sprinkler. In this method, you have  to remove all the heads from the equation and the zone should hold pressure just like any pressurized plumbing line. Check the water meter; if you still see a water loss, leave the zone on for 2 or 3 hours, or even the whole day. Again, look for water pools or mushy ground and check your meter.

You may also find benefit in reading the other articles I have written on the subject: Lawn Sprinkler Efficiency Part II, Lawn Sprinkler Efficiency Part I ,  Searching for Lawn Sprinkler Valves, Chasing Lawn Sprinkler Leaks


Lawn Sprinkler Efficiency Upgrades Part II

April 26, 2009

sprinkler-head3Nearly 60% of residential water consumption can be attributed to landscape watering.

Hopefully you have read my previous posts on “Lawn Sprinkler Efficiency and Chasing Lawn Sprinkler Leaks “. If so, you recognize that a fine tuned system can provide greater efficiency and reduced water usage. However, you may want to go further. Stage III and IV represent some significant decisions regarding  the way you treat your landscape.

Stage III:  Plan to get wet and dirty. This stage will impact the designed water delivery. These changes are a  bit lengthy and involved and may take several weekends to complete the items.

  1. Make a sketch:If you don’t have a drawing of your system, use sprinkler flags to identify each sprinkler head in the zone. You want to identify all heads associated to a zone, one zone at a time. Each existing nozzle/head should include a brand and  a number on the top edge, 10, 12, 15. As well as a pattern identifier 1/4, 1/2 or F.  Sketch out your lawn and zone. Typically, residential irrigation systems are designed based on 30 PSI of water pressure at the head. Go to the manufacturers webpage and look up the GPM usage for each head.   On your sketch identify each head by pattern, radii and GPM. Total the GPM per zone. TIP: Whatever changes are made in the following steps, do not exceed the calculated GPM by more than 10%.  
  2. Correcting design issues: After completing item 1 and 2 you may have noticed some sprinkler heads are not exactly in the right place. This may be based on poor placement, changes or growth in the landscape material.  If relocation is required ensure that you retain adequate head to head coverage with the neighboring sprinkler heads. TIP: Read the nozzle; if the nozzle is stamped with a 10′ on the top, you should have other heads within 100 to110% of the distance of that number  from the head location. So if you decide to move the head, locate the neighboring heads to ensure the relation lawn20edge20pop20up2011stays comparable.
  3. sprinkler-bodies1Replace Sprinkler Body: Similar to #2, but the solution may be to obtain a sprinkler body that allows the nozzle to extend above an obstruction.  If you find pop-ups in flower beds but the spray is obstructed by plant material, changing the head to a riser can provide the necessary reach allowing sufficient coverage. TRICK: Risers (ridged plastic pipe with nozzles) can use the same nozzles as pop-ups but require a transition fitting to convert the threaded pipe to a sprinkler head nozzle. These fittings are brand specific as well.  
  4. Convert from Spray to Stream Nozzles: This is a dramatic change, not to be taken lightly and I would only convert one section at a time to see if you are okay with the results and performance. Even though everything you have done to this point will be beneficial, changing the nozzles will drastically reduce your water usage, but may require longer watering durations. Look for a future write up on Nozzles for a comparison in the water usage. As an alternative to this you may try finding nozzles that are low arc, as lowering the trajectory arc  you are spraying less water high up in the air. Since the  low arc nozzles typically have shorter radius patterns, this may not work, but is worth keeping in mind as you can use nozzles with different arc’s in the same system. Read my article on changing sprinkler nozzles; the payback is not as much as you might want but its worth a look.
  5. Parkway’s: In my neighborhood, I see a tremendous amount of water traveling down the street (everyday) due to this type of runoff. If the area is watered with standard half and quarter circle nozzles, you may consider changing the nozzles to strip spray nozzles. Strip spray nozzles project a rectangular pattern and may help you manage the water usage and overspray. Technically this is still a spray nozzle and it is okay to mix this head with other spray nozzles.  As I mentioned earlier, Irrigators will collect sprinkler heads together to complete a zone water budget, so this zone may include heads in the main body of the lawn and this could complicate your efficiency measures.

Stage IV: More dirt more wet. This stage is very severe, so only consider these steps if you believe you are still not where you want to be with regard to water usage.  Some of these steps are major redesign initiatives and its a lot of work. Hiring someone to do the irrigation work can be expensive as installing new sprinkler systems. You will need to be the judge on Stage IV. I don’t consider these items in order, so weigh your options. 

  1. Change Landscape Material: By changing your plant material to drought tolerant regionally specific plants, you can successfully reduce your watering requirements for your flower beds. Granted if you still have a large amount of turf your water demand is still high. You may consider reducing the percentage of turf. You can replace it with plant material or porous aggregate (gravel, crushed granite, river rock, etc.)
  2. Stop Using The In-ground Lawn Sprinkler: Simple to accomplish and it will dramatically reduce your water usage. Granted, you are back to dragging hoses around the house but point-of-use sprinklers will not use near the water an in-ground system uses.
  3. sprinkler-controllerReplace the Lawn Sprinkler Controller:  Understanding that better water management can further reduce our water usage, typical Sprinkler Controllers (or Timers) provide water on a timed bases. If  the timer is equipped with rain, wind or freeze sensors they will provide a higher degree of water management. Hopefully you already have those add-on devices to your existing controller at this point. However, in Stage IV stepping to a digital grade of water management is required to reduce your water consumption further.  At this point, I have found limited products available directly to the public as most of the “Smart Controller” are defined to be professionally installed.  Many of them require a monthly fee as they are tied to a weather database for regular downloads (I dont like monthly fees). However, I recently found a product called Cyber-Rain. They appear to be headed down the right track, by using your PC and the Internet to upload the most current weather conditions to adjust the water settings accordingly. They use a wireless connection to get to your PC and provide you proprietary software to further manage the water delivery. At $400 it’s a bit steep if you compare it directly to a entry level $60 water timer, however here in Stage IV, we are very serious about water conservation. I have not tested this product but so far I like what I see.
  4. Water Only The Flower Beds.  In my part of the country watering flower beds serves two purposes, 1) to keep the plant material alive and, 2) it reduces opportunities for foundation problems associated with the expansion and contraction of the soil. Assuming your system design has the flower beds in their own zones, it will be simple to just turn off the other zones at the controller.  If you have Bermuda grasses, you can stop watering them  and the grass will go dormant, but don’t try this with St. Augustine or Fescue as this grass will die without water. If the flower beds are combined with the turf sprinklers you may consider #5.
  5. Rezoning  sections: By now you should know where each section is, what it waters and how much water (GPM) per section. Segregate flower beds into their own zones. This may include digging and re-piping some heads from the flower bed zone to another zone.
  6. Convert Flower Beds To  Drip Irrigation: This is all based on the flowerbeds being zoned separately. Since drip system run at lower pressure, you will need to change the zone valve that can support the lower pressure.  Then its a matter of capping the existing sprinkler heads (or turning them off). I have used the (brown tubing) drip-line style, its not quite as efficient as the point-of-use designed to water individual plants as it just has an emitter every 12″ but its a lot less drip-linework and maintenance. If you use this style, the home supply stores can provide you the material required to transition from a sprinkler riser to the new drip lines.
  7. Convert Parkways And Grass Strips to Drip Irrigation: Assuming you can isolate the parkways into their own zones you can use the same drip line mentioned in #4 by burying it about 3-4 inches below the ground spaced at 12″. I did this at my house and have been very pleased with the results. TIP: If you do this, be very careful if do any digging  in the future as this type line is very pliable and can easily be damaged with a shovel.
  8. Add Rainwater Collection: This can be  a major undertaking, I have wanted to do this myself and have researched it for several years but due to certain limitations  on my property its not feasible…yet.  By creating a full house rainwater collection system you could technically rework your system to rain-water-collectionuse nothing but rainwater to irrigate your property.  But here are some things you would need to consider if you are interested. 1)Storing the water, probably in the neighborhood of 1000 to 3000 gallons. 2) Pumps may be required to transfer the water and drive the water through your sprinkler system. 3) Zone valves may need to be changed to accept the water as it will have a bit of dirt in it, 4) Additional filtration may be required to keep the system from prematurely stopping up the standard sprinkler heads. On the other hand, as a simplier approach, using water barrels at the gutters you can easily use this water for hand watering applications.

Lawn Sprinkler Maintenance Can Increase Water Efficiency

April 20, 2009

sprinklers-01In-ground lawn sprinklers are about 50% efficient. Evaporation, poor maintenance and bad design  are the largest impact to that figure.

The spring season has many of us looking to use automatic lawn sprinklers to do our watering.   Hopefully you have read my post on Chasing Lawn Sprinkler Leaks.  This is a good start, but it just barely touches the subject of efficiency. Besides fixing leaks, there are numerous items that can be performed to make your system more efficient without sacrificing performance. Today, the dollar cost of water is still very reasonable, however water conservantion is really about using less and the long-term benefit.  Even though this article will address issues specifically related to systems designed with pop-up type heads, many of the suggestions will work with other types as well.

General Design Considerations:  Understanding how an irrigation system is engineered will help you understand how to make one work more efficiently. If you have a “blueprint” of your system you have a head start, if not, we will perform some hands-on analysis to obtain performance information. 

  • Elements of Design: All systems are designed based on water usage  and gallons of water (GPM) per minutes used by each head. Typically the small pop-up heads use more water per head per square foot watered. Because they apply more water per square foot than other types, they work well for small and medium-sized residential properties. They can also be easily tuned to fit odd spaces with a host of nozzle choices. 
  • Zones or Sections: All sprinkler systems are broken down into zones or sections. The Irrigator calculates the zone size by using available water pressure, pipe size and maximum GPM per zone. Besides these items, zone adjustments may also include special watering needs such as side yards, gardens, flower beds or odd-shaped areas. Since additional zones require more material, labor and money many Irrigators will keep the costs down by limiting the number of zones installed, this is good for him and maybe not so good for you. As you analyze your system and you see one head out all by itself in the middle of another zone, the Irrigator needed a head in that location but did not have enough water budget left in the prevailing zone. This is all very common but can be problematic if you are attempting to manage your water usage at a higher degree than normal homeowners.
  • Sprinkler Heads & Nozzles: There are a half a dozen types of sprinkler heads, but the pop-up style is still the most popular because they can meet varying needs. Pop-ups can be purchased in different levels of spray coverage and are promoted as providing better coverage because they are typically spaced closer together. Typical systems use heads designed with 10′, 12′ and 15′ radius spray patterns as well as strip sprays and bubblers.  Larger properties can use Impulse or Rotary style heads to conserve water as they can be placed very far apart. Because they distribute water in more of a stream vs. spray found with a pop-up style, they do not waste quite as much water per square foot.  Impulse and Rotary heads work well with wide open lots, but don’t work well when there are obstructions such as building structures, trees, and property lines.
  • Mixing Head Types: No matter the sprinkler head style, it is perfectly normal to find a mix of spray pattern nozzles within each zone, and a mixtures of head types in a system,  but NOT a mixture of head type (Pop-up, Rotary, Orbital) in the same zone. Mixing head type can make it difficult to properly manage coverage and watering levels.
  • Optimal Design: The best designed systems account for the water required based on the environment. In other words, shrubs and flowers should be watered at a different rate than turf. Shaded turf may be watered less than turf placed in full sun. Grass type is also influential. Unfortunately, not all sprinkler systems are designed with these considerations as it can be more costly to engineer a system with greater efficiency. TIP: If you don’t currently have a sprinkler system, and are looking to purchase one, beware of the very low bids as some Irrigation Contractors will take short cuts on the items mentioned in an effort to win the business.

EFFICIENCY STRATEGY

Stage I: Gain the most efficiency out of your existing system without impacting the design.  All of Stage I is covered in detail in the “Sprinkler Leak” post. But here are the high points.

  1. Check for leaks in the pressure side of the system. Use your water meter to isolate the leaks in the sprinkler zones.
  2. Check for leaks in each zone. Most leaks are at the heads; repair and replace the heads and risers as necessary. Make sure you use the same style head and similar nozzle sizes as the one you are replacing.  TIP: All the major manufacturers make pop-up heads, its okay to mix brands but if you stick with the same brand, you can always move and change nozzles between existing heads when needed because nozzles are not universal between manufacturers.
  3. Ensure all sprinkler heads are clean and providing the proper water pattern.
  4. Adjust the watering duration and times to match the season.
  5. If your watering durations continue to allow excessive water run off, try changing the watering times to a series of short cycles. For instance, change a single 15 minute cycle  to 3 back-to-back 4 or 5 minute cycles. This can allow the water to saturate before the second and third cycle occurs. Typically, I don’t like the short cycle watering strategy, but if you perform it back-to-back, its okay.
  6. Consider using your system in manual mode only. Watering when only necessary will reduce your water usage substantially. 

lawn-sprinklers3Stage II: Plan to get wet.  This stage requires a bit more effort and the gains achieved may be small, but the intent is to make gradual changes that will increase efficiency without negatively effecting performance.  This stage is intended to optimize the system by fine tuning the existing sprinkler heads. 

  1. Look for excessive water  accumulation. Not all landscapes require the same amount of water. Unfortunately, when irrigation systems are designed, this fact may not be included in the design. Read the system performance by looking for items such as excessive water, green moss or over saturated ground and plants.
  2. Fine tune  individual sprinkler nozzles. Each sprinkler nozzle has a fine tuning screw on the top of the nozzle allowing you to change the water output. However, when you reduce the flow, you reduce the pattern spray coverage. In some cases, you may completely turn the water off at the nozzle. This is sort of a trial and error exercise, so you may need to make the adjustment and keep an eye on the area for proper coverage. Newer style nozzles may include a water saver disk found under the nozzle to equalize pressure and reduce water usage. Adding or removing this disk will also change the amount of water delivered.
  3. Parkway Watering: I mention this because this strip of grass found with many older homes is a large source of water waste with automatic lawn sprinklers. Run the zone that waters this area to determine how much waste is occurring. Adjust it as much as you can. If you still have excessive water run off you may consider adjusting the fine tune screw to the off position and either hand water it or let it go brown and just let the rain keep it green By completing Stage I & II, you should be reducing you water waste. You may be able to reduce your watering duration by the fact that you are wasting less water. Before you move to the next step, let the system run for several weeks/months. Monitor the performance and make further adjustments as necessary to the nozzles and watering duration.

After completing Stage I and II let the system run for a couple of months. Monitor the performance and the water usage, make adjustments as necessary.  However, if you want to go further, I still have Stage III and IV recommendations. Look for my post next week on  “Lawn Sprinkler Efficiency Upgrades Part II“.  

 Stay up to date on the latest HomeownerBOB articles by signing up for the email subscription.


Chasing Lawn Sprinkler Leaks

March 21, 2009
 Fixing easily corrected household water leaks can save homeowners more than 10 percent on their water bills. sprinkler21


 Unfortunately many of us require lawn sprinklers to have any kind of landscaping short of cactus, gravel and rocks. Having a lawn sprinkler system is kind of like garage door openers, once you have one its hard not to. Dragging hoses around the yard is a real pain and it becomes a challenge to keep things alive. Taking care of your sprinkler system will save you money,  reduce the opportunity to waste water and keep your plant material alive. With water restrictions  on the upswing,  more and more cities are assessing fines for violating the restrictions.  Check with your local municipality for restrictions regarding time of day, rain and freeze detection.  Adding a rain sensor to your system is a wise decision.   

Rain Sensor

Rain Sensor


Because sprinkler heads are not under pressure until the system is live,  it can be difficult to isolate the leaks. “Pop-ups”  are the most common spray heads found in  residential systems. Typically I find  pop-ups require more maintenance than the larger impulse or stream sprayers primarily due to the fact that pop-up sprayer use less water per head and the water orifices are smaller and they clog easily.  With pop-ups, it takes more heads per square foot to provide adequate coverage. The greater the distance between heads, the further the water has to spray.  To do this, the arc in the spray pattern has to be projected higher in the air.  As a result,  you lose up to 50% of the water in the air.  Up until the last year or so, we have seen little in the way of water miser type heads. These new type heads are designed to replace the pop-up with a miniature stream sprayer providing a coarse spray in lieu of a mist. This can help reduce water loss and your system may be retrofitted to use these type heads. However, it is important to match the right head for the system. When your system was designed,  it was all based on a certain water pressure, pipe size and GPM (gallon per minute) volume, so any changes need to take this into account otherwise you may end up over/under-watering. Not that a DIYer cant figure this out,  a good licenced irrigator can help you solve the problem. Also, take a look at this comparison study of nozzle types.   

Top 5 Reasons Why Water Sprinklers are Wasteful   

  • Poor design: System design that allows sprinklers to spray water across sidewalks or concrete cause water to be lost to evaporation and run off. 
  • Wrong watering times:  Running your water sprinklers in the middle of the day allows the water to evaporate before it has time to absorb in to the ground. 
  • Wrong water duration: Some believe short duration watering is a way to conserve water however, short shallow watering can cause turf and plants to experience stress because the shallow water can cause shallow roots.
  • Dirty nozzles: Even though sprinkler heads (should) have filters underneath the nozzles, they can still pass some particles in to the nozzle. Many times bad-sprinklerthese particles can be wedged in the spray nozzle causing it to mis-spray and not distribute water equally and efficiently throughout the spray pattern.
  • Lack of maintenance: Sprinkler heads take a lot of abuse from lawn mowers, string trimmers and edgers. Whether it be abuse,  leaky or bad sprinkler heads, all of these conditions can cause a lot of water to run down the sidewalk. 

Standard spray nozzles are approximately 50% efficient as the over-spray is lost in the air.  Loss and waste in a sprinkler system can be difficult to recognize without taking the time to exercise the system and inspect each sprinkler head while running.   

 Keeping your lawn sprinkler system in good working order is one of the easiest ways to get optimum performance from your system. Most all lawn sprinkler systems can be defined in two distinct parts:
  • Feeder or Pressure Lines: The side under pressure includes a cut off valve, double check valve (aka back flow prevention valve) and a valve for each zone and a lot of pipe. 
  • Distribution Lines or Zones: The system could include any number of  zones, this is all dependent on the size of the system. The zone has to be running to inspect it for leaks. Since the sprinklers are spraying water, finding leaks can be a bit more challenging.

Chasing Lawn Sprinkler Leaks   

Feeder or Pressure Line  Leaks:   

  1. Finding leaks in feeder/pressure lines is similar to the same process as found in the Chasing Water Leaks post. Turn off the main cut-off that will isolate the sprinkler system from the remaining water supply. If the flow meter stops proceed with the following steps.
  2. Locate each sprinkler valve in your system. If you are not sure how many valves are in your system, look at your Sprinkler Controller to identify how many sections or zones are in the system. Finding the sprinkler valve may be difficult as valves can be overgrown by grass or ground cover.  If you have the original installation drawing, it should identify the approximate locations of the valves. Before you hire a professional, try the methods described in Searching for Lawn Sprinkler Valves. Either way, once you find them, take note of their location for future use. 
  3. You may notice water residue around some sprinkler heads even when it should be dry, known as weeping, this could be a hint that the sprinkler valve is passing water when it should not be.
  4. Once the valves are located, they should be turned off, one at a time to determine if you have isolated the leak. Each valve has a manual cut off on the center top of the valve. Once you have isolated the leak to a specific zone, the problem will be resolved at the valve. (TIP: Sprinkler valve can be disassembled and cleaned without removing them from the system but the water must be shut off.) Most likely it just needs to be cleaned (that means taking it apart and removing any dirt or debris inside the housing),  but it could have been damaged during the winter months, if so, you may need to replace the valve. Read this tutorial for specific instructions on repairing a solenoid valve.

Distribution Lines or Zones: (Plan to get wet)   

  1. Run each section one at a time. Walk the zone looking for excess water accumulation around the head, the seal could be bad or the head loose causing a lot blown-sprinkler1of blow by. Try tightening the head, (yes, all this while the system is running). If none of this stops the excessive water, replacing the head and riser is the simplest solution. If the leak is around the stem or nozzle riser, you can take these head apart for cleaning. Perform this action with the water turned off. To avoid additional dirt in the system, its best to dig away the dirt from around the head, down to the connection otherwise dirty water will enter the lines. It’s important to remember to do your best job of keeping new dirt from entering the system as this will cause more blockage problems further down the pipe. TIP: Keep a couple of extra sprinkler heads around for spares and spare parts. Changing the head is lots less invasive and a 1 for 1 head swap out than trying to operate on the head in the dirt and water. You can also rebuild the removed head for future change-outs.
  2. If the head is not leaking inspect the pattern of the water spray. Different nozzles are designed with different patterns, so the spray could be limited by design to provide adequate coverage. There are too many nozzle patterns to discuss, but most importantly, look for a  nice clean even pattern. If you see breaks or weakness  in the pattern, the nozzle is probably dirty. Turn the zone off and unscrew the nozzle. There will be a  filter in the riser. Clean the dirt out of it. Also inspect the nozzle itself for very small pebble grit lodged in the sprayer. Use a toothpick or very small screwdriver to remove these particles. The last item may require 2 people. Run the zone without the nozzle installed, this will blow-out any dirt particles that are below the filter. Tell your partner to turn the water off and grab the riser before it stops releasing water. This will keep  dirt from re-entering the system. Re-install the filter and nozzle. Perform this same inspection with each sprinkler zone.   
  3. If necessary, (while the zone is running) adjust any partial pattern sprayers that may be near sidewalks or driveways to keep the water spraying on the grass. If you have parkway sprinklers that  are designed to water across a sidewalk (bad design)  to water grass or plants, you may be stuck with leaving it alone since cutting it back may cause an area to be dry.

Key Inspection Points and Action Items:   

  1. Look at your water meter for any slow leak that may be caused by your sprinkler system. Isolate the sprinkler valves to determine where the leak is.
  2. Run each zone, inspect each head for leaks, also look for a good pattern and good coverage. Cleaning the heads may be required.  
  3. Adjust the sprinkler heads as necessary to minimize water over-spray on no-porous surfaces (sidewalks and streets).
  4. Adjust your water cycles to match the season.